はじめに
The Printed Circuit Board is a foundation to the majority of electronic devices that serves a purpose to sync all mechanical aspects of a device. Printed Circuit Boards could fail due to several things such as physical damage, component failure, trace damage, poor design, and power failure. Typically the reason of failure will need a clear, professional diagnosis; however, if any electrical component (such as lights or the tracking pad) of your ASUS VivoBook S200e-RHI3T73 isn’t functioning properly, and you want to try your hand at replacing the entire PCB yourself, follow this guide to replace the board.
Before using this guide, I suggest getting your device looked over my a professional who can accurately diagnose the problem as there might be a simpler fix. Sometimes the PCB just needs to be cleaned, or certain wires may need to be reconnected. If said professional suggests replacing the entire board, continue with our easy, less-than-thirty-minute guide to solve your tech problem today.
Be sure to unplug and power off your device completely before beginning your replacement.
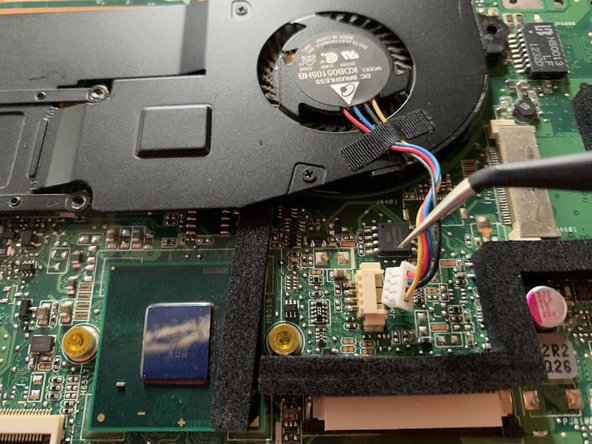
Use caution throughout the processes of this guide. Elements of the ASUS VivoBook S200e-RHI3T73 are fragile and easy to bend if not handled with delicacy—which may prevent your device from returning to its original, functioning state.
必要な工具と部品
-
-
Use a metal spudger to pry the bottom panel open.
-
Lift the back panel to expose the inside of the laptop.
-
-
-
-
Use a Phillips #0 screwdriver to remove the nine 50mm panel screws.
-
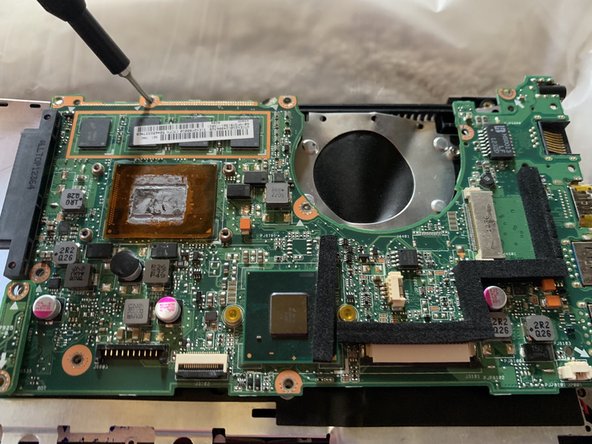
Gently remove back panel
-


To reassemble your device, follow these instructions in reverse order.
To reassemble your device, follow these instructions in reverse order.
ある他の人がこのガイドを完成しました。

チーム

University of North Alabama, Team S1-G4, Winner Fall 2019 University of North Alabama, Team S1-G4, Winner Fall 2019人のメンバー
UNA-WINNER-F19S1G4
3 メンバー
3のガイドは作成済み