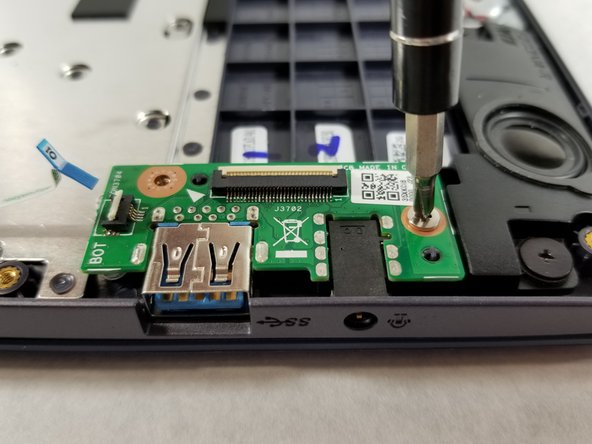
メインコンテンツにスキップ

Asus VivoBook E203MA-TBCL432B Headphone Jack and USB Port Replacement

必要な工具と部品

  1. Asus VivoBook E203MA-TBCL432B Headphone Jack and USB Port Replacement, Back Panel: 手順 1、 1の画像 1
    • Position the laptop so that the bottom panel is facing upwards, the hinge is away from you, and the ASUS logo is against the table.

    • It will be easier to replace the battery if the laptop is closed.

  2. Asus VivoBook E203MA-TBCL432B Headphone Jack and USB Port Replacement: 手順 2、 3の画像 1 Asus VivoBook E203MA-TBCL432B Headphone Jack and USB Port Replacement: 手順 2、 3の画像 2 Asus VivoBook E203MA-TBCL432B Headphone Jack and USB Port Replacement: 手順 2、 3の画像 3
    • Use a Phillips #0 screwdriver to remove the eight 5 mm screws on the back panel.

    • Remove the two 7 mm Phillips #0 screws.

    • The 8 screws marked in red are all of the same length, 5 mm, and should not be interchanged with the two longer 7 mm screws marked in orange.

  3. Asus VivoBook E203MA-TBCL432B Headphone Jack and USB Port Replacement: 手順 3、 3の画像 1 Asus VivoBook E203MA-TBCL432B Headphone Jack and USB Port Replacement: 手順 3、 3の画像 2 Asus VivoBook E203MA-TBCL432B Headphone Jack and USB Port Replacement: 手順 3、 3の画像 3
    • Insert the iFixit opening tool in between the back panel and the rest of the laptop.

    • With the iFixit opening tool, lift the panel from the laptop body. Work your way around the device creating separation with the tool.

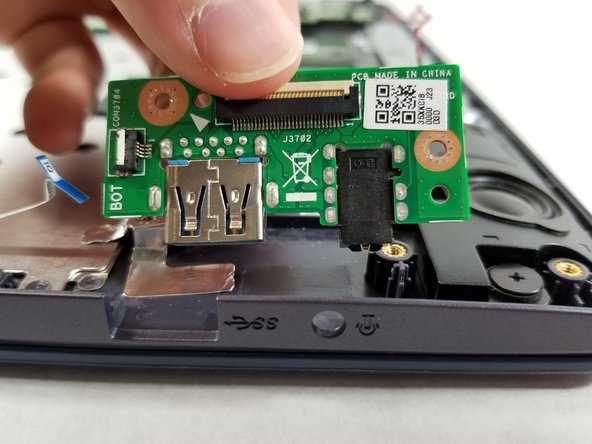
    • Once there is enough separation between the back panel and the device, gently pull off the back panel with your hands and completely remove it.

    • Make sure to use a plastic tool, not a metal one, so that you don't scratch the panel.

  4. Asus VivoBook E203MA-TBCL432B Headphone Jack and USB Port Replacement, Headphone Jack and USB Port: 手順 4、 2の画像 1 Asus VivoBook E203MA-TBCL432B Headphone Jack and USB Port Replacement, Headphone Jack and USB Port: 手順 4、 2の画像 2
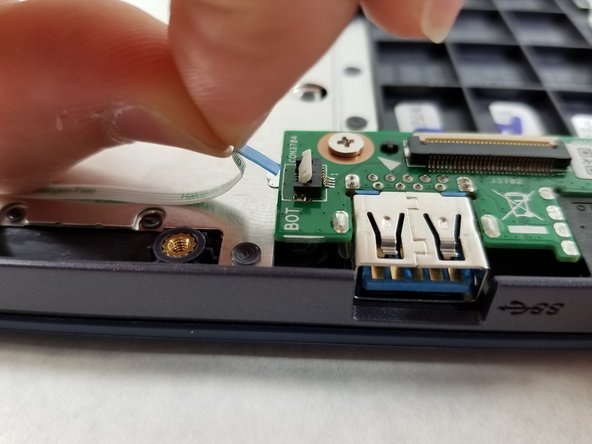
    • Disconnect the ribbon cable located above the battery.

    • Flip up the locking tab on the Zero Insertion Force (ZIF) connector, then slide the cable away.

  5. Asus VivoBook E203MA-TBCL432B Headphone Jack and USB Port Replacement: 手順 5、 2の画像 1 Asus VivoBook E203MA-TBCL432B Headphone Jack and USB Port Replacement: 手順 5、 2の画像 2
    • Disconnect the small white ribbon cable that is connected to the unit that holds the USB and headphone jack.

    • First, lift the white tab that locks onto the blue tab and then pull the cable out by the blue tab.

  6. Asus VivoBook E203MA-TBCL432B Headphone Jack and USB Port Replacement: 手順 6、 2の画像 1 Asus VivoBook E203MA-TBCL432B Headphone Jack and USB Port Replacement: 手順 6、 2の画像 2
    • Use the Phillips #0 screwdriver to remove the two 2 mm screws on the top left and bottom left of the component with the headphone jack and USB port.

  7. Asus VivoBook E203MA-TBCL432B Headphone Jack and USB Port Replacement: 手順 7、 2の画像 1 Asus VivoBook E203MA-TBCL432B Headphone Jack and USB Port Replacement: 手順 7、 2の画像 2
    • Remove the headphone jack and USB printed circuit board by lifting it directly up and out of the laptop.

終わりに

To reassemble your device, follow these instructions in reverse order.

作成者

3人の作成者と共同で作成されました。

Melanie

メンバー登録日: 03/21/19

280 ポイント

1ガイドが承認済み

チーム

UMass Dartmouth, Team S8-G1, Bailey Spring 2019 UMass Dartmouth, Team S8-G1, Bailey Spring 2019人のメンバー

UMASSD-BAILEY-S19S8G1

3 メンバー

6のガイドは作成済み

0 件のコメント

コメントを追加

統計データ:

過去 24時間: 1

過去 7 日: 2

過去 30 日: 9

今までの合計 593