メインコンテンツにスキップ

Asus VivoBook E203MA-TBCL432B Display Assembly Replacement

必要な工具と部品

  1. Asus VivoBook E203MA-TBCL432B Display Assembly Replacement, Back Panel: 手順 1、 1の画像 1
    • Position the laptop so that the bottom panel is facing upwards, the hinge is away from you, and the ASUS logo is against the table.

    • It will be easier to replace the battery if the laptop is closed.

  2. Asus VivoBook E203MA-TBCL432B Display Assembly Replacement: 手順 2、 3の画像 1 Asus VivoBook E203MA-TBCL432B Display Assembly Replacement: 手順 2、 3の画像 2 Asus VivoBook E203MA-TBCL432B Display Assembly Replacement: 手順 2、 3の画像 3
    • Use a Phillips #0 screwdriver to remove the eight 5 mm screws on the back panel.

    • Remove the two 7 mm Phillips #0 screws.

    • The 8 screws marked in red are all of the same length, 5 mm, and should not be interchanged with the two longer 7 mm screws marked in orange.

  3. Asus VivoBook E203MA-TBCL432B Display Assembly Replacement: 手順 3、 3の画像 1 Asus VivoBook E203MA-TBCL432B Display Assembly Replacement: 手順 3、 3の画像 2 Asus VivoBook E203MA-TBCL432B Display Assembly Replacement: 手順 3、 3の画像 3
    • Insert the iFixit opening tool in between the back panel and the rest of the laptop.

    • With the iFixit opening tool, lift the panel from the laptop body. Work your way around the device creating separation with the tool.

    • Once there is enough separation between the back panel and the device, gently pull off the back panel with your hands and completely remove it.

    • Make sure to use a plastic tool, not a metal one, so that you don't scratch the panel.

  4. Asus VivoBook E203MA-TBCL432B Display Assembly Replacement, Battery: 手順 4、 3の画像 1 Asus VivoBook E203MA-TBCL432B Display Assembly Replacement, Battery: 手順 4、 3の画像 2 Asus VivoBook E203MA-TBCL432B Display Assembly Replacement, Battery: 手順 4、 3の画像 3
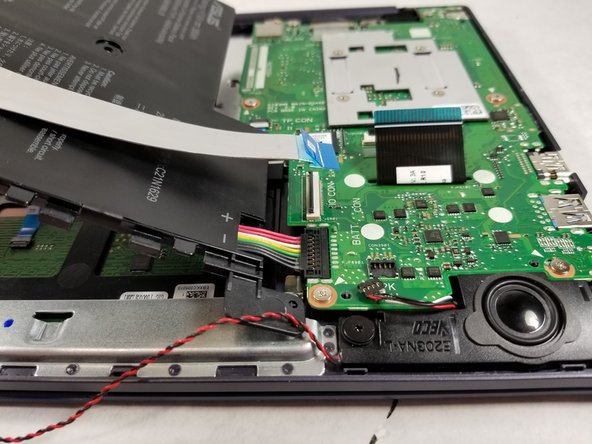
    • Now that the back panel is removed you can clearly see the battery and all of its connectors.

    • Begin by removing the silver ribbon cable along the back of the battery.

    • To disconnect it from the motherboard, lift the black tab on the Zero Insertion Force (ZIF) connector up and pull the cable away using the blue tab.

    • Disconnect the ribbon cable from the left side in the same way.

  5. Asus VivoBook E203MA-TBCL432B Display Assembly Replacement: 手順 5、 1の画像 1
    • Remove the red and black wire along the bottom of the battery.

    • This does not need to be disconnected, only removed from the clamps along the bottom of the battery.

  6. Asus VivoBook E203MA-TBCL432B Display Assembly Replacement: 手順 6、 2の画像 1 Asus VivoBook E203MA-TBCL432B Display Assembly Replacement: 手順 6、 2の画像 2
    • Using the Phillips #0 screwdriver, remove the two 3 mm screws located at the top and left side of the battery.

  7. Asus VivoBook E203MA-TBCL432B Display Assembly Replacement: 手順 7、 3の画像 1 Asus VivoBook E203MA-TBCL432B Display Assembly Replacement: 手順 7、 3の画像 2 Asus VivoBook E203MA-TBCL432B Display Assembly Replacement: 手順 7、 3の画像 3
    • Gently lift the battery being mindful of the one cable still connected to the motherboard.

    • With the battery lifted, pull the remaining connector going to the motherboard up, it should come out with little force.

  8. Asus VivoBook E203MA-TBCL432B Display Assembly Replacement, Motherboard: 手順 8、 1の画像 1
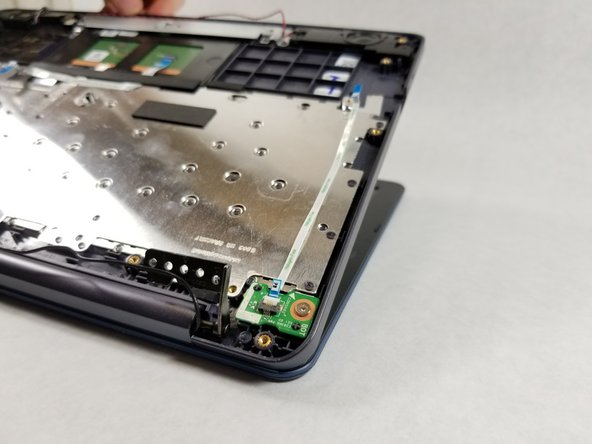
    • Disconnect the small black and red bundled cable by lifting it directly up from the connector on the motherboard.

  9. Asus VivoBook E203MA-TBCL432B Display Assembly Replacement: 手順 9、 2の画像 1 Asus VivoBook E203MA-TBCL432B Display Assembly Replacement: 手順 9、 2の画像 2
    • Disconnect the black ribbon cable in the center of the motherboard by first lifting the black tab and then pulling the cable free.

  10. Asus VivoBook E203MA-TBCL432B Display Assembly Replacement: 手順 10、 3の画像 1 Asus VivoBook E203MA-TBCL432B Display Assembly Replacement: 手順 10、 3の画像 2 Asus VivoBook E203MA-TBCL432B Display Assembly Replacement: 手順 10、 3の画像 3
    • Remove the coaxial connector from the motherboard.

    • Grasp the wire close to where it connects to the motherboard.

    • Pull up and away from the motherboard until the connector is no longer attached to the motherboard.

  11. Asus VivoBook E203MA-TBCL432B Display Assembly Replacement: 手順 11、 2の画像 1 Asus VivoBook E203MA-TBCL432B Display Assembly Replacement: 手順 11、 2の画像 2
    • At the top of the motherboard there is a connector that is taped in place.

    • Peel back the tape so that it is no longer in contact with the motherboard.

    • Gently pull the connector out from its socket.

  12. Asus VivoBook E203MA-TBCL432B Display Assembly Replacement: 手順 12、 2の画像 1 Asus VivoBook E203MA-TBCL432B Display Assembly Replacement: 手順 12、 2の画像 2
    • Now that all the cables are disconnected from the motherboard, you can begin to remove the screws holding the motherboard in place.

    • Use a Philips #0 screwdriver to remove the six 2 mm screws.

  13. Asus VivoBook E203MA-TBCL432B Display Assembly Replacement: 手順 13、 3の画像 1 Asus VivoBook E203MA-TBCL432B Display Assembly Replacement: 手順 13、 3の画像 2 Asus VivoBook E203MA-TBCL432B Display Assembly Replacement: 手順 13、 3の画像 3
    • Lift the motherboard away from the computer while allowing the ribbon cable in the middle to fall through its cutout.

  14. Asus VivoBook E203MA-TBCL432B Display Assembly Replacement, Display Assembly: 手順 14、 3の画像 1 Asus VivoBook E203MA-TBCL432B Display Assembly Replacement, Display Assembly: 手順 14、 3の画像 2 Asus VivoBook E203MA-TBCL432B Display Assembly Replacement, Display Assembly: 手順 14、 3の画像 3
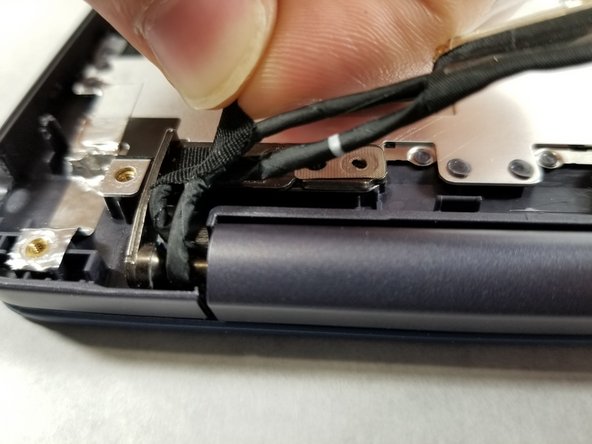
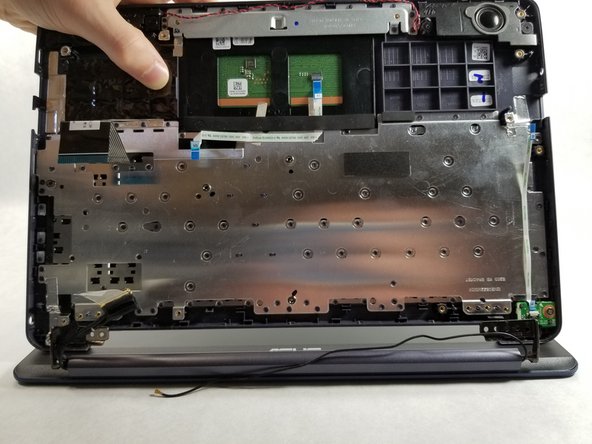
    • Position the device so that the hinge is closest to you.

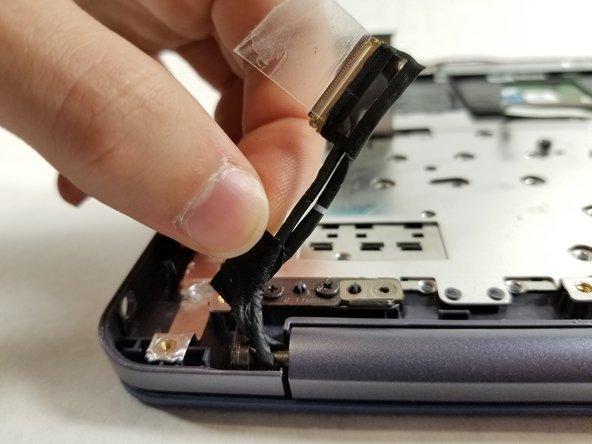
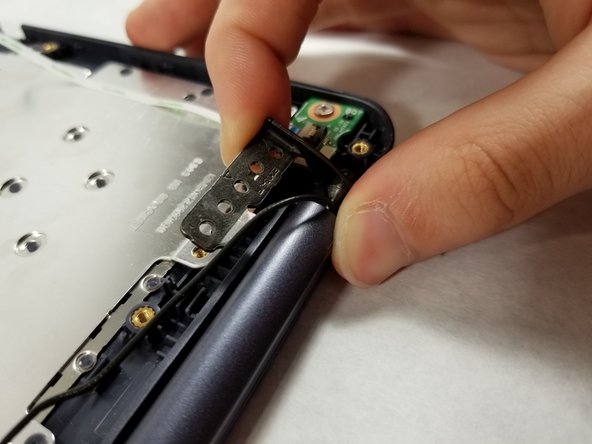
    • Identify the connector with two thick wires that previously attached the LCD to the motherboard.

    • Gently remove the tape on the wires that binds the connector to the metal hinge.

  15. Asus VivoBook E203MA-TBCL432B Display Assembly Replacement: 手順 15、 2の画像 1 Asus VivoBook E203MA-TBCL432B Display Assembly Replacement: 手順 15、 2の画像 2
    • There are two hinges at the bottom of the laptop: one on the left side, and one on the right side.

    • Using a Phillips #0 screwdriver, remove the three 3 mm screws that are through the hinges.

  16. Asus VivoBook E203MA-TBCL432B Display Assembly Replacement: 手順 16、 3の画像 1 Asus VivoBook E203MA-TBCL432B Display Assembly Replacement: 手順 16、 3の画像 2 Asus VivoBook E203MA-TBCL432B Display Assembly Replacement: 手順 16、 3の画像 3
    • Lift each of the hinge tabs up from the device approximately 90 degrees.

  17. Asus VivoBook E203MA-TBCL432B Display Assembly Replacement: 手順 17、 3の画像 1 Asus VivoBook E203MA-TBCL432B Display Assembly Replacement: 手順 17、 3の画像 2 Asus VivoBook E203MA-TBCL432B Display Assembly Replacement: 手順 17、 3の画像 3
    • With the hinge facing towards you, open your device approximately 90 degrees.

    • This should make it easier to separate the two components.

  18. Asus VivoBook E203MA-TBCL432B Display Assembly Replacement: 手順 18、 3の画像 1 Asus VivoBook E203MA-TBCL432B Display Assembly Replacement: 手順 18、 3の画像 2 Asus VivoBook E203MA-TBCL432B Display Assembly Replacement: 手順 18、 3の画像 3
    • Push the bottom portion of your device away from you to separate it from the LCD

    • The two components should separate with a little force.

終わりに

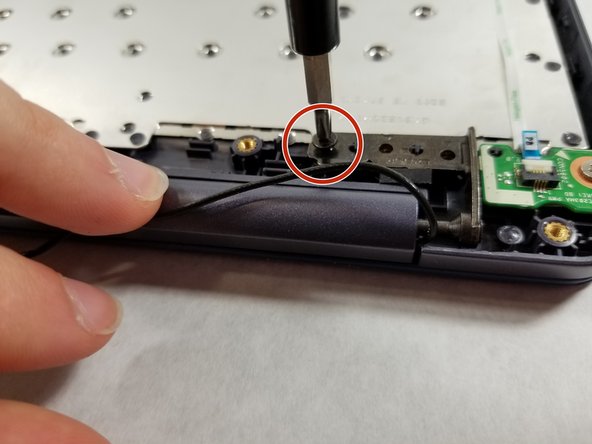
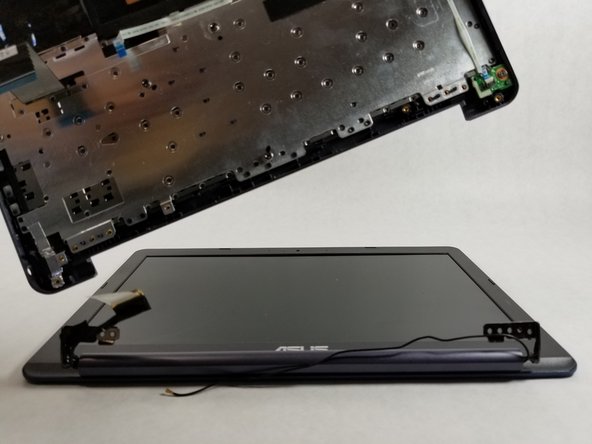
To reassemble your device, follow these instructions in reverse order. Be mindful of the wire that connects the screen to the motherboard. If it is not properly tucked into the body of the laptop, the hinge may not close properly.

ある他の人がこのガイドを完成しました。

作成者

3人の作成者と共同で作成されました。

Jacob Aubertine

メンバー登録日: 03/21/19

470 ポイント

3のガイドは作成済み

チーム

UMass Dartmouth, Team S8-G1, Bailey Spring 2019 UMass Dartmouth, Team S8-G1, Bailey Spring 2019人のメンバー

UMASSD-BAILEY-S19S8G1

3 メンバー

6のガイドは作成済み

0 件のコメント

コメントを追加

統計データ:

過去 24時間: 3

過去 7 日: 3

過去 30 日: 8

今までの合計 911