メインコンテンツにスキップ

このバージョンは誤った内容を含んでいる可能性があります。最新の承認済みスナップショットに切り替えてください。

必要な工具と部品

  1. この手順は未翻訳です。 翻訳を手伝う。

    : 手順 1、 2の画像 1 : 手順 1、 2の画像 2
    • Place the computer upside down.

    • Using your thumbs, slide both latches away from each other (towards the outside).

    • Push the battery out with your fingers.

    • The actual battery is not pictured.

  2. この手順は未翻訳です。 翻訳を手伝う。

    : 手順 2、 2の画像 1 : 手順 2、 2の画像 2
    • Remove the six screws highlighted on the picture.

    • Once the screws are removed, pry open the panel with the pry tool.

    • It should now look like this.

  3. この手順は未翻訳です。 翻訳を手伝う。

    : 手順 3、 2の画像 1 : 手順 3、 2の画像 2
    • After removing that panel, locate the screw on the right as highlighted.

    • Remove that screw.

    • Pry open the side panel with the small prying tool as shown.

    • That panel should pop off and the wireless card will now be easily visible.

  4. この手順は未翻訳です。 翻訳を手伝う。

    : 手順 4、 1の画像 1
    • Place the small prying tool underneath the gold connector and gently apply pressure straight up until it pops off.

    • Repeat for the other one.

    • Place the gold connectors aside.

  5. この手順は未翻訳です。 翻訳を手伝う。

    : 手順 5、 3の画像 1 : 手順 5、 3の画像 2 : 手順 5、 3の画像 3
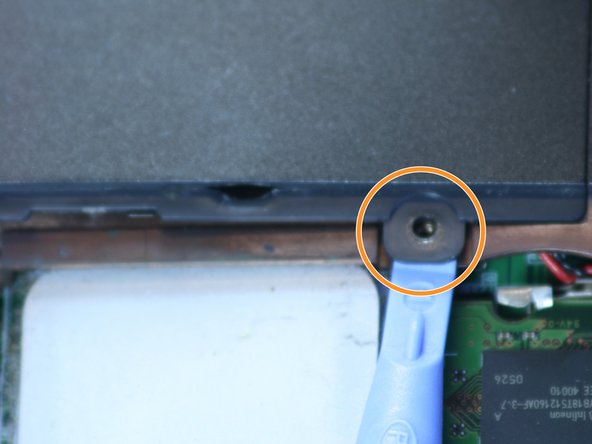
    • Locate the tabs that are holding the wireless card in place. These are highlighted in picture.

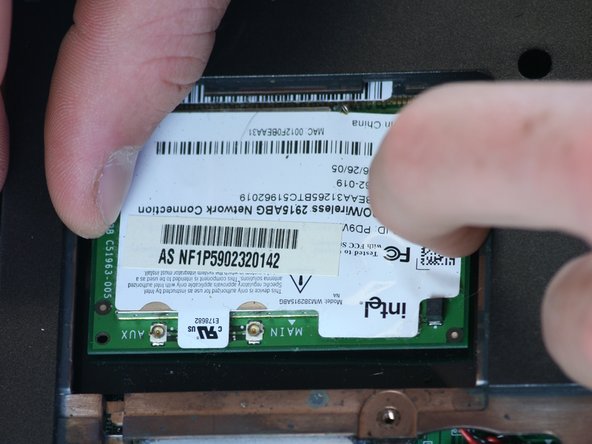
    • Place one finger on each tab and press each to the side away from the wireless card as shown.

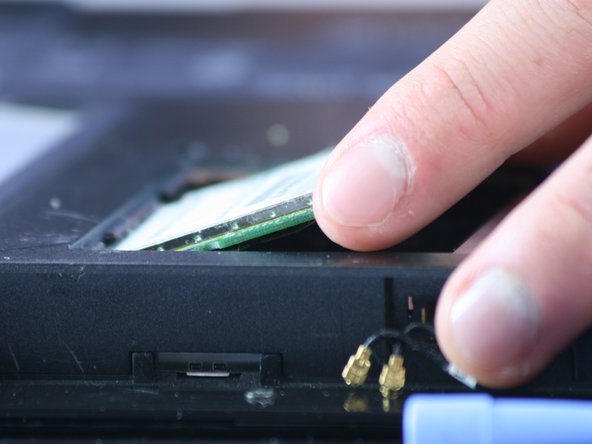
    • The wireless card should pop up as shown. Pull up more with fingers to get more clearance.

  6. この手順は未翻訳です。 翻訳を手伝う。

    : 手順 6、 2の画像 1 : 手順 6、 2の画像 2
    • To remove the wireless card, pull the card directly out.

    • It should come out with just a little bit of pressure.

    • It should look as shown when removed.

ゴール

作成者

10人の作成者と共同で作成されました。

Steven

メンバー登録日: 06/24/10

32 ポイント

2のガイドは作成済み

チーム

Cal Poly, Team 2-9, Johann Summer 2010 Cal Poly, Team 2-9, Johann Summer 2010人のメンバー

CPSU-JOHANN-R10S2G9

5 メンバー

10のガイドは作成済み

0 件のコメント

コメントを追加

統計データ:

過去 24時間: 0

過去 7 日: 8

過去 30 日: 11

今までの合計 3,848