メインコンテンツにスキップ

この修理ガイドは変更されています。最新の未承認バージョンに切り替えます。

Asus V6800V Fan Replacement

必要な工具と部品

  1. Asus V6800V Fan Replacement, Battery: 手順 1、 2の画像 1 Asus V6800V Fan Replacement, Battery: 手順 1、 2の画像 2
    • Place the computer upside down.

    • Using your thumbs, slide both latches away from each other (towards the outside).

    • Push the battery out with your fingers.

    • The actual battery is not pictured.

  2. Asus V6800V Fan Replacement, Fan: 手順 2、 2の画像 1 Asus V6800V Fan Replacement, Fan: 手順 2、 2の画像 2
    • Remove highlighted screws, pry open case at highlighted spot.

  3. Asus V6800V Fan Replacement: 手順 3、 2の画像 1 Asus V6800V Fan Replacement: 手順 3、 2の画像 2
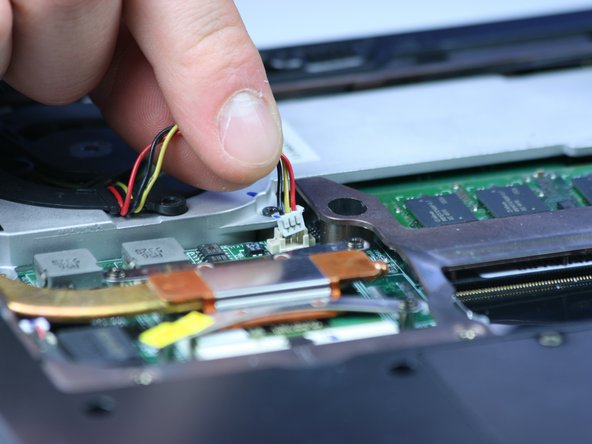
    • There are red, yellow, and black set of wires going to a white connector. Grab the three cables and pull straight up, away from the computer.

    • Make sure not to pull wires from connector. White connector should pop off with very little force.

  4. Asus V6800V Fan Replacement: 手順 4、 2の画像 1 Asus V6800V Fan Replacement: 手順 4、 2の画像 2
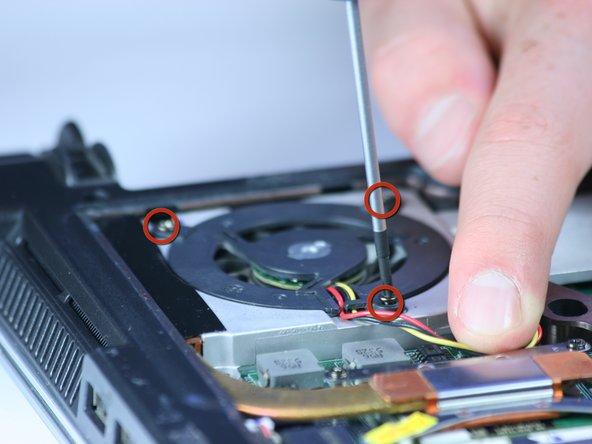
    • Remove screws highlighted.

  5. Asus V6800V Fan Replacement: 手順 5、 2の画像 1 Asus V6800V Fan Replacement: 手順 5、 2の画像 2
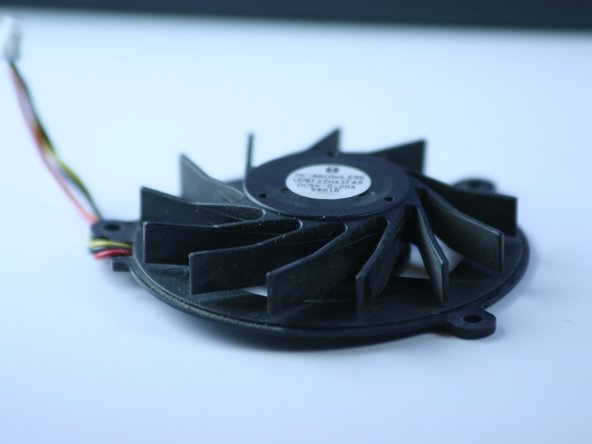
    • Fan should come up very easily. Grab the set of wires that you disconnected earlier and pull straight up.

    • In our pictured fan, there are a few pieces missing.

  6. Asus V6800V Fan Replacement: 手順 6、 2の画像 1 Asus V6800V Fan Replacement: 手順 6、 2の画像 2
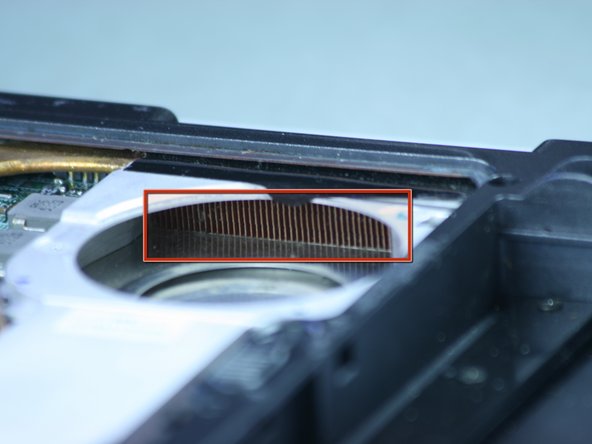
    • Use a cotton swab to remove dust. Also you can use compressed air, blow air from the inside out to clear dust from vent, or heat sink.

終わりに

To reassemble your device, follow these instructions in reverse order.

作成者

12人の作成者と共同で作成されました。

Jong Park

メンバー登録日: 06/24/10

114 ポイント

5のガイドは作成済み

チーム

Cal Poly, Team 2-9, Johann Summer 2010 Cal Poly, Team 2-9, Johann Summer 2010人のメンバー

CPSU-JOHANN-R10S2G9

5 メンバー

10のガイドは作成済み

0 件のコメント

コメントを追加

統計データ:

過去 24時間: 0

過去 7 日: 1

過去 30 日: 2

今までの合計 4,949