はじめに
Replacing a CD/DVD drive may need to take place when the drive simply fails to perform its normal functions. It has built up too much debris/dust, or the drive itself may have no power due to broken internal mechanisms and parts. Replacing the drive may resolve issues with lag and lack of smooth audio/visuals so the CD/DVD can run smoothly for anyone wanting to enjoy media, or burn a CD.
Before beginning, unplug the laptop and make sure it is completely off.
The battery and hard drive will need to be removed before replacing the CD/DVD drive on the last step.
必要な工具と部品
-
-
Place the computer upside down.
-
Using your thumbs, slide both latches away from each other (towards the outside).
-
Push the battery out with your fingers.
-
-
-
-
Remove the screw from the bottom right corner using a Phillips #0 screwdriver.
-
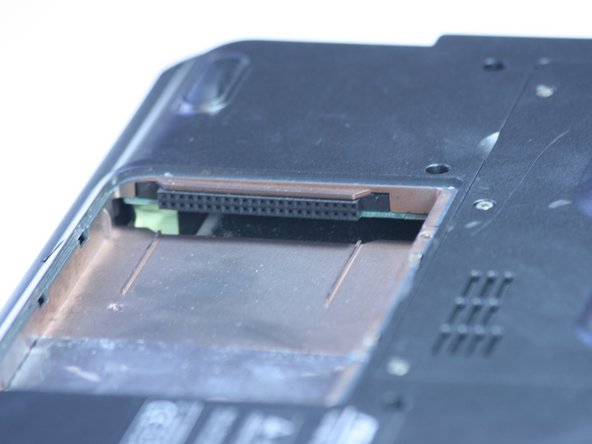
Insert a spudger into the hole to carefully push the CD/DVD drive out.
-


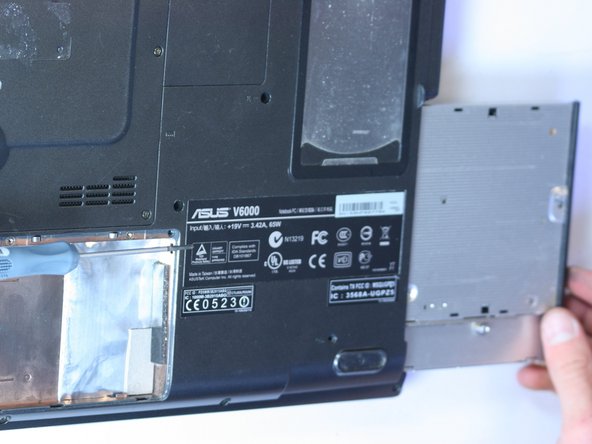
To reassemble your device, just push the new CD/DVD driver back. Then put the components back together then put the screws back in.
To reassemble your device, just push the new CD/DVD driver back. Then put the components back together then put the screws back in.
チーム

Cal Poly, Team 2-9, Johann Summer 2010 Cal Poly, Team 2-9, Johann Summer 2010人のメンバー
CPSU-JOHANN-R10S2G9
5 メンバー
10のガイドは作成済み