メインコンテンツにスキップ

Asus UL80J Wifi Card Replacement

必要な工具と部品

  1. Asus UL80J Wifi Card Replacement, Battery: 手順 1、 1の画像 1
    • Place laptop face down with battery facing up.

  2. Asus UL80J Wifi Card Replacement: 手順 2、 1の画像 1
    • Slide unlock button to the right.

  3. Asus UL80J Wifi Card Replacement: 手順 3、 3の画像 1 Asus UL80J Wifi Card Replacement: 手順 3、 3の画像 2 Asus UL80J Wifi Card Replacement: 手順 3、 3の画像 3
    • Slide the button marked with an arrow to the left. The battery should now unclick. Slide the battery away from the laptop to remove it.

  4. Asus UL80J Wifi Card Replacement, Keyboard: 手順 4、 1の画像 1
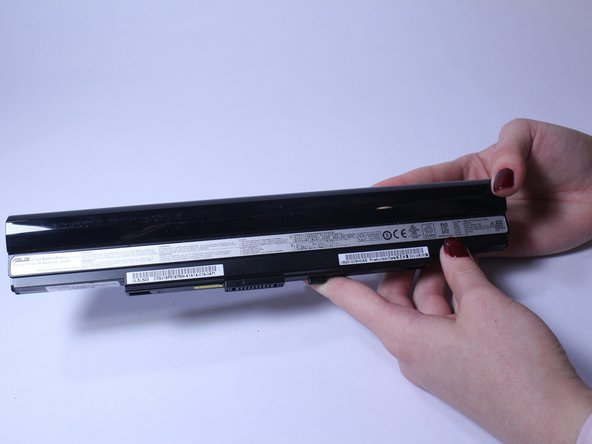
    • Insert a plastic opening tool or a flat-head screwdriver between the laptop body and the keyboard.

  5. Asus UL80J Wifi Card Replacement: 手順 5、 1の画像 1
    この手順で使用する道具:
    Plastic Cards
    $2.99
    購入する
    • Gently pry the keyboard up. This will allow you to unclip the keyboard.

    • Use an old plastic card or a similar flat object to prevent the keyboard from clipping back in while carefully working along the keyboard perimeter.

    • Unclipping sounds are normal.

    • Keep unclipping the keyboard along the perimeter. Once the keyboard is unclipped, be careful and do not take it out right away, as there is still a ribbon that connects the keyboard with the rest of the computer located on the bottom.

  6. Asus UL80J Wifi Card Replacement: 手順 7、 1の画像 1
    • Slowly lift the keyboard and use flash light if needed to locate the ribbon cable on the bottom. Lift the ZIF connector tab before pulling the ribbon cable out.

    • Remove the tape from the ribbon cable if needed and remove the keyboard.

  7. Asus UL80J Wifi Card Replacement, Wifi Card: 手順 8、 1の画像 1
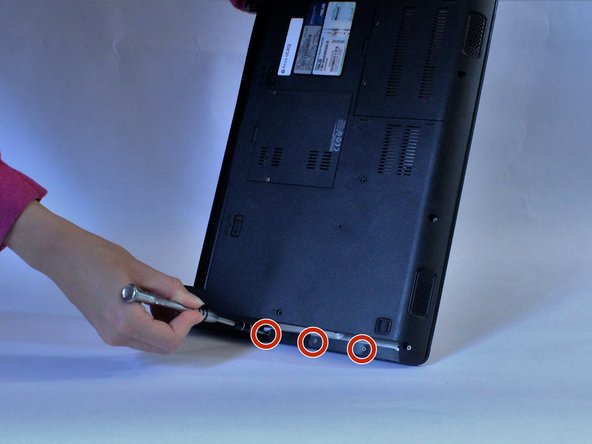
    • Once the keyboard and battery are removed, unscrew the five 8 mm screws from the aluminum plate below the keyboard.

    • Remove the four 5 mm screws.

    • WARNING: In order to replace this you need to remove a screw that voids the warranty on your computer.

  8. Asus UL80J Wifi Card Replacement: 手順 9、 1の画像 1
    • Unscrew these nine 6 mm screws on the back cover, as these hold down the plastic cover on top.

  9. Asus UL80J Wifi Card Replacement: 手順 10、 2の画像 1 Asus UL80J Wifi Card Replacement: 手順 10、 2の画像 2
    • Once those screws are out, remove the CD drive out of the computer, as there are three 3 mm screws underneath that need to be removed before undoing the plastic cover.

  10. Asus UL80J Wifi Card Replacement: 手順 11、 1の画像 1
    • Once the CD drive is out, use a plastic opening tool to pull the plastic cover off the base of the laptop. There will be sticky tape stuck to the ports on the sides, this is normal, you will have to pull hard enough to get the tape off the ports.

    • WARNING: Be careful with the plastic opening tool, as you can break the plastic in the thinner sections of the cover.

  11. Asus UL80J Wifi Card Replacement: 手順 12、 3の画像 1 Asus UL80J Wifi Card Replacement: 手順 12、 3の画像 2 Asus UL80J Wifi Card Replacement: 手順 12、 3の画像 3
    • Before removing the plastic cover, there will be two ribbon cables that require detachment with locations indicated by the red arrows. Carefully lift up the cover to expose the motherboard and components.

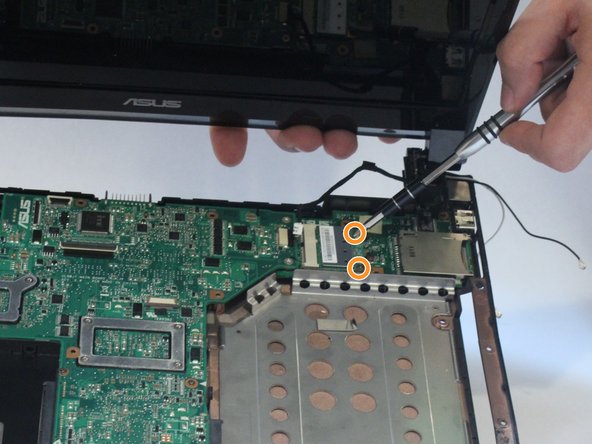
    • The WiFi card is located in the upper right corner. Disconnect the black and white wires. It is attached via two 3 mm screws. Remove these screws to remove the WiFi card.

終わりに

To reassemble your device, follow these instructions in reverse order.

ある他の人がこのガイドを完成しました。

作成者

3人の作成者と共同で作成されました。

John

メンバー登録日: 02/15/17

316 ポイント

3のガイドは作成済み

チーム

USF Tampa, Team S2-G4, Lacy Spring 2017 USF Tampa, Team S2-G4, Lacy Spring 2017人のメンバー

USFT-LACY-S17S2G4

3 メンバー

7のガイドは作成済み

0 件のコメント

コメントを追加

統計データ:

過去 24時間: 1

過去 7 日: 4

過去 30 日: 10

今までの合計 1,320