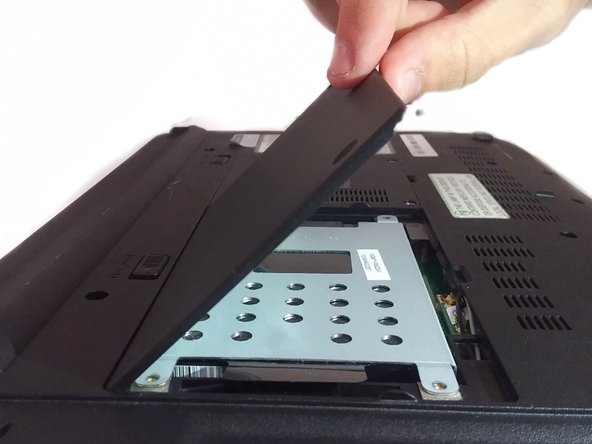
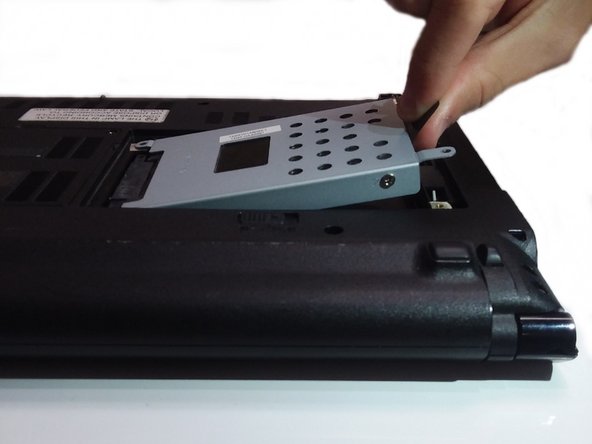
メインコンテンツにスキップ

Asus UL30VT-X1 Hard Drive Replacement

必要な工具と部品

  1. Asus UL30VT-X1 Hard Drive Replacement, Hard Drive: 手順 1、 2の画像 1 Asus UL30VT-X1 Hard Drive Replacement, Hard Drive: 手順 1、 2の画像 2
    • Flip the laptop over onto the back.

  2. Asus UL30VT-X1 Hard Drive Replacement: 手順 2、 2の画像 1 Asus UL30VT-X1 Hard Drive Replacement: 手順 2、 2の画像 2
    • Unscrew the three screws on the hard drive panel using a Phillips Head #00 screwdriver.

  3. Asus UL30VT-X1 Hard Drive Replacement: 手順 3、 2の画像 1 Asus UL30VT-X1 Hard Drive Replacement: 手順 3、 2の画像 2
    • Lift the hard drive panel up from the small cut out at the bottom with your finger to expose the hard drive.

  4. Asus UL30VT-X1 Hard Drive Replacement: 手順 4、 2の画像 1 Asus UL30VT-X1 Hard Drive Replacement: 手順 4、 2の画像 2
    • Grab the black pull tab with your fingers. Pull upwards and then outwards to remove the hard drive.

    • It can sometimes be a little difficult to remove the hard drive.

終わりに

To reassemble your device, follow these instructions in reverse order.

作成者

1人の作成者と共同作成されました。

Robert Wilcox

メンバー登録日: 09/20/17

218 ポイント

2のガイドは作成済み

チーム

University of North Texas, Team S6-G7, Thomas Fall 2017 University of North Texas, Team S6-G7, Thomas Fall 2017人のメンバー

UNT-THOMAS-F17S6G7

3 メンバー

5のガイドは作成済み

0 件のコメント

コメントを追加

統計データ:

過去 24時間: 0

過去 7 日: 2

過去 30 日: 11

今までの合計 189