メインコンテンツにスキップ

Asus TUF Gaming FX705G Fan Replacement

必要な工具と部品

  1. Asus TUF Gaming FX705G Fan Replacement, Back Cover: 手順 1、 2の画像 1 Asus TUF Gaming FX705G Fan Replacement, Back Cover: 手順 1、 2の画像 2
    • Remove the eleven Phillips #0 screws that secure the back cover.

  2. Asus TUF Gaming FX705G Fan Replacement: 手順 2、 2の画像 1 Asus TUF Gaming FX705G Fan Replacement: 手順 2、 2の画像 2
    • Use the iFixit opening tool to lift the back cover's seam, then insert the spudger parallel to the back cover and lift gently upward.

    • You will hear pops as the back cover releases.

  3. Asus TUF Gaming FX705G Fan Replacement, Battery: 手順 3、 2の画像 1 Asus TUF Gaming FX705G Fan Replacement, Battery: 手順 3、 2の画像 2
    • Remove the three Phillips #00 screws from the battery housing.

  4. Asus TUF Gaming FX705G Fan Replacement: 手順 4、 2の画像 1 Asus TUF Gaming FX705G Fan Replacement: 手順 4、 2の画像 2
    • Disconnect the wire from the motherboard, and lift the battery from its housing.

  5. Asus TUF Gaming FX705G Fan Replacement, Fan: 手順 5、 2の画像 1 Asus TUF Gaming FX705G Fan Replacement, Fan: 手順 5、 2の画像 2
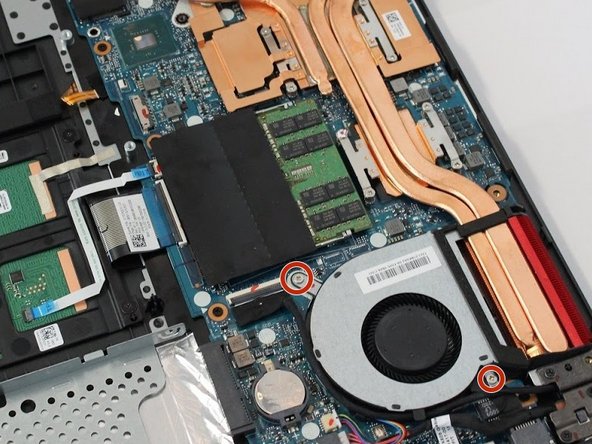
    • Remove the five Phillips #00 screws from the fan casings.

    • The left fan has three screws and the right fan has two screws.

  6. Asus TUF Gaming FX705G Fan Replacement: 手順 6、 3の画像 1 Asus TUF Gaming FX705G Fan Replacement: 手順 6、 3の画像 2 Asus TUF Gaming FX705G Fan Replacement: 手順 6、 3の画像 3
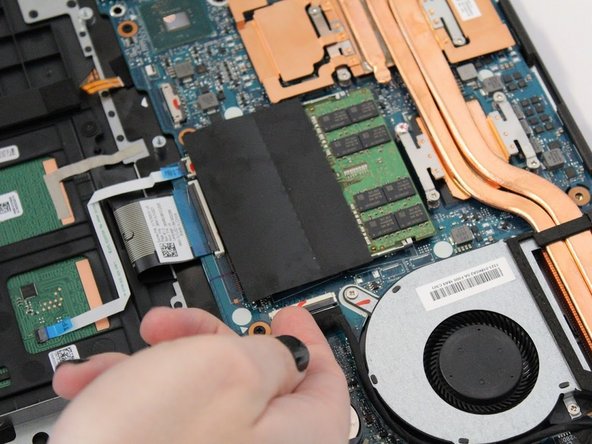
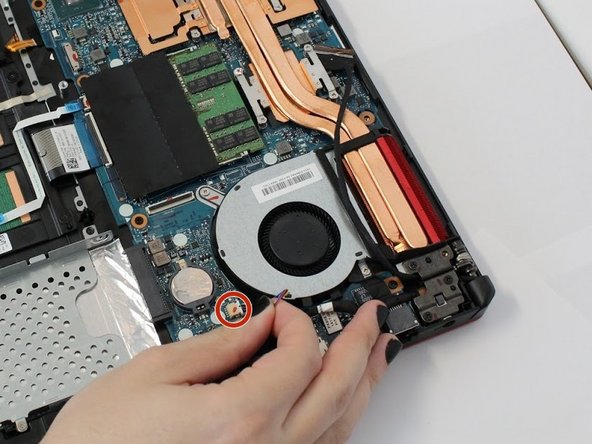
    • Unplug the cables that connect the fan to the motherboard.

  7. Asus TUF Gaming FX705G Fan Replacement: 手順 7、 3の画像 1 Asus TUF Gaming FX705G Fan Replacement: 手順 7、 3の画像 2 Asus TUF Gaming FX705G Fan Replacement: 手順 7、 3の画像 3
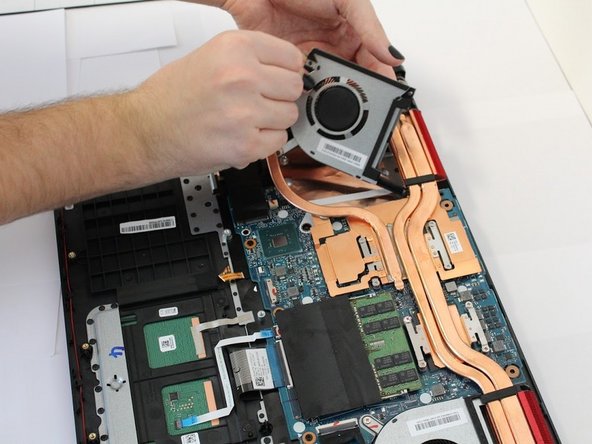
    • Lift the motherboard to unclip the housing clip on the back of the fan.

    • Remove the fan.

終わりに

To reassemble your device, follow these instructions in reverse order.

15 の人々がこのガイドを完成させました。

作成者

5人の作成者と共同で作成されました。

Britney Smit

メンバー登録日: 10/15/19

477 ポイント

2のガイドは作成済み

チーム

Grand Valley State University, Team S4-G5, DeVasto Fall 2019 Grand Valley State University, Team S4-G5, DeVasto Fall 2019人のメンバー

GVSU-DEVASTO-F19S4G5

4 メンバー

6のガイドは作成済み

3 件のコメント

A bit nerve-racking, but got the new CPU fan installed, seems to be working fine according to armory crate. I did note that the CPU fan plug was quite stiff but I did manage to carefully wiggle it out. Anyways found your instructions very helpful especially the pics.

Thank You.

1857classic - 返信

Is it possible to change the cpu an gpu I'm a noob for sure thanks

Like to change them to make it a better pc might not be able to FX705DY

Christopher Hall - 返信

This was very helpful. Thank you

Sue Olmos - 返信

コメントを追加

統計データ:

過去 24時間: 4

過去 7 日: 30

過去 30 日: 134

今までの合計 15,444