メインコンテンツにスキップ

Asus TUF Gaming FX505DY Heat Sink & Fan Replacement

必要な工具と部品

  1. Asus TUF Gaming FX505DY Heat Sink & Fan Replacement, Back Case: 手順 1、 1の画像 1
    • Turn off the laptop.

    • Disconnect the charging cable.

    • Failure to disconnect the charging cable and power down the computer could result in personal or property damage.

    • Flip the laptop so the back is facing up.

  2. Asus TUF Gaming FX505DY Heat Sink & Fan Replacement: 手順 2、 2の画像 1 Asus TUF Gaming FX505DY Heat Sink & Fan Replacement: 手順 2、 2の画像 2
    • Use a Phillips #1 screwdriver to remove the five 6 mm screws that secure the back panel.

    • Use the same screwdriver to remove the six 13 mm screws securing the back panel.

  3. Asus TUF Gaming FX505DY Heat Sink & Fan Replacement: 手順 3、 2の画像 1 Asus TUF Gaming FX505DY Heat Sink & Fan Replacement: 手順 3、 2の画像 2
    • Insert the plastic opening tool at a corner and pry up along the edges, leaving the back side with the hinges for last.

    • Do not insert the opening tool too far into the laptop to avoid damaging internal components.

  4. Asus TUF Gaming FX505DY Heat Sink & Fan Replacement: 手順 4、 2の画像 1 Asus TUF Gaming FX505DY Heat Sink & Fan Replacement: 手順 4、 2の画像 2
    • Gently lift up the back panel to release any remaining clips on the side with the hinges and remove the panel.

  5. Asus TUF Gaming FX505DY Heat Sink & Fan Replacement, Heat Sink & Fan: 手順 5、 3の画像 1 Asus TUF Gaming FX505DY Heat Sink & Fan Replacement, Heat Sink & Fan: 手順 5、 3の画像 2 Asus TUF Gaming FX505DY Heat Sink & Fan Replacement, Heat Sink & Fan: 手順 5、 3の画像 3
    • With a Phillips 0-bit screwdriver, remove eight 5.0 mm screws on the silver brackets

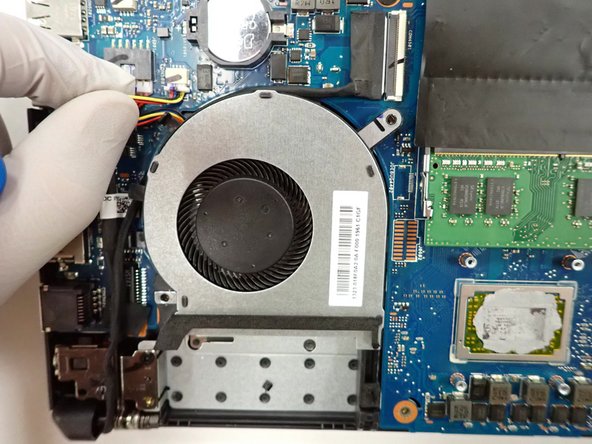
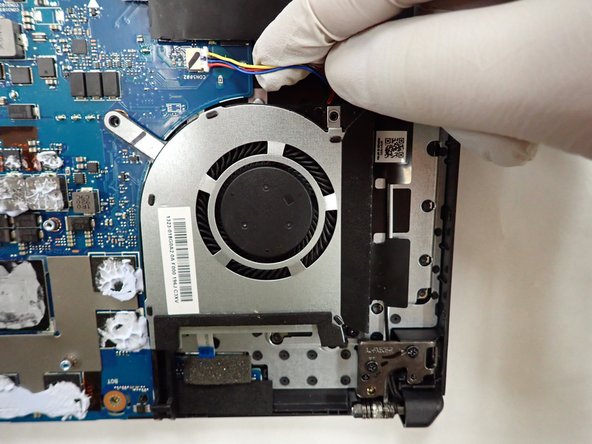
    • With a Phillips 0-bit screwdriver, remove two 5.0 mm screws holding the edge of the fans in place

  6. Asus TUF Gaming FX505DY Heat Sink & Fan Replacement: 手順 6、 3の画像 1 Asus TUF Gaming FX505DY Heat Sink & Fan Replacement: 手順 6、 3の画像 2 Asus TUF Gaming FX505DY Heat Sink & Fan Replacement: 手順 6、 3の画像 3
    • Disconnect two power cables connecting fans to the motherboard.

    • Once all cables and screws are removed, carefully lift up and remove the fans and heat sink

終わりに

To reassemble your device, follow these instructions in reverse order.

2 の人々がこのガイドを完成させました。

作成者

3人の作成者と共同で作成されました。

Sebastian Frederick Klincewicz

メンバー登録日: 10/04/22

394 ポイント

3のガイドは作成済み

0 件のコメント

コメントを追加

統計データ:

過去 24時間: 4

過去 7 日: 11

過去 30 日: 55

今までの合計 1,230