メインコンテンツにスキップ

Asus ROG G751JL-DS71 Hard Drive Replacement

必要な工具と部品

  1. Asus ROG G751JL-DS71 Hard Drive Replacement, Hard Drive: 手順 1、 2の画像 1 Asus ROG G751JL-DS71 Hard Drive Replacement, Hard Drive: 手順 1、 2の画像 2
    • Lift the rubber cover found on the bottom of the laptop.

    • Remove the 5.2 mm screw with a Phillips 1 Screwdriver.

  2. Asus ROG G751JL-DS71 Hard Drive Replacement: 手順 2、 3の画像 1 Asus ROG G751JL-DS71 Hard Drive Replacement: 手順 2、 3の画像 2 Asus ROG G751JL-DS71 Hard Drive Replacement: 手順 2、 3の画像 3
    • Use the black nylon spudger to pry the back panel off the laptop.

  3. Asus ROG G751JL-DS71 Hard Drive Replacement: 手順 3、 3の画像 1 Asus ROG G751JL-DS71 Hard Drive Replacement: 手順 3、 3の画像 2 Asus ROG G751JL-DS71 Hard Drive Replacement: 手順 3、 3の画像 3
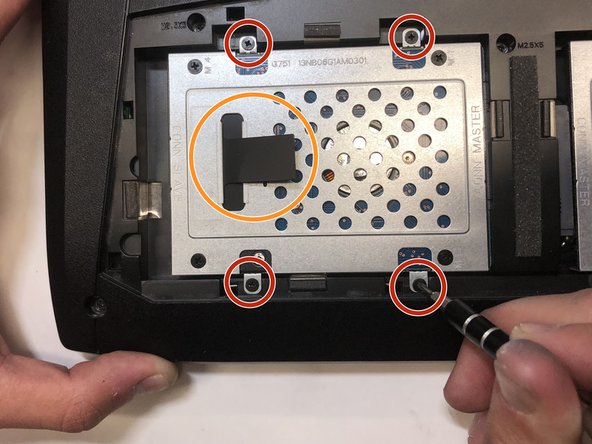
    • Use a Phillips 1 Screwdriver to remove the four 2.4 mm screws securing the hard drive.

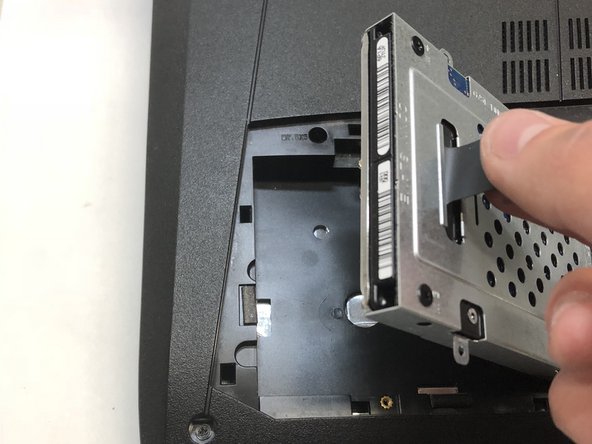
    • Use the black pull-tab located on the shell covering the hard drive, to lift the hard drive housing and pull the hard drive away from the connector.

    • To access the hard drive on the right side of the laptop, perform the same steps, but on hard drive casing to the right of the previous hard drive.

終わりに

To reassemble your device, follow these instructions in reverse order.

2 の人々がこのガイドを完成させました。

作成者

2人の作成者と共同で作成されました。

Vincent Guarino

メンバー登録日: 01/22/18

190 ポイント

1ガイドが承認済み

チーム

Cal Poly, Team S16-G1, Banghart Winter 2018 Cal Poly, Team S16-G1, Banghart Winter 2018人のメンバー

CPSU-BANGHART-W18S16G1

4 メンバー

22のガイドは作成済み

0 件のコメント

コメントを追加

統計データ:

過去 24時間: 0

過去 7 日: 5

過去 30 日: 7

今までの合計 507