メインコンテンツにスキップ

Asus R510CA-OB01 Keyboard and Mousepad Replacement

必要な工具と部品

  1. Asus R510CA-OB01 Keyboard and Mousepad Replacement, Battery: 手順 1、 3の画像 1 Asus R510CA-OB01 Keyboard and Mousepad Replacement, Battery: 手順 1、 3の画像 2 Asus R510CA-OB01 Keyboard and Mousepad Replacement, Battery: 手順 1、 3の画像 3
    • Locate the two switches that lock the battery.

    • Then, push the right switch outward to unlock it.

  2. Asus R510CA-OB01 Keyboard and Mousepad Replacement: 手順 2、 2の画像 1 Asus R510CA-OB01 Keyboard and Mousepad Replacement: 手順 2、 2の画像 2
    • Push the left switch outward and push the battery upward at the same time.

  3. Asus R510CA-OB01 Keyboard and Mousepad Replacement: 手順 3、 1の画像 1
    • Use a Li-ion battery as a replacement for your battery.

  4. Asus R510CA-OB01 Keyboard and Mousepad Replacement, Keyboard and Mousepad: 手順 4、 1の画像 1
    • Shut down the computer and disconnect all external devices connected to it.

    • Turn the computers that it is upside down. Position the computer with the front towards you.

  5. Asus R510CA-OB01 Keyboard and Mousepad Replacement: 手順 5、 1の画像 1
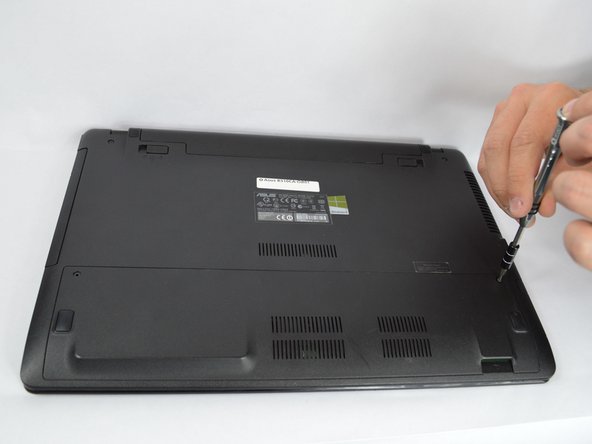
    • After detaching the battery, remove the two 5mm screws holding down the casing using a Phillips #00 screwdriver.

  6. Asus R510CA-OB01 Keyboard and Mousepad Replacement: 手順 6、 2の画像 1 Asus R510CA-OB01 Keyboard and Mousepad Replacement: 手順 6、 2の画像 2
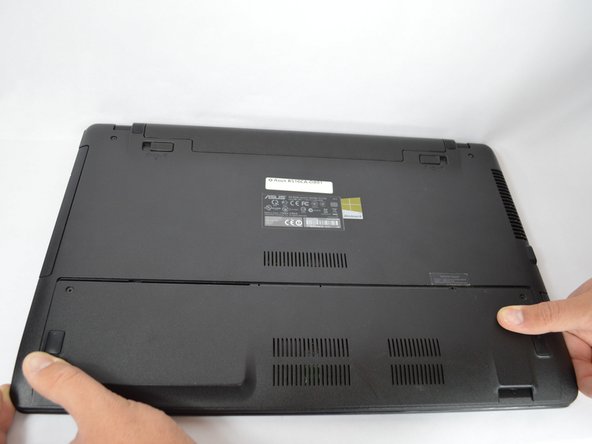
    • Loosen the four 12mm screws on the bottom and top panel of your device using a Phillips #0 screwdriver.

  7. Asus R510CA-OB01 Keyboard and Mousepad Replacement: 手順 7、 3の画像 1 Asus R510CA-OB01 Keyboard and Mousepad Replacement: 手順 7、 3の画像 2 Asus R510CA-OB01 Keyboard and Mousepad Replacement: 手順 7、 3の画像 3
    • Use the grips to slide the panel off.

    • Remove the panel by lifting it off the device.

  8. Asus R510CA-OB01 Keyboard and Mousepad Replacement: 手順 8、 2の画像 1 Asus R510CA-OB01 Keyboard and Mousepad Replacement: 手順 8、 2の画像 2
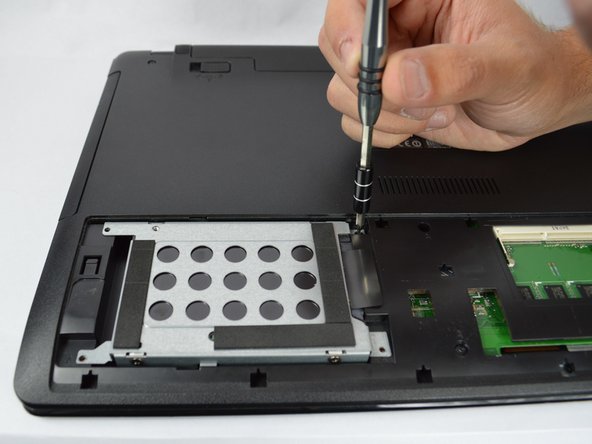
    • Remove the three 5mm screws holding down the hard drive and the five 5mm screws holding down the casing using a Phillips #00 bit.

  9. Asus R510CA-OB01 Keyboard and Mousepad Replacement: 手順 9、 2の画像 1 Asus R510CA-OB01 Keyboard and Mousepad Replacement: 手順 9、 2の画像 2
    • Turn the laptop the right way up and face it towards you.

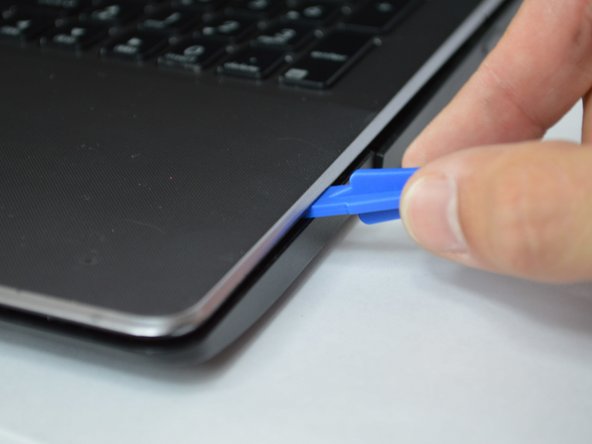
    • Insert the flat edge of the flat plastic opening tool into the crease of the keyboard cover.

    • While the opening tool is in the crease, carefully pry open the casing by sliding the plastic opening tool along the edge.

  10. Asus R510CA-OB01 Keyboard and Mousepad Replacement: 手順 10、 2の画像 1 Asus R510CA-OB01 Keyboard and Mousepad Replacement: 手順 10、 2の画像 2
    • Make sure that the entire cover has been released front the plastic pins.

    • Slowly lift the cover open from the front of the laptop but do not completely remove.

    • Note the three locations of the three white and blue data cables connecting the keyboard to the computer's main board.

  11. Asus R510CA-OB01 Keyboard and Mousepad Replacement: 手順 11、 3の画像 1 Asus R510CA-OB01 Keyboard and Mousepad Replacement: 手順 11、 3の画像 2 Asus R510CA-OB01 Keyboard and Mousepad Replacement: 手順 11、 3の画像 3
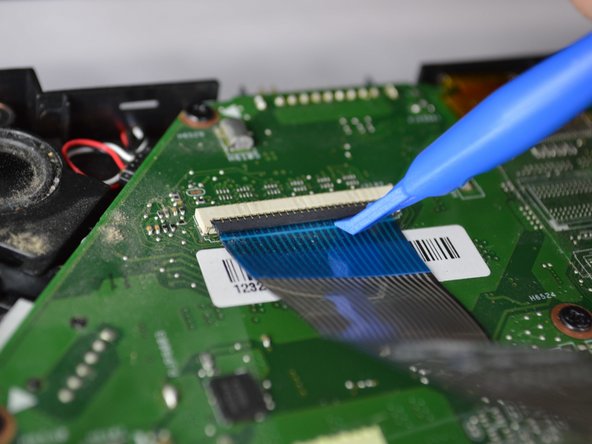
    • Remove each data cable from the motherboard by using your finger or the plastic opening tool to lift the white latch.

    • The cable will slide out of its place.

  12. Asus R510CA-OB01 Keyboard and Mousepad Replacement: 手順 12、 2の画像 1 Asus R510CA-OB01 Keyboard and Mousepad Replacement: 手順 12、 2の画像 2
    • With the data cables removed and the keyboard module fully disconnected, the keyboard module should come free from the laptop.

終わりに

To reassemble your device, follow these instructions in reverse order.

作成者

6人の作成者と共同で作成されました。

Blanche Pinto

メンバー登録日: 09/28/17

437 ポイント

4のガイドは作成済み

チーム

USF Tampa, Team S3-G4, Nance Fall 2017 USF Tampa, Team S3-G4, Nance Fall 2017人のメンバー

USFT-NANCE-F17S3G4

2 メンバー

4のガイドは作成済み

0 件のコメント

コメントを追加

統計データ:

過去 24時間: 4

過去 7 日: 10

過去 30 日: 15

今までの合計 783