メインコンテンツにスキップ

Asus Q551L Repair Motherboard Replacement

必要な工具と部品

  1. Asus Q551L Repair Motherboard Replacement, Back Panel: 手順 1、 2の画像 1 Asus Q551L Repair Motherboard Replacement, Back Panel: 手順 1、 2の画像 2
    • Unscrew the 10 screws around the edge of the back panel. Eight of the screws are 0.0793mm T5 , two of them are 0.0793 JIS #0.

  2. Asus Q551L Repair Motherboard Replacement: 手順 2、 1の画像 1
    • Use the plastic opening tool to pry the back panel off the base of the laptop.

  3. Asus Q551L Repair Motherboard Replacement, Battery: 手順 3、 2の画像 1 Asus Q551L Repair Motherboard Replacement, Battery: 手順 3、 2の画像 2
    • Unscrew the four screws to remove the battery.

  4. Asus Q551L Repair Motherboard Replacement: 手順 4、 2の画像 1 Asus Q551L Repair Motherboard Replacement: 手順 4、 2の画像 2
    • Un-clip both wire clips on the upper and right side of the battery.

    • Lift the battery out of the device.

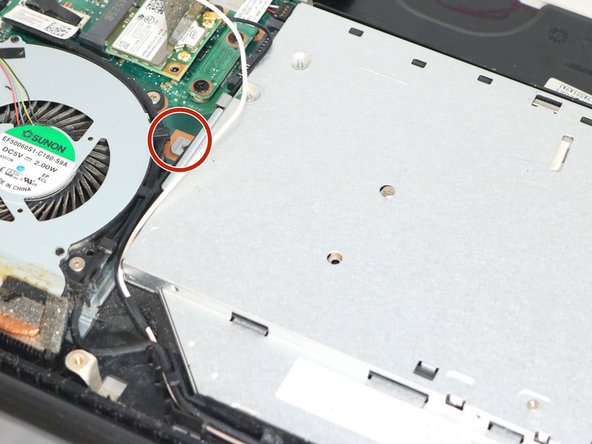
  5. Asus Q551L Repair Motherboard Replacement, Optical Drive: 手順 5、 3の画像 1 Asus Q551L Repair Motherboard Replacement, Optical Drive: 手順 5、 3の画像 2 Asus Q551L Repair Motherboard Replacement, Optical Drive: 手順 5、 3の画像 3
    • Lift up the sticker that sticks between the motherboard and the optical drive. Then, unscrew the one screw where it is marked and slide it out gently.

    • Watch out for the wires around the optical drive.

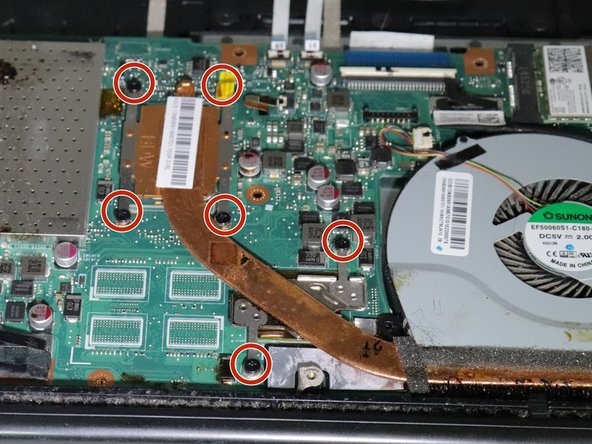
  6. Asus Q551L Repair Motherboard Replacement, Motherboard: 手順 6、 3の画像 1 Asus Q551L Repair Motherboard Replacement, Motherboard: 手順 6、 3の画像 2 Asus Q551L Repair Motherboard Replacement, Motherboard: 手順 6、 3の画像 3
    • Remove the fan by unscrewing the nine screws shown in the images.

    • The four colored wire and the black cable need to be pulled out gently.

    • There will be wires around the fan. Make sure they are not stuck to it.

    • You want to keep the fan if it still in good conditions.

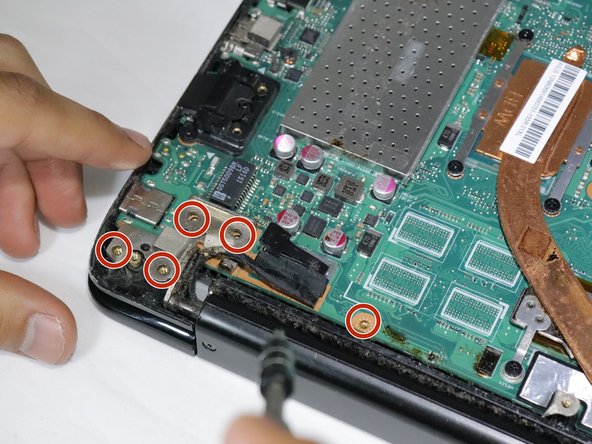
  7. Asus Q551L Repair Motherboard Replacement: 手順 7、 2の画像 1 Asus Q551L Repair Motherboard Replacement: 手順 7、 2の画像 2
    • Unscrew the seven screws Phillips Head 0.0793 MM on the edges of the motherboard.

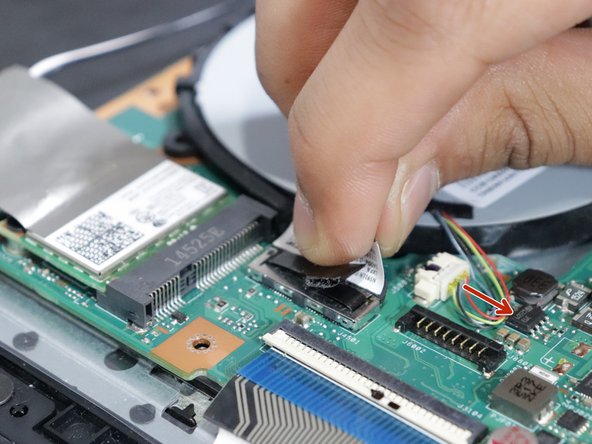
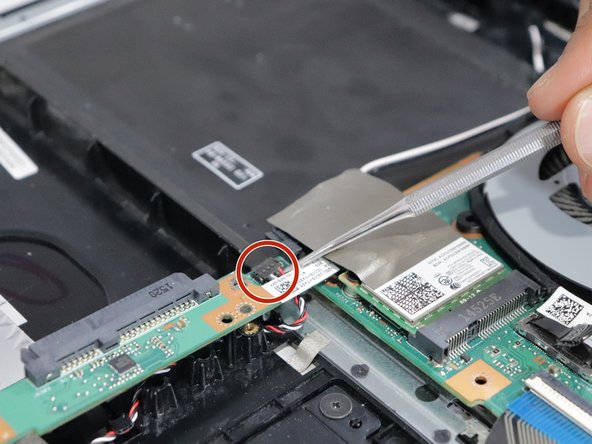
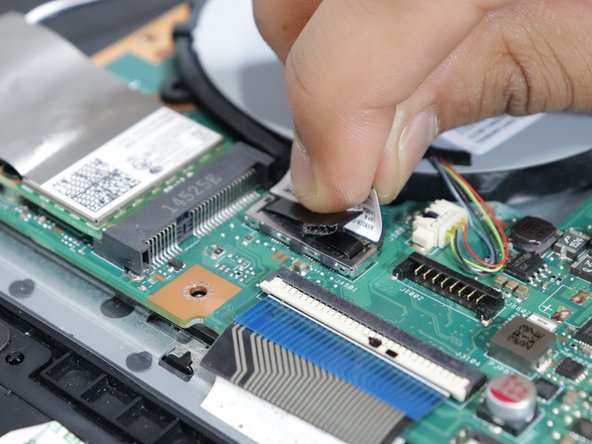
  8. Asus Q551L Repair Motherboard Replacement: 手順 8、 3の画像 1 Asus Q551L Repair Motherboard Replacement: 手順 8、 3の画像 2 Asus Q551L Repair Motherboard Replacement: 手順 8、 3の画像 3
    • Disconnect any cables that hold the motherboard.

    • Open up the white adjustable latch first to pull out the tapes.

終わりに

To reassemble your device, follow these instructions in reverse order.

2 の人々がこのガイドを完成させました。

作成者

4人の作成者と共同で作成されました。

Baker

メンバー登録日: 01/17/18

300 ポイント

1ガイドが承認済み

チーム

コメント 1 件

Thanks for posting this guide. Helped me to fix this model computer for a friend. Very well done!

Robert Valentino - 返信

コメントを追加

統計データ:

過去 24時間: 0

過去 7 日: 10

過去 30 日: 17

今までの合計 2,370