メインコンテンツにスキップ

Asus Q550LF-BBI7T07 Hard Drive Replacement

必要な工具と部品

  1. Asus Q550LF-BBI7T07 Hard Drive Replacement, Battery: 手順 1、 2の画像 1 Asus Q550LF-BBI7T07 Hard Drive Replacement, Battery: 手順 1、 2の画像 2
    • Use a T4 Torx screwdriver head to remove the ten 4mm Torx head screws on the bottom of the laptop.

  2. Asus Q550LF-BBI7T07 Hard Drive Replacement: 手順 2、 2の画像 1 Asus Q550LF-BBI7T07 Hard Drive Replacement: 手順 2、 2の画像 2
    • Use an opening tool to pry open the rear cover. Lift the cover off and away from the board.

  3. Asus Q550LF-BBI7T07 Hard Drive Replacement: 手順 3、 2の画像 1 Asus Q550LF-BBI7T07 Hard Drive Replacement: 手順 3、 2の画像 2
    • Use a Phillips #0 screwdriver head to remove the three black 7mm Phillips head screws that hold the battery in place.

  4. Asus Q550LF-BBI7T07 Hard Drive Replacement: 手順 4、 2の画像 1 Asus Q550LF-BBI7T07 Hard Drive Replacement: 手順 4、 2の画像 2
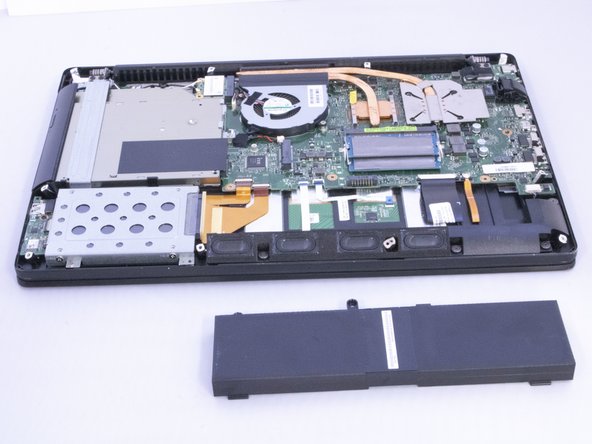
    • Once the screws have been removed, gently lift the battery out.

  5. Asus Q550LF-BBI7T07 Hard Drive Replacement, Hard Drive: 手順 5、 2の画像 1 Asus Q550LF-BBI7T07 Hard Drive Replacement, Hard Drive: 手順 5、 2の画像 2
    • Use the Phillips #0 Screwdriver to unscrew the four silver 5mm screws.

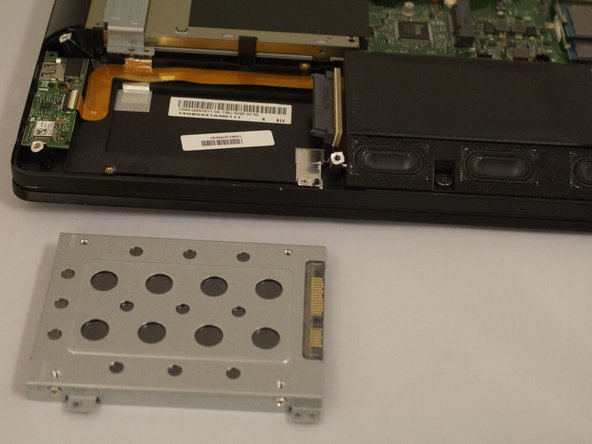
  6. Asus Q550LF-BBI7T07 Hard Drive Replacement: 手順 6、 2の画像 1 Asus Q550LF-BBI7T07 Hard Drive Replacement: 手順 6、 2の画像 2
    • Gently disconnect the Hard Drive from the connector cable. Lift it out and remove it.

終わりに

To reassemble your device, follow these instructions in reverse order.

ある他の人がこのガイドを完成しました。

作成者

5人の作成者と共同で作成されました。

Chance Woudenberg

メンバー登録日: 10/02/18

673 ポイント

4のガイドは作成済み

チーム

Eastern Washington University, Team S2-G1, Munoz Fall 2018 Eastern Washington University, Team S2-G1, Munoz Fall 2018人のメンバー

EWU-MUNOZ-F18S2G1

4 メンバー

5のガイドは作成済み

0 件のコメント

コメントを追加

統計データ:

過去 24時間: 2

過去 7 日: 7

過去 30 日: 13

今までの合計 1,587