はじめに
The ASUS Q503UA-BSI5T17 is a 2 in 1 touch-screen portable PC with a 15.6-inch screen. This guide will show a step-by-step process on how to remove the hard drive. Removal of the hard drive is necessary if the hard drive begins to fail or dies.
Signs of a failing hard drive are a blue screen error when starting the PC, the PC not starting at all, a “file not found” error when turning on the device , an increase in the amount of corrupted files on the PC, and a loud ticking or scratching sound coming from the device.
Removal of the hard drive may also be necessary to reach other components of the PC or to upgrade for more storage space.
Steps 4 through 6 require handling of the battery and disconnecting it. Make sure the device is completely shut off and unplugged from any chargers or wall ports before working on the device. Be extremely cautious when working with the battery as breaking it can ruin your device.
必要な工具と部品
-
-
Flip the computer upside down. In order to ensure that the correct side is up, you should be able to read the sticker that indicates the serial number on the bottom.
-
-
-
-
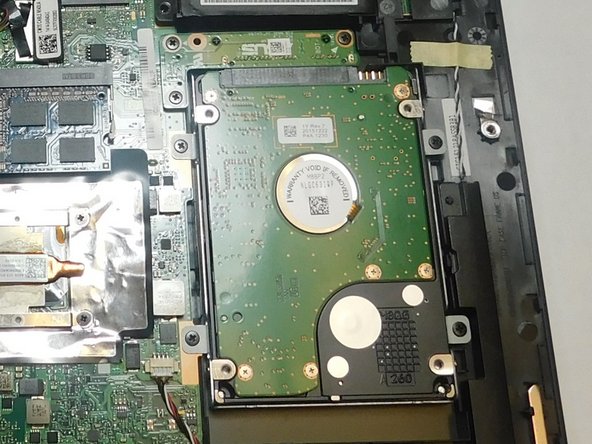
Once you opened the laptop, the hard drive is located on the bottom right from where the battery is.
-


To reassemble your device, follow these instructions in reverse order.
To reassemble your device, follow these instructions in reverse order.
4 の人々がこのガイドを完成させました。

チーム

Gateway, Team S1-G4, Saknee Fall 2019 Gateway, Team S1-G4, Saknee Fall 2019人のメンバー
GCC-SAKNEE-F19S1G4
4 メンバー
5のガイドは作成済み
2 件のコメント
Very easy to do. Directions were easy to follow.
Does this laptop have an M.2 nvme SDD slot?