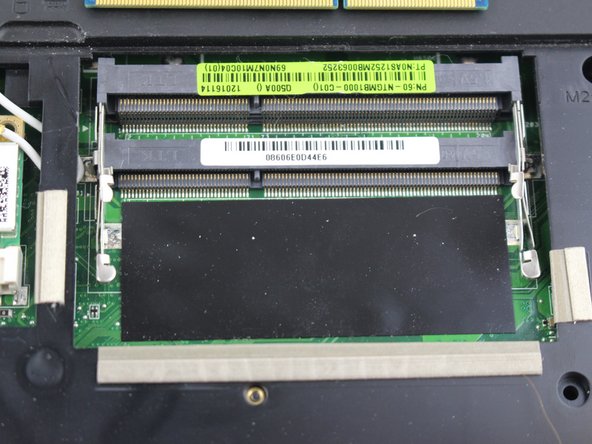
メインコンテンツにスキップ

Asus Q500A RAM Replacement

必要な工具と部品

  1. Asus Q500A RAM Replacement, RAM: 手順 1、 2の画像 1 Asus Q500A RAM Replacement, RAM: 手順 1、 2の画像 2
    • Flip device upside-down.

    • Remove back-plate by unscrewing the two screws on either side of the back-plate.

    • Remove the plastic cover.

  2. Asus Q500A RAM Replacement: 手順 2、 1の画像 1
    • Depending on the model of the device, there will either be one or two sticks of ram.

    • There are two metal brackets holding each ram stick in.

    • To unlock the RAM, you'll need to remove the metal brackets. To do this, carefully push out the brackets.

  3. Asus Q500A RAM Replacement: 手順 3、 2の画像 1 Asus Q500A RAM Replacement: 手順 3、 2の画像 2
    • Now simply remove the ram by pulling it out using a set of pliers to be safe and careful not to damage the ram.

  4. Asus Q500A RAM Replacement: 手順 4、 1の画像 1
    • To insert the ram line up the ram stick and the slot.

    • Next you will have to push the ram down until it snaps into place.

    • Be careful not to do this too hard, as it can break the ram.

    • Make sure the ram is secure in its slot before moving on to the next piece of ram or replacing the back-plate.

終わりに

To reassemble your device, follow these instructions in reverse order.

作成者

10人の作成者と共同で作成されました。

cameron

メンバー登録日: 02/15/17

319 ポイント

3のガイドは作成済み

チーム

USF Tampa, Team 12-5, Eyestone Spring 2017 USF Tampa, Team 12-5, Eyestone Spring 2017人のメンバー

USFT-EYESTONE-S17S12G5

3 メンバー

3のガイドは作成済み

0 件のコメント

コメントを追加

統計データ:

過去 24時間: 1

過去 7 日: 6

過去 30 日: 17

今までの合計 685