メインコンテンツにスキップ

Asus PadFone S Front Facing Camera Replacement

必要な工具と部品

  1. Asus PadFone S Front Facing Camera Replacement, Remove the Back Panel: 手順 1、 1の画像 1
    • Place your thumb in the charging port and pry the back cover off of the phone.

  2. Asus PadFone S Front Facing Camera Replacement, Remove the Back Panel: 手順 2、 2の画像 1 Asus PadFone S Front Facing Camera Replacement, Remove the Back Panel: 手順 2、 2の画像 2
    • Remove all screws using the T5 Torx screwdriver

    • Lift the back panel off the phone.

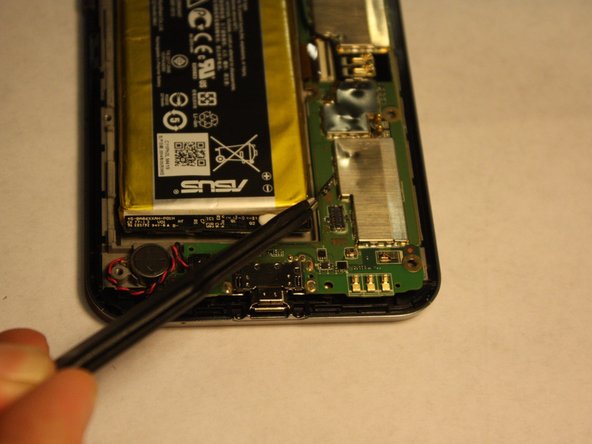
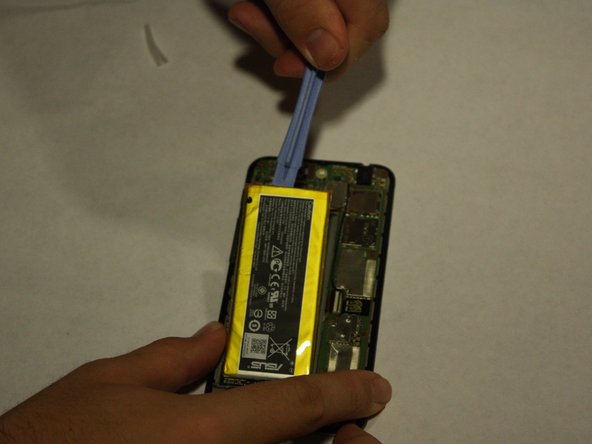
  3. Asus PadFone S Front Facing Camera Replacement, Remove the Battery: 手順 3、 2の画像 1 Asus PadFone S Front Facing Camera Replacement, Remove the Battery: 手順 3、 2の画像 2
    • Disconnect the battery from the logic board using tweezers

    • Using the plastic opening tools, lift the battery up from its slot

    • Apply consistent, steady force to lift the battery from its slot. Be careful not to damage the battery while removing it.

  4. Asus PadFone S Front Facing Camera Replacement, Front Facing Camera: 手順 4、 3の画像 1 Asus PadFone S Front Facing Camera Replacement, Front Facing Camera: 手順 4、 3の画像 2 Asus PadFone S Front Facing Camera Replacement, Front Facing Camera: 手順 4、 3の画像 3
    • Once the Battery has been successfully removed, move on to the step 2.

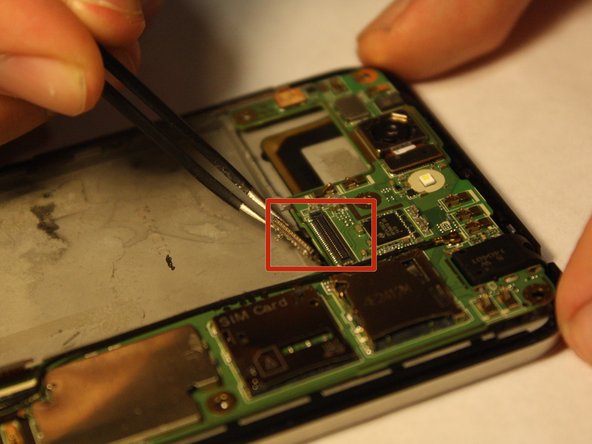
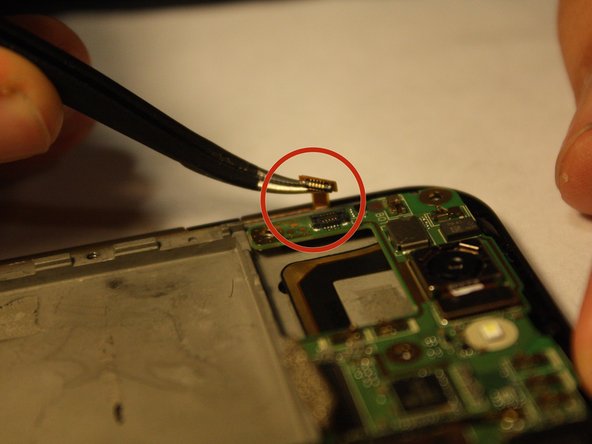
  5. Asus PadFone S Front Facing Camera Replacement, Start of Logic Board Removal: 手順 5、 2の画像 1 Asus PadFone S Front Facing Camera Replacement, Start of Logic Board Removal: 手順 5、 2の画像 2
    • Disconnect the marked strips from the logic board using the tweezers.

    • Applying too much force may damage the strips/connectors.

    • Remember to remove speaker connection located at the bottom left hand corner.

  6. Asus PadFone S Front Facing Camera Replacement, Logic Board Removal - Continued: 手順 6、 2の画像 1 Asus PadFone S Front Facing Camera Replacement, Logic Board Removal - Continued: 手順 6、 2の画像 2
    • Disconnect the other two strips that connect the logic board to the phone.

    • Applying too much force may damage the strips/connectors.

  7. Asus PadFone S Front Facing Camera Replacement, Remove The Camera: 手順 7、 2の画像 1 Asus PadFone S Front Facing Camera Replacement, Remove The Camera: 手順 7、 2の画像 2
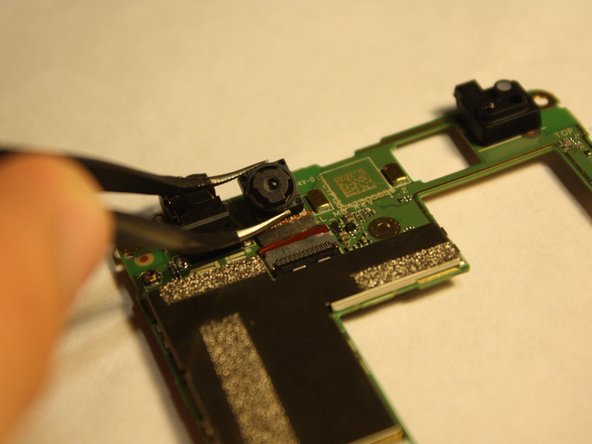
    • Turn over the logic board to locate the front camera.

    • Grasp the sides of the camera with the tweezers and carefully remove the camera from the logic board.

    • Applying to much force will damage the connective strip.

終わりに

To reassemble your device, follow these instructions in reverse order.

ある他の人がこのガイドを完成しました。

作成者

3人の作成者と共同で作成されました。

Everette Gonsalves

メンバー登録日: 10/23/14

26 ポイント

1ガイドが承認済み

チーム

UMass Dartmouth, Team 6-1, Vijaybhaskar Fall 2014 UMass Dartmouth, Team 6-1, Vijaybhaskar Fall 2014人のメンバー

UMASSD-VIJAYBHASKAR-F14S6G1

3 メンバー

10のガイドは作成済み

0 件のコメント

コメントを追加

統計データ:

過去 24時間: 2

過去 7 日: 6

過去 30 日: 7

今までの合計 1,500