はじめに
If you forgot your Password, Security PIN, Pattern Drill...
You can pass the security with a factory reset.We will show you how to do this.
!!! ATTENTION. This will erase all your personal data !!!
ビデオの概要
-
-
First, try to pass the security with the Google account, registered on this tablet.
-
If you can't, then go to the next step.
-
-
-
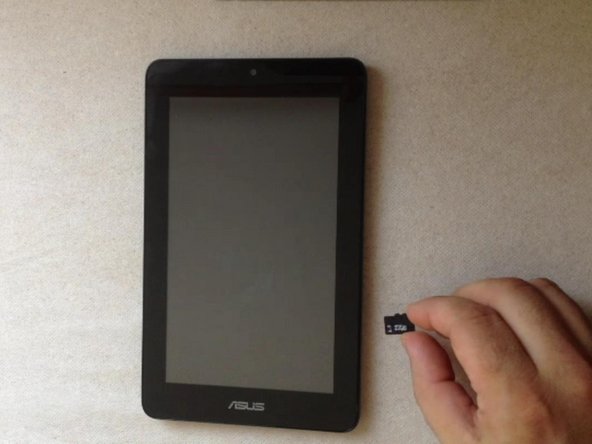
Switch off the tablet and eject the memory card.
-
If you haven't memory card, you can use another, but it must be formatted at FAT32.
-
Google "asus memo pad how to reset to factory settings" and find the link to the official ASUS website.
-
Dounload "cleandata.zip".
-
-
-
-
In this menu use Volume Up/Down for movement and Power On to confirm.
-
Choose "clear user data"
-
After a while the tablet will ask you to remove the media (memory card).
-
The tablet tablet will restart and restore the system automatically.
-
Before installing the micro SD back, erase last copied files.
-
.
-


To reassemble your device, follow these instructions in reverse order.
To reassemble your device, follow these instructions in reverse order.
24 の人々がこのガイドを完成させました。

チーム

19 件のコメント
the tablet don,t go to andriod bsp instalation menu
Try with another micro SD card.
ZFix -
Hey All, I was able to complete this task by placing the individual files from "cleandata.zip" onto the memory card. I tried placing the files from the zip folder onto the memory card, but that didn't work. Place only the individual files from the zip folder onto the memory card and re-boot and it will work...
Monk
Monk Paloo - 返信
make sure format it to FAT32
Power up the Tablet while PRESSING the (POWER)+(VOLUME UP)+(VOLUME DOWN) buttons all at the same time for several seconds..... the Android native boot loader will load allowing you to delete data and restore to factory defaults.....