メインコンテンツにスキップ

Asus MeMO Pad 7 ME176C Battery Replacement

必要な工具と部品

  1. Asus MeMO Pad 7 ME176C Battery Replacement, Battery Replacement: 手順 1、 1の画像 1
    • Make sure the device is turned off.

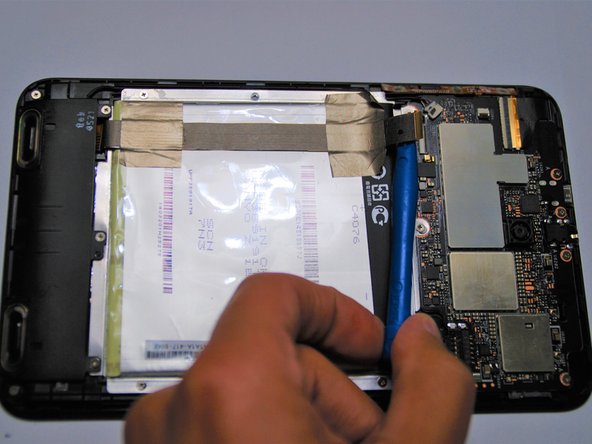
    • Use a plastic opening tool to remove the back panel by carefully moving the tool around the back cover of the device until it comes off.

  2. Asus MeMO Pad 7 ME176C Battery Replacement: 手順 2、 2の画像 1 Asus MeMO Pad 7 ME176C Battery Replacement: 手順 2、 2の画像 2
    • Locate the black bundle connector on the back of the device. Gently slide the plastic tool underneath the black bundle cable connector towards the battery until it comes off.

  3. Asus MeMO Pad 7 ME176C Battery Replacement: 手順 3、 3の画像 1 Asus MeMO Pad 7 ME176C Battery Replacement: 手順 3、 3の画像 2 Asus MeMO Pad 7 ME176C Battery Replacement: 手順 3、 3の画像 3
    • Using the plastic opener tool, carefully remove the ZIF connectors that is covering the battery.

  4. Asus MeMO Pad 7 ME176C Battery Replacement: 手順 4、 3の画像 1 Asus MeMO Pad 7 ME176C Battery Replacement: 手順 4、 3の画像 2 Asus MeMO Pad 7 ME176C Battery Replacement: 手順 4、 3の画像 3
    • Wedge the flat end of a spudger or plastic opening tool under the battery to free the battery form any adhesives.

    • Do not bend or puncture the battery.

終わりに

To reassemble your device, follow these instructions in reverse order.

3 の人々がこのガイドを完成させました。

作成者

3人の作成者と共同で作成されました。

Benjamin von Furstenrecht

メンバー登録日: 09/26/17

164 ポイント

1ガイドが承認済み

チーム

Cal Poly, Team S6-G3, Banghart Fall 2017 Cal Poly, Team S6-G3, Banghart Fall 2017人のメンバー

CPSU-BANGHART-F17S6G3

5 メンバー

9のガイドは作成済み

コメント 1 件

It might be better to remove the whole aluminum tray under the battery. It is really tough to slice the tape holding the battery to the tray without bending up the battery or putting a lot of pressure on the circuit board. It looks like nine screws and a couple extra steps.

Jim80686 - 返信

コメントを追加

統計データ:

過去 24時間: 0

過去 7 日: 3

過去 30 日: 13

今までの合計 2,200