メインコンテンツにスキップ

Asus K55N-DS81 Hard Drive Replacement

必要な工具と部品

  1. Asus K55N-DS81 Hard Drive Replacement, Battery: 手順 1、 1の画像 1
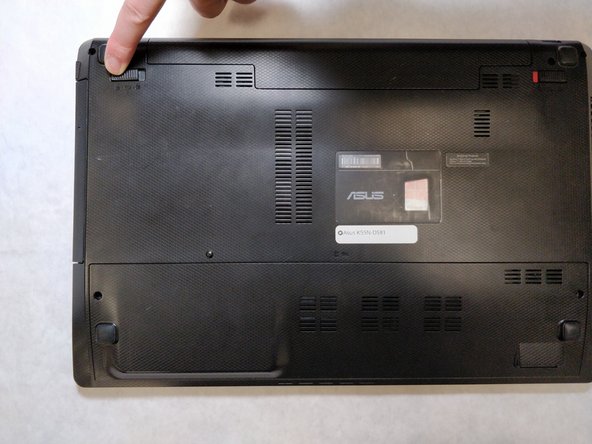
    • Flip the laptop over, such that the bottom of the laptop is facing upwards.

    • Ensure that the laptop is powered off prior to following this guide.

  2. Asus K55N-DS81 Hard Drive Replacement: 手順 2、 2の画像 1 Asus K55N-DS81 Hard Drive Replacement: 手順 2、 2の画像 2
    • Pull the latch to the right of the battery to the right.

  3. Asus K55N-DS81 Hard Drive Replacement: 手順 3、 2の画像 1 Asus K55N-DS81 Hard Drive Replacement: 手順 3、 2の画像 2
    • Pull the latch to the left of the battery to the left. Hold the latch open with a finger to prevent it from closing.

  4. Asus K55N-DS81 Hard Drive Replacement: 手順 4、 2の画像 1 Asus K55N-DS81 Hard Drive Replacement: 手順 4、 2の画像 2
    • While holding the second latch from the previous step, use another hand to reach underneath the battery.

    • Pull the battery upwards and away from the laptop to remove it.

  5. Asus K55N-DS81 Hard Drive Replacement, Rear Panel: 手順 5、 2の画像 1 Asus K55N-DS81 Hard Drive Replacement, Rear Panel: 手順 5、 2の画像 2
    • Using a JIS #00 screwdriver, unscrew the two 5 mm screws on either side of the laptop panel.

  6. Asus K55N-DS81 Hard Drive Replacement: 手順 6、 3の画像 1 Asus K55N-DS81 Hard Drive Replacement: 手順 6、 3の画像 2 Asus K55N-DS81 Hard Drive Replacement: 手順 6、 3の画像 3
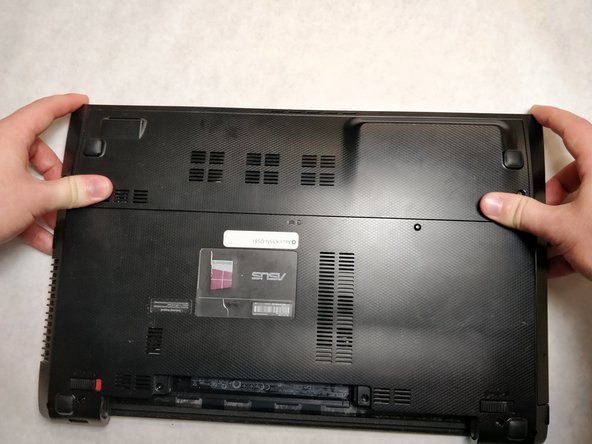
    • Remove the panel by pushing away from the laptop until the panel is free of the laptop.

    • Lift to remove the panel.

  7. Asus K55N-DS81 Hard Drive Replacement, Hard Drive: 手順 7、 1の画像 1
    • Using a JIS #00 screwdriver, unscrew the four 5 mm screws fastening the hard drive enclosure to the laptop.

  8. Asus K55N-DS81 Hard Drive Replacement: 手順 8、 3の画像 1 Asus K55N-DS81 Hard Drive Replacement: 手順 8、 3の画像 2 Asus K55N-DS81 Hard Drive Replacement: 手順 8、 3の画像 3
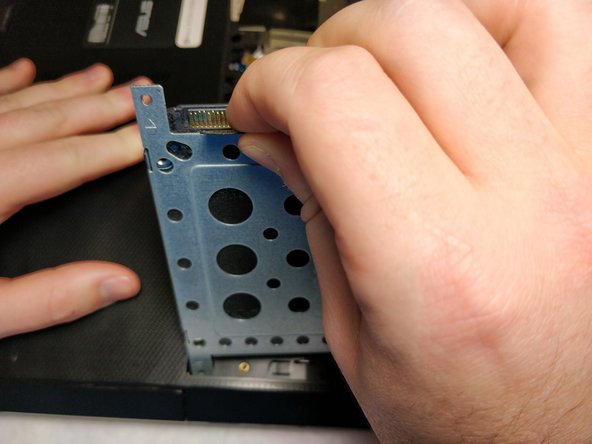
    • Grab the plastic tab located on the hard drive enclosure.

    • Pull the tab towards yourself, the hard drive will slide towards you as it disconnects from the motherboard.

    • Lift the enclosure by the tab to remove the enclosure from the laptop.

  9. Asus K55N-DS81 Hard Drive Replacement: 手順 9、 2の画像 1 Asus K55N-DS81 Hard Drive Replacement: 手順 9、 2の画像 2
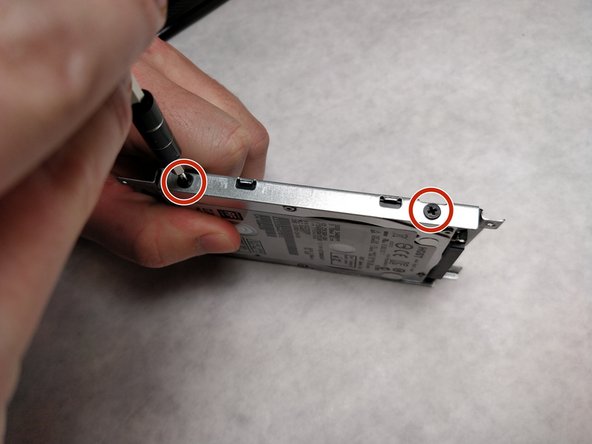
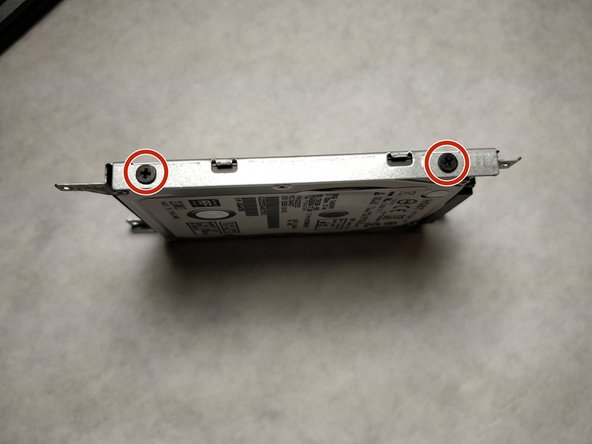
    • Using a JIS #00 screwdriver, unscrew the four 3 mm screws securing the hard drive to the enclosure.

    • Do not forget to flip the enclosure over and unscrew the screws on the other side.

  10. Asus K55N-DS81 Hard Drive Replacement: 手順 10、 2の画像 1 Asus K55N-DS81 Hard Drive Replacement: 手順 10、 2の画像 2
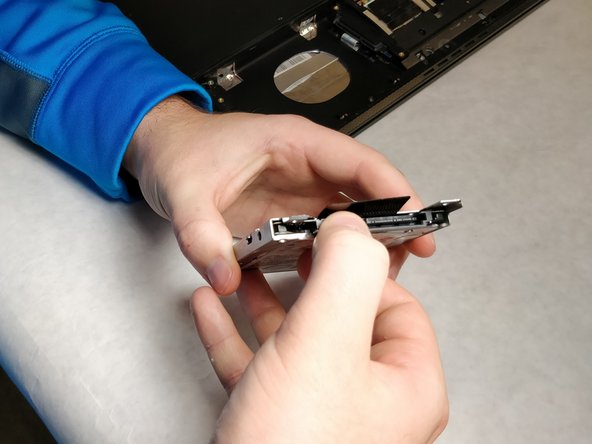
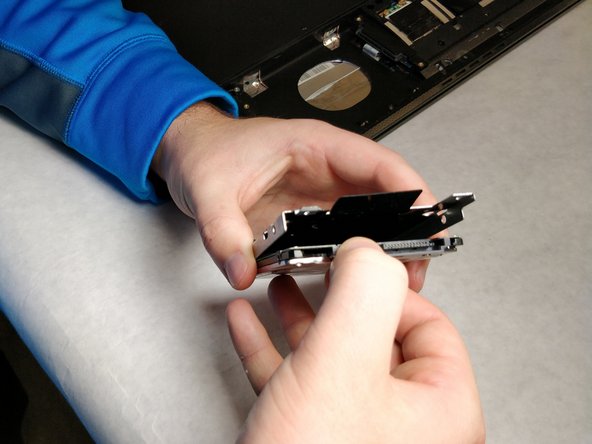
    • Grab the hard drive and pull it away from the enclosure to remove it.

終わりに

To reassemble your device, follow these instructions in reverse order.

ある他の人がこのガイドを完成しました。

作成者

2人の作成者と共同で作成されました。

Elliott Beckner

メンバー登録日: 11/05/18

543 ポイント

4のガイドは作成済み

チーム

IUPUI, Team S2-G1, Baechle Fall 2018 IUPUI, Team S2-G1, Baechle Fall 2018人のメンバー

IUPUI-BAECHLE-F18S2G1

4 メンバー

5のガイドは作成済み

0 件のコメント

コメントを追加

統計データ:

過去 24時間: 0

過去 7 日: 1

過去 30 日: 3

今までの合計 432