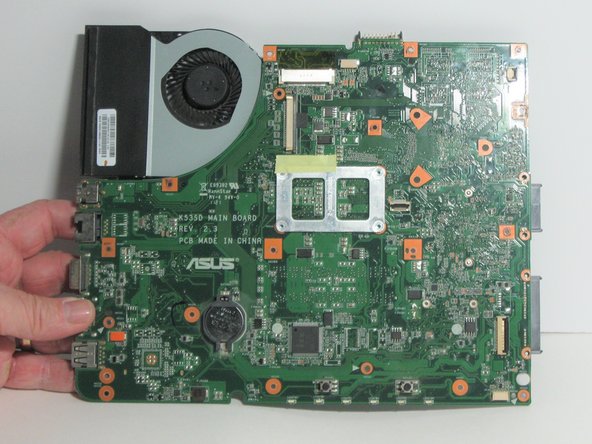
メインコンテンツにスキップ

Asus K53E-BBR7 Motherboard Replacement

必要な工具と部品

  1. Asus K53E-BBR7 Motherboard Replacement, Motherboard: 手順 1、 3の画像 1 Asus K53E-BBR7 Motherboard Replacement, Motherboard: 手順 1、 3の画像 2 Asus K53E-BBR7 Motherboard Replacement, Motherboard: 手順 1、 3の画像 3
    • Turn off the computer and disconnect the charging cable from the laptop.

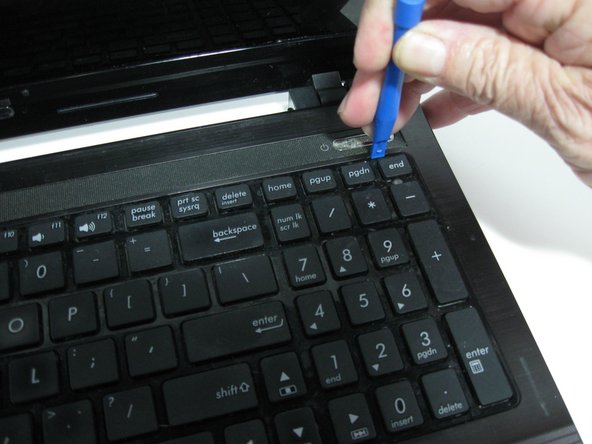
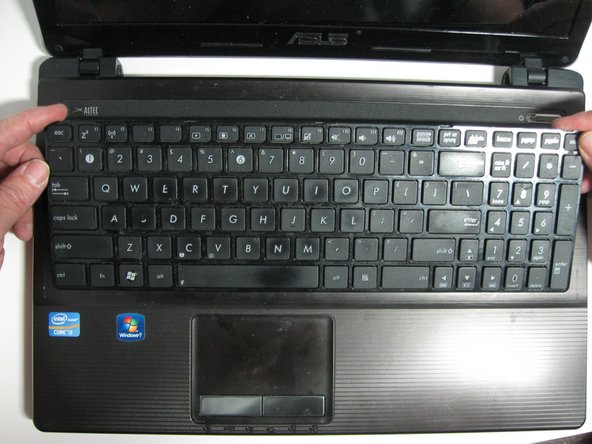
    • Push the two locking mechanisms at the top of the laptop outward and pull the battery away from the laptop.

    • This laptop is missing the battery.

  2. Asus K53E-BBR7 Motherboard Replacement: 手順 2、 2の画像 1 Asus K53E-BBR7 Motherboard Replacement: 手順 2、 2の画像 2
    • Remove the two black 7.0 mm Phillips #0 screws on the back panel using your Phillips #0 screwdriver.

    • Using your hands, slide the cover downwards and remove it from the laptop.

  3. Asus K53E-BBR7 Motherboard Replacement: 手順 3、 1の画像 1
    • Using your Phillips #0 screwdriver, remove the four 7.0 mm Phillips #0 screws that are securing your hard drive into place.

    • Gently lift the hard drive out of its case using your hands.

    • This device is missing the hard drive.

  4. Asus K53E-BBR7 Motherboard Replacement: 手順 4、 2の画像 1 Asus K53E-BBR7 Motherboard Replacement: 手順 4、 2の画像 2
    • Remove the following seventeen screws from the back panel of your laptop using your Phillips #0 screwdriver:

    • Sixteen black 7.0 mm Phillips #0 screws.

    • One black 4.0 mm Phillips #0 screw.

  5. Asus K53E-BBR7 Motherboard Replacement: 手順 5、 3の画像 1 Asus K53E-BBR7 Motherboard Replacement: 手順 5、 3の画像 2 Asus K53E-BBR7 Motherboard Replacement: 手順 5、 3の画像 3
    • Using the blue prying tool, separate the keyboard from the palm rest by inserting the prying tool into each of the five tabs at the top of the keyboard.

    • Slowly remove the keyboard by gently pulling the keyboard away from the palm rest.

    • A silver ribbon cable is connected to the keyboard and the palm rest of the laptop. Removing the keyboard quickly may tear the silver ribbon cable, causing harm to your device.

  6. Asus K53E-BBR7 Motherboard Replacement: 手順 6、 1の画像 1
    • Using your fingers, slowly remove the silver ribbon cable from the laptop by disconnecting it from its connector.

    • Be careful when removing the ribbon. Pulling carelessly can cause damage to both the ribbon and the laptop.

  7. Asus K53E-BBR7 Motherboard Replacement: 手順 7、 1の画像 1
    • Remove the six silver 6.0 mm Phillips #0 screws using your Phillips #0 screwdriver.

  8. Asus K53E-BBR7 Motherboard Replacement: 手順 8、 3の画像 1 Asus K53E-BBR7 Motherboard Replacement: 手順 8、 3の画像 2 Asus K53E-BBR7 Motherboard Replacement: 手順 8、 3の画像 3
    • Use your fingers to gently disconnect the following cables from your laptop:

    • Power button cable.

    • Touchpad cable.

  9. Asus K53E-BBR7 Motherboard Replacement: 手順 9、 1の画像 1
    • Remove the optical drive from the laptop by pulling it to the right until it has been fully detached from your laptop.

  10. Asus K53E-BBR7 Motherboard Replacement: 手順 10、 1の画像 1
    • Close the lid of the laptop and flip the laptop over to access the screws located beneath the optical drive.

    • Remove the three silver 6.0 mm Phillips #0 screws from beneath the optical drive using your Phillips #0 screwdriver.

  11. Asus K53E-BBR7 Motherboard Replacement: 手順 11、 2の画像 1 Asus K53E-BBR7 Motherboard Replacement: 手順 11、 2の画像 2
    • Slide the blue prying tool between the palm rest and the base of the laptop to separate them.

    • Carefully remove the palm rest from your device using your hands.

  12. Asus K53E-BBR7 Motherboard Replacement: 手順 12、 3の画像 1 Asus K53E-BBR7 Motherboard Replacement: 手順 12、 3の画像 2 Asus K53E-BBR7 Motherboard Replacement: 手順 12、 3の画像 3
    • Detach the gold video cable from the motherboard using your fingers.

    • Using your fingers, detach the speaker cable from the motherboard.

    • Slowly lift the blue tape from the motherboard and remove the i/o board cable.

  13. Asus K53E-BBR7 Motherboard Replacement: 手順 13、 2の画像 1 Asus K53E-BBR7 Motherboard Replacement: 手順 13、 2の画像 2
    • Remove nine 7.0 mm Phillips #0 screws from the motherboard using your Phillips #0 screwdriver.

  14. Asus K53E-BBR7 Motherboard Replacement: 手順 14、 3の画像 1 Asus K53E-BBR7 Motherboard Replacement: 手順 14、 3の画像 2 Asus K53E-BBR7 Motherboard Replacement: 手順 14、 3の画像 3
    • Use your hands to lift the motherboard from the laptop.

    • The fan and several ports will be attached to the motherboard when it has been detached from the laptop.

終わりに

To reassemble your device, follow these instructions in reverse order.

ある他の人がこのガイドを完成しました。

作成者

2人の作成者と共同で作成されました。

Matthew Molina

メンバー登録日: 10/26/16

253 ポイント

1ガイドが承認済み

チーム

UW Tacoma, Team 1-3, Rose Fall 2016 UW Tacoma, Team 1-3, Rose Fall 2016人のメンバー

UWT-ROSE-F16S1G3

4 メンバー

4のガイドは作成済み

0 件のコメント

コメントを追加

統計データ:

過去 24時間: 0

過去 7 日: 1

過去 30 日: 7

今までの合計 1,459