メインコンテンツにスキップ

Asus G75VW-BHI7N07 USB Port Replacement

必要な工具と部品

  1. Asus G75VW-BHI7N07 USB Port Replacement, USB Port: 手順 1、 3の画像 1 Asus G75VW-BHI7N07 USB Port Replacement, USB Port: 手順 1、 3の画像 2 Asus G75VW-BHI7N07 USB Port Replacement, USB Port: 手順 1、 3の画像 3
    • Remove the screws around the back cover using a Phillips #1 screwdriver.

    • Take the back cover off using the opening tool.
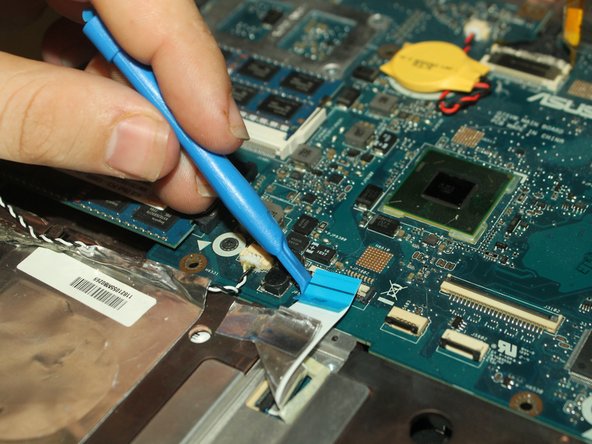
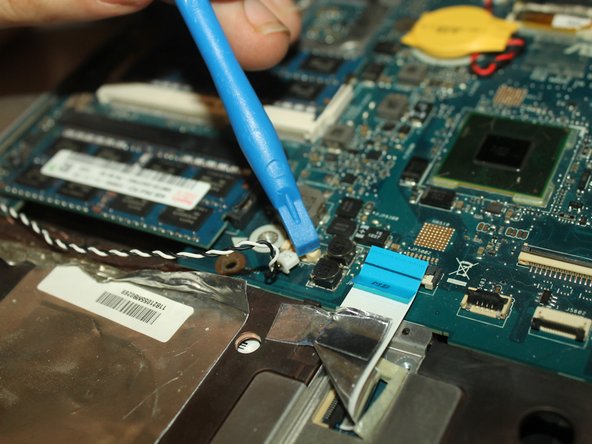
  2. Asus G75VW-BHI7N07 USB Port Replacement: 手順 2、 3の画像 1 Asus G75VW-BHI7N07 USB Port Replacement: 手順 2、 3の画像 2 Asus G75VW-BHI7N07 USB Port Replacement: 手順 2、 3の画像 3
    • Once you get rid of the back cover, spot all the screws marked ‘A’. There should be 10 in total.

    • Remove the battery using the slide release button.

    • This should expose 2 more ‘A’ marked screws.

    • Remove those using the same screwdriver.

  3. Asus G75VW-BHI7N07 USB Port Replacement: 手順 3、 2の画像 1 Asus G75VW-BHI7N07 USB Port Replacement: 手順 3、 2の画像 2
    • Using the opening tool, remove the disc drive cover.

    • Spot the 6 ‘B’ marked screws and remove them using the Phillips #1 screwdriver.

  4. Asus G75VW-BHI7N07 USB Port Replacement: 手順 4、 2の画像 1 Asus G75VW-BHI7N07 USB Port Replacement: 手順 4、 2の画像 2
    • Using the opening tool, pry open the keypad platform.

    • You will need to use your hands to get to the laptop’s internal systems by lifting the keypad platform.

  5. Asus G75VW-BHI7N07 USB Port Replacement: 手順 5、 3の画像 1 Asus G75VW-BHI7N07 USB Port Replacement: 手順 5、 3の画像 2 Asus G75VW-BHI7N07 USB Port Replacement: 手順 5、 3の画像 3
    • Now that the fans are exposed, use the opening tool to unhook them at the 4 connecting points.

    • Detach the blue-colored electrical component using the opening tool.

    • Detach the white and black colored electrical component using the opening tool.

  6. Asus G75VW-BHI7N07 USB Port Replacement: 手順 6、 1の画像 1
    • Using the Phillips #0 Screwdriver, remove the 5 screws around the edges of the motherboard.

    • Remove the 2 screws around the fan using the Phillips #0 Screwdriver which should be near the motherboard.

  7. Asus G75VW-BHI7N07 USB Port Replacement: 手順 7、 1の画像 1
終わりに

To reassemble your device, follow these instructions in reverse order.

ある他の人がこのガイドを完成しました。

作成者

6人の作成者と共同で作成されました。

Joy

メンバー登録日: 09/08/17

437 ポイント

4のガイドは作成済み

チーム

Western Carolina University, Team S1-G1, Virtue Fall 2017 Western Carolina University, Team S1-G1, Virtue Fall 2017人のメンバー

WCU-VIRTUE-F17S1G1

3 メンバー

5のガイドは作成済み

0 件のコメント

コメントを追加

統計データ:

過去 24時間: 0

過去 7 日: 1

過去 30 日: 6

今までの合計 593