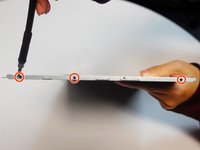
メインコンテンツにスキップ

Asus G750JW-BBI7N05 Display Replacement

必要な工具と部品

  1. Asus G750JW-BBI7N05 Display Replacement, Battery: 手順 1、 1の画像 1
    • Power off and unplug your laptop, then turn it over.

  2. Asus G750JW-BBI7N05 Display Replacement: 手順 2、 1の画像 1
    • Slide the battery release latch all the way to the right. This will cause the battery to "pop" out slightly.

  3. Asus G750JW-BBI7N05 Display Replacement: 手順 3、 1の画像 1
    • Remove the battery from its compartment.

  4. Asus G750JW-BBI7N05 Display Replacement, Display: 手順 4、 1の画像 1
    • Place your laptop in the upright and open position.

  5. Asus G750JW-BBI7N05 Display Replacement: 手順 5、 1の画像 1
    • Remove the four 4mm Phillips #00 screws from the four corners of the display.

  6. Asus G750JW-BBI7N05 Display Replacement: 手順 6、 1の画像 1
    • Gently pry the front bezel away from the screen and back bezel with an opening tool.

    • The bezel is the outside plastic frame surrounding the screen.

    • You will feel and hear the bezel "unsnap" as you move the pry tool around the entire display.

  7. Asus G750JW-BBI7N05 Display Replacement: 手順 7、 1の画像 1
    • As you work, be mindful of other components that surround the screen, like the WiFi antenna, Bluetooth, webcam, and microphone.

    • Remove the six 6mm Phillips #00 screws across the top of the screen and the four 6mm Phillips #00 screws at the bottom of the screen.

  8. Asus G750JW-BBI7N05 Display Replacement: 手順 8、 1の画像 1
    • With the screws removed, the metal bracket surrounding the screen will feel loose.

    • Remove the top bracket by pulling upwards on the tabs.

  9. Asus G750JW-BBI7N05 Display Replacement: 手順 9、 1の画像 1
    • Remove the four 3mm Phillips #00 screws from the sides of the screen.

  10. Asus G750JW-BBI7N05 Display Replacement: 手順 10、 1の画像 1
    • With the screen free, tilt it gently forward to reveal the display data cable.

    • Unplug the display data cable by peeling off the clear sticker covering its connector, then pulling this connector out of its socket.

    • Make sure to only peel off the sticker that covers the display data cable connector.

  11. Asus G750JW-BBI7N05 Display Replacement: 手順 11、 2の画像 1 Asus G750JW-BBI7N05 Display Replacement: 手順 11、 2の画像 2
    • Remove the two side brackets from the sides of the screen by removing the six 3mm Phillips #00 screws attaching it. There are three screws on either side of the screen.

終わりに

To reassemble your device, follow these instructions in reverse order.

5 の人々がこのガイドを完成させました。

作成者

2人の作成者と共同で作成されました。

Sandy Jewell

メンバー登録日: 10/05/17

342 ポイント

2のガイドは作成済み

チーム

Portland State University, Team S1-G1, Romaine Spring 2018 Portland State University, Team S1-G1, Romaine Spring 2018人のメンバー

PSUN-ROMAINE-S18S1G1

7 メンバー

4のガイドは作成済み

0 件のコメント

コメントを追加

統計データ:

過去 24時間: 0

過去 7 日: 1

過去 30 日: 3

今までの合計 2,160