メインコンテンツにスキップ
リペアコミュニティに参加 - アカウントの作成

Asus Eee PC 900 RAM Replacement

必要な工具と部品

  1. Asus Eee PC 900 RAM Replacement, Battery: 手順 1、 3の画像 1 Asus Eee PC 900 RAM Replacement, Battery: 手順 1、 3の画像 2 Asus Eee PC 900 RAM Replacement, Battery: 手順 1、 3の画像 3
    • Slide the battery's locking tabs from the locked position to unlocked positions.

    • The right tab is unlocked when a red dot is showing.

    • The left tab will have to be held in the unlocked position in order to release the battery.

    FixBotに聞いてみる

    コメントを追加

  2. Asus Eee PC 900 RAM Replacement: 手順 2、 1の画像 1
    • Slide the battery out while holding the left locking tab in the unlocked position.

    FixBotに聞いてみる

    コメントを追加

  3. Asus Eee PC 900 RAM Replacement, RAM: 手順 3、 2の画像 1 Asus Eee PC 900 RAM Replacement, RAM: 手順 3、 2の画像 2
    この手順で使用する道具:
    Tweezers
    $4.99
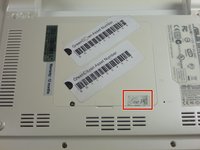
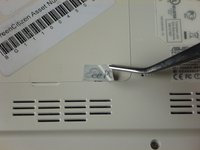
    • Remove the sticker from the RAM compartment using a pair of tweezers.

    FixBotに聞いてみる

    コメントを追加

  4. Asus Eee PC 900 RAM Replacement: 手順 4、 2の画像 1 Asus Eee PC 900 RAM Replacement: 手順 4、 2の画像 2
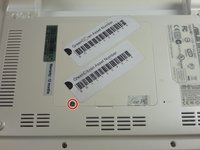
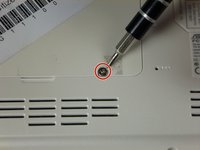
    • Remove the two 4.8 mm screws using a Phillips #0 screwdriver.

    FixBotに聞いてみる

    コメントを追加

  5. Asus Eee PC 900 RAM Replacement: 手順 5、 1の画像 1
    • Open up the cover from the bottom by carefully prying it open with a plastic opening tool.

    • Be gentle when prying open the cover in order to not damage it.

    FixBotに聞いてみる

    コメントを追加

  6. Asus Eee PC 900 RAM Replacement: 手順 6、 1の画像 1
    • Remove the back cover by pulling up on the side that had the screws.

    FixBotに聞いてみる

    コメントを追加

  7. Asus Eee PC 900 RAM Replacement: 手順 7、 2の画像 1 Asus Eee PC 900 RAM Replacement: 手順 7、 2の画像 2
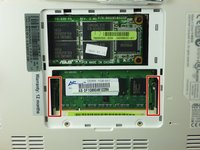
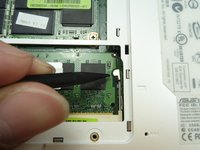
    • Use a spudger to push the top of the pin on the right towards the right (so it isn't holding the RAM chip).

    • Do the same for the left pin. Push the top of the pin towards the left.

    • The RAM should pop up.

    FixBotに聞いてみる

    コメントを追加

  8. Asus Eee PC 900 RAM Replacement: 手順 8、 1の画像 1
    • Remove the RAM chip by grabbing the top of the chip and pulling it upwards.

    • Be gentle when removing the RAM because it is a very delicate part and you do not want to break any of the pins in the computer.

    FixBotに聞いてみる

    コメントを追加

終わりに

To reassemble your device, follow these instructions in reverse order.

キャンセル: このガイドを終了できませんでした。

5 の人々がこのガイドを完成させました。

作成者

10人の作成者と共同で作成されました。

Brian Carreon

メンバー登録日: 01/25/12

300 ポイント

2のガイドは作成済み

チーム

Cal Poly, Team 3-27, Amido Winter 2012 Cal Poly, Team 3-27, Amido Winter 2012人のメンバー

CPSU-AMIDO-W12S3G27

4 メンバー

16のガイドは作成済み

0件のガイドコメント

コメントを追加

統計データ:

過去 24時間: 1

過去 7 日: 10

過去 30 日: 40

今までの合計 9,795