メインコンテンツにスキップ
リペアコミュニティに参加 - アカウントの作成

Asus Eee PC 900 LCD Display Screen Replacement

必要な工具と部品

  1. Asus Eee PC 900 LCD Display Screen Replacement, Battery: 手順 1、 3の画像 1 Asus Eee PC 900 LCD Display Screen Replacement, Battery: 手順 1、 3の画像 2 Asus Eee PC 900 LCD Display Screen Replacement, Battery: 手順 1、 3の画像 3
    • Slide the battery's locking tabs from the locked position to unlocked positions.

    • The right tab is unlocked when a red dot is showing.

    • The left tab will have to be held in the unlocked position in order to release the battery.

    FixBotに聞いてみる
  2. Asus Eee PC 900 LCD Display Screen Replacement: 手順 2、 1の画像 1
    • Slide the battery out while holding the left locking tab in the unlocked position.

    FixBotに聞いてみる
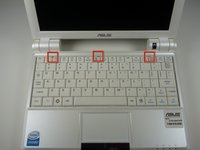
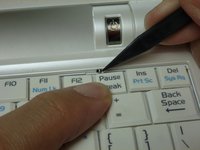
  3. Asus Eee PC 900 LCD Display Screen Replacement, Keyboard: 手順 3、 2の画像 1 Asus Eee PC 900 LCD Display Screen Replacement, Keyboard: 手順 3、 2の画像 2
    • Caution Follow this step to detach the upper portion of the keyboard, but do not remove it from the laptop. Damage to the keyboard's ribbon cable may result if improperly executed.

    • Identify the three metal tabs holding down the laptop's keyboard.

    • Using a spudger, depress each metal tab to remove the keyboard.

    • The upper part of the keyboard should "pop up" from its holder.

    FixBotに聞いてみる
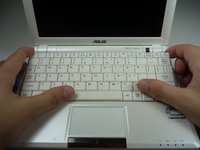
  4. Asus Eee PC 900 LCD Display Screen Replacement: 手順 4、 2の画像 1 Asus Eee PC 900 LCD Display Screen Replacement: 手順 4、 2の画像 2
    • Clips hold the bottom portion of the keyboard to the laptop. Gently lift the upper portion of the keyboard and then move the entire keyboard towards the computer's screen until the ribbon cable is visible.

    FixBotに聞いてみる
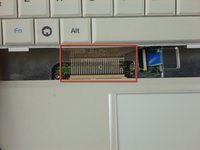
  5. Asus Eee PC 900 LCD Display Screen Replacement: 手順 5、 1の画像 1
    • Using a spudger, gently push the two black pins holding the ribbon cable towards the computer's screen.

    • Slide the keyboard's ribbon cable from the connector.

    FixBotに聞いてみる
  6. Asus Eee PC 900 LCD Display Screen Replacement: 手順 6、 1の画像 1
    • Remove the keyboard by lifting upwards.

    FixBotに聞いてみる
  7. Asus Eee PC 900 LCD Display Screen Replacement, Top Cover: 手順 7、 2の画像 1 Asus Eee PC 900 LCD Display Screen Replacement, Top Cover: 手順 7、 2の画像 2
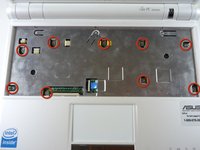
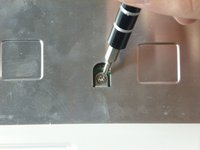
    • Remove the nine 4.76mm Phillips #0 screws on the top cover of the laptop.

    FixBotに聞いてみる
  8. Asus Eee PC 900 LCD Display Screen Replacement: 手順 8、 2の画像 1 Asus Eee PC 900 LCD Display Screen Replacement: 手順 8、 2の画像 2
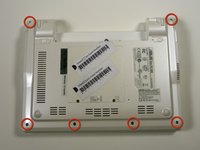
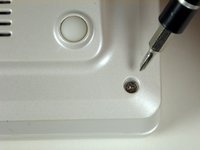
    • Remove the six 4.76 mm Phillips #0 screws on the back of the laptop.

    FixBotに聞いてみる
  9. Asus Eee PC 900 LCD Display Screen Replacement: 手順 9、 3の画像 1 Asus Eee PC 900 LCD Display Screen Replacement: 手順 9、 3の画像 2 Asus Eee PC 900 LCD Display Screen Replacement: 手順 9、 3の画像 3
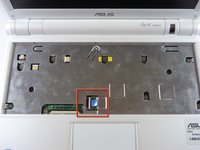
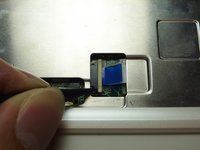
    • Flip the laptop back over and identify the touchpad ribbon.

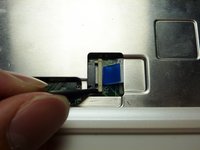
    • Unlock the tan locking pin from the black connector by pushing the pin to the right with a spudger.

    FixBotに聞いてみる
  10. Asus Eee PC 900 LCD Display Screen Replacement: 手順 10、 1の画像 1
    • Slide out the touchpad's ribbon connector by pulling the blue tab to the right.

    FixBotに聞いてみる
  11. Asus Eee PC 900 LCD Display Screen Replacement: 手順 11、 1の画像 1
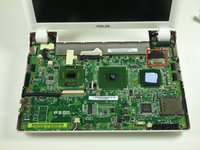
    • Use a plastic opening tool to gently detach the top cover from the laptop's base. See the next step for removing the cover.

    FixBotに聞いてみる
  12. Asus Eee PC 900 LCD Display Screen Replacement: 手順 12、 3の画像 1 Asus Eee PC 900 LCD Display Screen Replacement: 手順 12、 3の画像 2 Asus Eee PC 900 LCD Display Screen Replacement: 手順 12、 3の画像 3
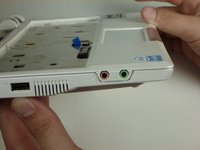
    • Caution: To clear the audio and microphone, lift the right half and move the cover to the left (as shown in the second picture) to prevent cover damage.

    • Remove the laptop cover.

    FixBotに聞いてみる
  13. Asus Eee PC 900 LCD Display Screen Replacement, LCD Display Screen: 手順 13、 3の画像 1 Asus Eee PC 900 LCD Display Screen Replacement, LCD Display Screen: 手順 13、 3の画像 2 Asus Eee PC 900 LCD Display Screen Replacement, LCD Display Screen: 手順 13、 3の画像 3
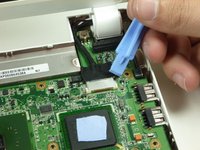
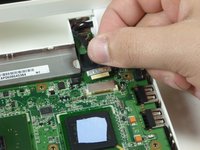
    • Remove the large black wire using a plastic opening tool.

    FixBotに聞いてみる
  14. Asus Eee PC 900 LCD Display Screen Replacement: 手順 14、 3の画像 1 Asus Eee PC 900 LCD Display Screen Replacement: 手順 14、 3の画像 2 Asus Eee PC 900 LCD Display Screen Replacement: 手順 14、 3の画像 3
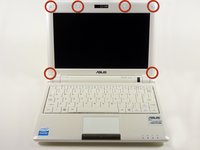
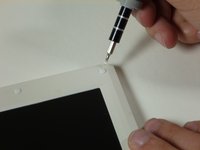
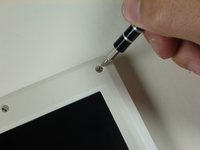
    • Gently pry off the six rubber covers around the outside of the screen using a two mm flat head screwdriver.

    • A flat head screwdriver is preferable over a spudger as the spudger's head is not thin enough to to slip under the rubber covers.

    • Remove the six 4.76 mm Phillips #0 screws underneath each cover.

    FixBotに聞いてみる
  15. Asus Eee PC 900 LCD Display Screen Replacement: 手順 15、 1の画像 1
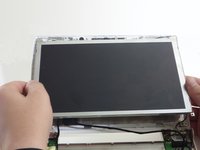
    • Using a plastic opening tool, carefully detach the casing around the screen cover.

    • Remove the screen cover.

    FixBotに聞いてみる
  16. Asus Eee PC 900 LCD Display Screen Replacement: 手順 16、 3の画像 1 Asus Eee PC 900 LCD Display Screen Replacement: 手順 16、 3の画像 2 Asus Eee PC 900 LCD Display Screen Replacement: 手順 16、 3の画像 3
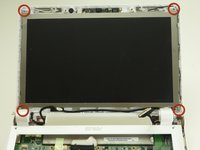
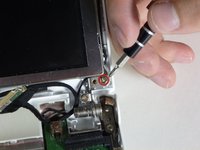
    • Remove the four 4.76mm Phillips #0 screws located on the corners of the screen.

    • Lift out the display screen.

    FixBotに聞いてみる
終わりに

To reassemble your device, follow these instructions in reverse order.

16 の人々がこのガイドを完成させました。

作成者

10人の作成者と共同で作成されました。

Michael Barker

メンバー登録日: 01/25/12

299 ポイント

2のガイドは作成済み

チーム

Cal Poly, Team 3-27, Amido Winter 2012 Cal Poly, Team 3-27, Amido Winter 2012人のメンバー

CPSU-AMIDO-W12S3G27

4 メンバー

16のガイドは作成済み

2件のガイドコメント

Another PERFECT iFixIt guide!

Had to replace the screen in one of these little beauties, and this walk-through worked like all iFixIt tutorials: Flawlessly.

Kudos Mr. Barker!

WildBill - 返信 共有
Perfect guide, thank you.

Roberto Zoni - 返信 共有
コメントを追加

統計データ:

過去 24時間: 2

過去 7 日: 7

過去 30 日: 95

今までの合計 15,760