メインコンテンツにスキップ

Asus Eee PC 1000HA Screen Replacement

必要な工具と部品

  1. Asus Eee PC 1000HA Screen Replacement, Screen: 手順 1、 2の画像 1 Asus Eee PC 1000HA Screen Replacement, Screen: 手順 1、 2の画像 2
    • Remove the battery before working on your device. See this LINK for a step-by-step guide.

    • Use the metal tweezers to remove all of the rubber pads from the face of the lap top.

    • Removing the rubber pads will reveal 6 screws.

  2. Asus Eee PC 1000HA Screen Replacement: 手順 2、 1の画像 1
    • Use a #00 Phillips Head screw driver to remove the 4.8mm screws.

    • There will be 6 screws total.

  3. Asus Eee PC 1000HA Screen Replacement: 手順 3、 2の画像 1 Asus Eee PC 1000HA Screen Replacement: 手順 3、 2の画像 2
    • Use the metal spudger to pry off the outside frame of the screen.

  4. Asus Eee PC 1000HA Screen Replacement: 手順 4、 1の画像 1
    • Use the #00 Phillips Head screw driver to remove the 5.44mm screws.

    • There are 6 screws total.

  5. Asus Eee PC 1000HA Screen Replacement: 手順 5、 3の画像 1 Asus Eee PC 1000HA Screen Replacement: 手順 5、 3の画像 2 Asus Eee PC 1000HA Screen Replacement: 手順 5、 3の画像 3
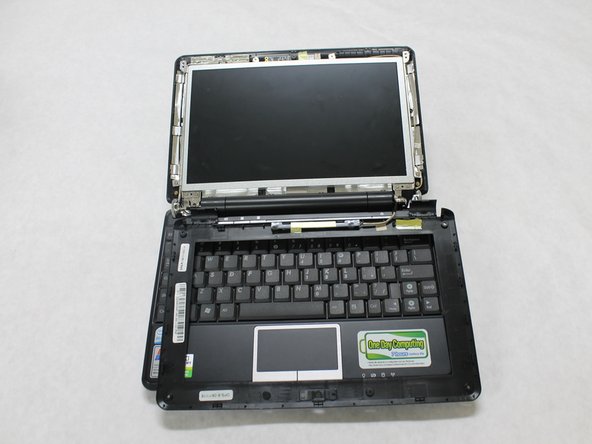
    • Use the metal spudger to gently remove the screen from the laptop.

  6. Asus Eee PC 1000HA Screen Replacement: 手順 6、 3の画像 1 Asus Eee PC 1000HA Screen Replacement: 手順 6、 3の画像 2 Asus Eee PC 1000HA Screen Replacement: 手順 6、 3の画像 3
    • Gently pull the tab that is connecting the laptop to the screen, to fully disconnect the screen from the laptop.

終わりに

To reassemble your device, follow these instructions in reverse order.

ある他の人がこのガイドを完成しました。

作成者

1人の作成者と共同作成されました。

Ashlee Stickle

メンバー登録日: 10/13/15

675 ポイント

5のガイドは作成済み

チーム

Sam Houston State, Team 1-1, Blackburne Fall 2015 Sam Houston State, Team 1-1, Blackburne Fall 2015人のメンバー

SHSU-BLACKBURNE-F15S1G1

3 メンバー

10のガイドは作成済み

コメント 1 件

Merci beaucoup ! Great tutorial.

Joffrey Abeilard - 返信

コメントを追加

統計データ:

過去 24時間: 0

過去 7 日: 3

過去 30 日: 8

今までの合計 1,164