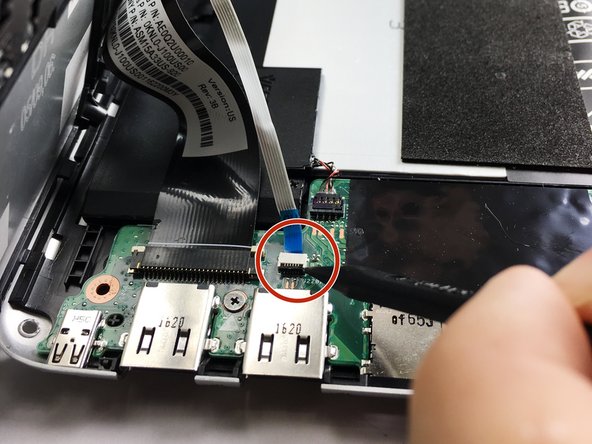
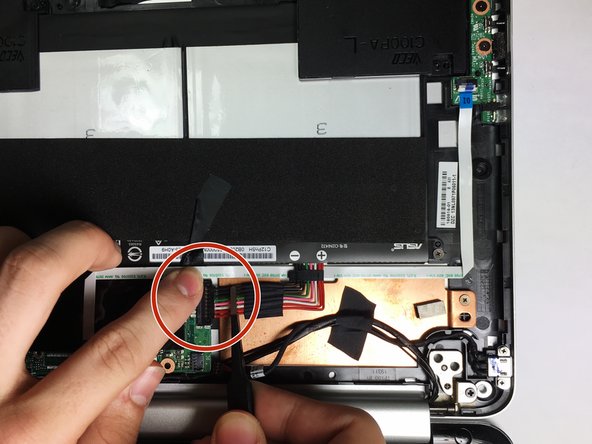
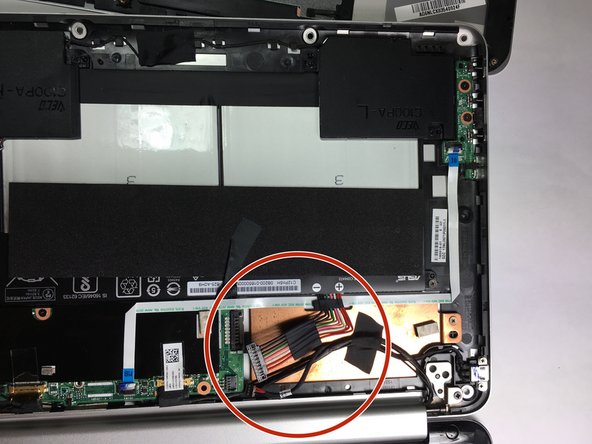
メインコンテンツにスキップ

Asus Chromebook Flip C100P Charging Port Replacement

必要な工具と部品

  1. Asus Chromebook Flip C100P Charging Port Replacement, Charging Port: 手順 1、 1の画像 1
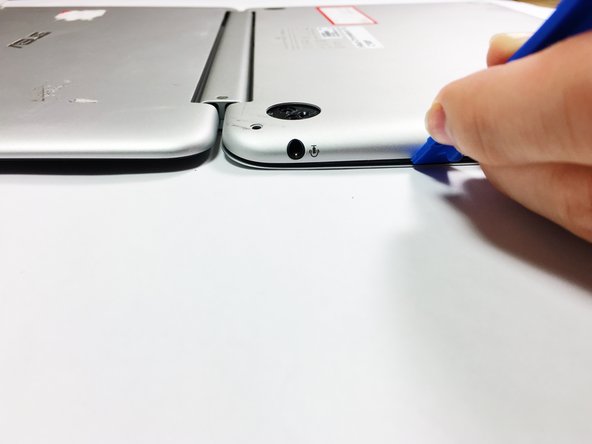
    • Remove three of the rubber feet on the bottom cover with a plastic or metal spudger.

  2. Asus Chromebook Flip C100P Charging Port Replacement: 手順 2、 1の画像 1
    • Remove the five screws from beneath the rubber feet using a Phillips #0 screwdriver.

    • The first 1.9mm screw is located under the front right foot, the second 1.9mm screw and third 2.3mm screw are located under the rear right foot, and the fourth and fifth 2.3mm screws are located under the rear left foot.

  3. Asus Chromebook Flip C100P Charging Port Replacement: 手順 3、 1の画像 1
    • Remove the nine bottom cover screws using a T5 screwdriver.

    • Set apart the 6mm screw in the rear middle of the bottom cover from the the other eight 3mm screws, as it is longer than them.

  4. Asus Chromebook Flip C100P Charging Port Replacement: 手順 4、 3の画像 1 Asus Chromebook Flip C100P Charging Port Replacement: 手順 4、 3の画像 2 Asus Chromebook Flip C100P Charging Port Replacement: 手順 4、 3の画像 3
    • Pry the palm rest assembly apart from the bottom cover using a spudger. This step may require extra power.

    • Once the palm rest has been separated from the bottom cover, pull it away from the screen, rather than away from yourself.

  5. Asus Chromebook Flip C100P Charging Port Replacement: 手順 5、 3の画像 1 Asus Chromebook Flip C100P Charging Port Replacement: 手順 5、 3の画像 2 Asus Chromebook Flip C100P Charging Port Replacement: 手順 5、 3の画像 3
    • Disconnect the touchpad cable and the keyboard cable on the palm rest assembly from the motherboard using the pointed end of a plastic spudger.

  6. Asus Chromebook Flip C100P Charging Port Replacement: 手順 6、 3の画像 1 Asus Chromebook Flip C100P Charging Port Replacement: 手順 6、 3の画像 2 Asus Chromebook Flip C100P Charging Port Replacement: 手順 6、 3の画像 3
    • Disconnect the DC jack cable and the battery cable from the motherboard using tweezers, the pointed end of a plastic spudger, or by simply pulling the cables apart from the motherboard with your fingers.

  7. Asus Chromebook Flip C100P Charging Port Replacement: 手順 7、 1の画像 1
    • Remove the two 2.7mm screws using the Phillips #0 screwdriver.

  8. Asus Chromebook Flip C100P Charging Port Replacement: 手順 8、 1の画像 1
    • Using a pair of tweezers or your fingers, lift up the charging cable and remove the charging port.

終わりに

To reassemble your device, follow these instructions in reverse order.

10 の人々がこのガイドを完成させました。

作成者

3人の作成者と共同で作成されました。

Sid Yadav

メンバー登録日: 03/19/18

424 ポイント

1ガイドが承認済み

チーム

Baylor, Team S5-G2, Williams Spring 2018 Baylor, Team S5-G2, Williams Spring 2018人のメンバー

BU-WILLIAMS-S18S5G2

3 メンバー

8のガイドは作成済み

コメント 1 件

I just did this but now when I turn it on there is no picture on the computer. I had to change the charging port because my cats knocked over a water glass. The charging port was successful because the light was on. Amy troubleshooting?

Alexandra Miller - 返信

コメントを追加

統計データ:

過去 24時間: 0

過去 7 日: 11

過去 30 日: 34

今までの合計 5,687