メインコンテンツにスキップ

Asus A53U-ES21 Motherboard Replacement

必要な工具と部品

  1. Asus A53U-ES21 Motherboard Replacement, Battery: 手順 1、 2の画像 1 Asus A53U-ES21 Motherboard Replacement, Battery: 手順 1、 2の画像 2
    • Make sure the laptop is off.

    • Flip the laptop upside down so that the battery is facing you.

  2. Asus A53U-ES21 Motherboard Replacement: 手順 2、 2の画像 1 Asus A53U-ES21 Motherboard Replacement: 手順 2、 2の画像 2
    • Move the two sliders towards the outer edge of the laptop.

    • Pull the battery out with your left hand while holding the right slider.

  3. Asus A53U-ES21 Motherboard Replacement, Optical Drive: 手順 3、 3の画像 1 Asus A53U-ES21 Motherboard Replacement, Optical Drive: 手順 3、 3の画像 2 Asus A53U-ES21 Motherboard Replacement, Optical Drive: 手順 3、 3の画像 3
    • Remove the 5mm screw using a Phillips #1 screwdriver.

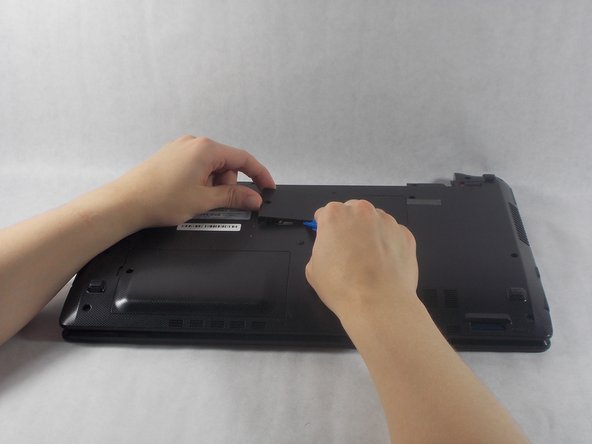
    • Use the iFixit opening tools to remove the RAM panel.

  4. Asus A53U-ES21 Motherboard Replacement: 手順 4、 3の画像 1 Asus A53U-ES21 Motherboard Replacement: 手順 4、 3の画像 2 Asus A53U-ES21 Motherboard Replacement: 手順 4、 3の画像 3
    • Remove the 7mm screw using a Phillips #1 screwdriver.

    • Pull the optical drive out from the side of the laptop.

  5. Asus A53U-ES21 Motherboard Replacement, Keyboard: 手順 5、 3の画像 1 Asus A53U-ES21 Motherboard Replacement, Keyboard: 手順 5、 3の画像 2 Asus A53U-ES21 Motherboard Replacement, Keyboard: 手順 5、 3の画像 3
    • Remove the RAM cover from the bottom of the keyboard.

    • Remove the 5mm screw keeping the panel in place using a Phillips #1 screwdriver.

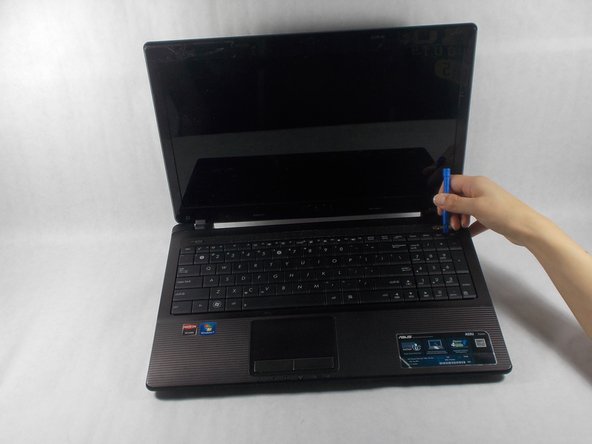
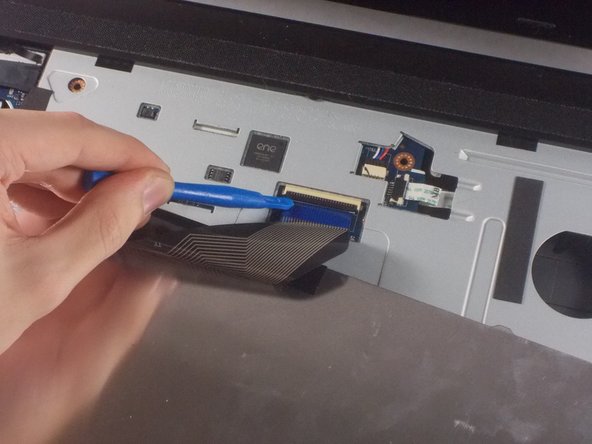
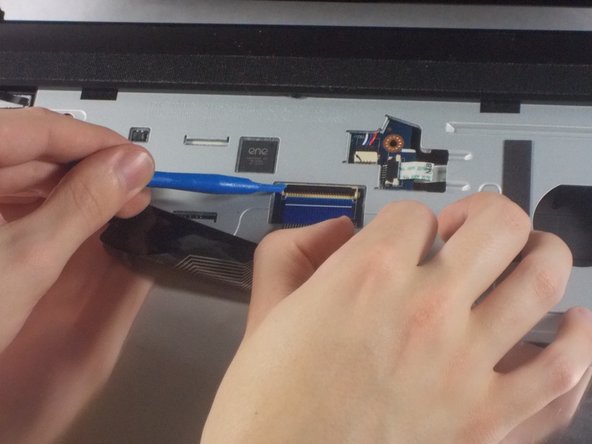
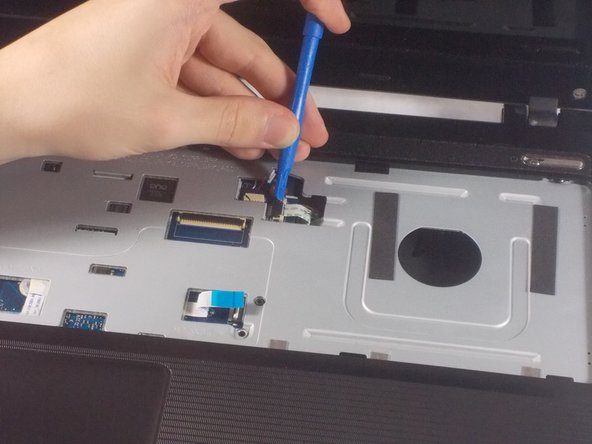
    • Work the pry tool along the edge to finish removal.

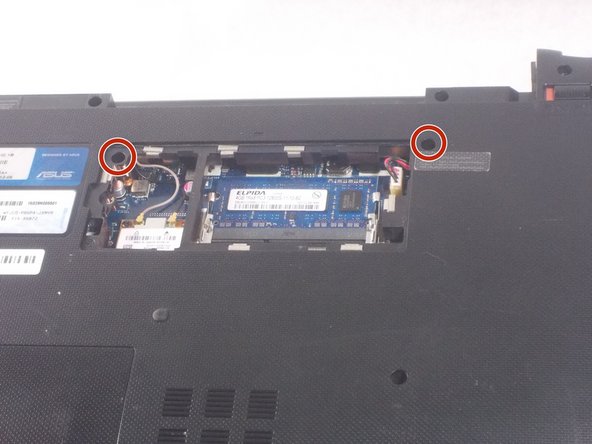
    • Unscrew the two 7mm screws marked with an engraved "K" using a #1 Phillips screwdriver.

  6. Asus A53U-ES21 Motherboard Replacement: 手順 6、 3の画像 1 Asus A53U-ES21 Motherboard Replacement: 手順 6、 3の画像 2 Asus A53U-ES21 Motherboard Replacement: 手順 6、 3の画像 3
    • Orient the computer so the keyboard is facing toward you with the screen at the top.

    • Find the three buttons to depress at top of the keyboard, set in the crack between the casing and the keyboard, highlighted here in red.

    • Use the pry tool to depress the buttons. The keyboard should pop out.

  7. Asus A53U-ES21 Motherboard Replacement: 手順 7、 3の画像 1 Asus A53U-ES21 Motherboard Replacement: 手順 7、 3の画像 2 Asus A53U-ES21 Motherboard Replacement: 手順 7、 3の画像 3
    • Fold the keyboard out towards you. It should still be connected by a ribbon to the rest of the computer.

    • Gently use the opening tool to lift the black piece holding the ribbon down and remove the ribbon.

    • The black piece should cover the white line on the ribbon when it is replaced.

  8. Asus A53U-ES21 Motherboard Replacement, Motherboard: 手順 8、 1の画像 1
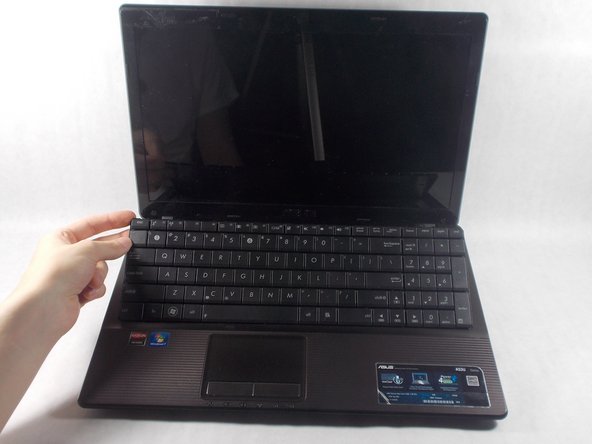
    • Close the laptop and place it upside down.

    • Remove the twelve 7mm screws using a Phillips #1 screwdriver.

  9. Asus A53U-ES21 Motherboard Replacement: 手順 9、 1の画像 1
    • Remove the two 2mm screws using a Phillips #1 screwdriver.

  10. Asus A53U-ES21 Motherboard Replacement: 手順 10、 2の画像 1 Asus A53U-ES21 Motherboard Replacement: 手順 10、 2の画像 2
    • Pull the connectors away from the wireless card using the plastic opening tools.

    • Pull the white connector from its socket in the RAM panel.

  11. Asus A53U-ES21 Motherboard Replacement: 手順 11、 1の画像 1
    • Flip the laptop over again, open it, and unscrew the three 7mm screws using a Phillips #1 screwdriver.

  12. Asus A53U-ES21 Motherboard Replacement: 手順 12、 3の画像 1 Asus A53U-ES21 Motherboard Replacement: 手順 12、 3の画像 2 Asus A53U-ES21 Motherboard Replacement: 手順 12、 3の画像 3
    • Gently pull the tan flap off of the cable using the plastic opening tool.

    • Push the tan piece towards the cable and release it using the plastic opening tool.

    • Pull the black flap off of its connector.

  13. Asus A53U-ES21 Motherboard Replacement: 手順 13、 2の画像 1 Asus A53U-ES21 Motherboard Replacement: 手順 13、 2の画像 2
    • Separate the front plate of the laptop from the back using the plastic opening tool.

  14. Asus A53U-ES21 Motherboard Replacement: 手順 14、 3の画像 1 Asus A53U-ES21 Motherboard Replacement: 手順 14、 3の画像 2 Asus A53U-ES21 Motherboard Replacement: 手順 14、 3の画像 3
    • Remove the single 7mm screw from the motherboard using a Phillips #1 screwdriver.

    • Pull to two shown cables from their sockets using the plastic opening tools.

    • Gently remove the motherboard from the laptop.

終わりに

To reassemble your device, follow these instructions in reverse order.

2 の人々がこのガイドを完成させました。

作成者

3人の作成者と共同で作成されました。

Chase Poirier

メンバー登録日: 10/23/18

544 ポイント

5のガイドは作成済み

チーム

UMass Dartmouth, Team S1-G3, Simcock Fall 2018 UMass Dartmouth, Team S1-G3, Simcock Fall 2018人のメンバー

UMASSD-SIMCOCK-F18S1G3

3 メンバー

7のガイドは作成済み

0 件のコメント

コメントを追加

統計データ:

過去 24時間: 1

過去 7 日: 6

過去 30 日: 14

今までの合計 851