メインコンテンツにスキップ

Asus A52F XE2 Lower Case Replacement

必要な工具と部品

  1. Asus A52F XE2 Lower Case Replacement, Battery: 手順 1、 2の画像 1 Asus A52F XE2 Lower Case Replacement, Battery: 手順 1、 2の画像 2
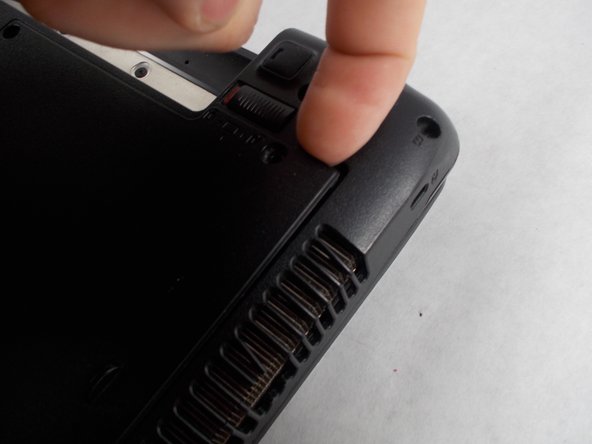
    • Place the laptop face down with the battery facing away from you.

    • Locate the two buttons next to the battery.

    • Slide the right slider to the unlocked (red) position.

  2. Asus A52F XE2 Lower Case Replacement: 手順 2、 2の画像 1 Asus A52F XE2 Lower Case Replacement: 手順 2、 2の画像 2
    • Hold the left button to the left.

    • Slide the battery with your other hand away from you and it should disconnect.

  3. Asus A52F XE2 Lower Case Replacement, Lower Case: 手順 3、 3の画像 1 Asus A52F XE2 Lower Case Replacement, Lower Case: 手順 3、 3の画像 2 Asus A52F XE2 Lower Case Replacement, Lower Case: 手順 3、 3の画像 3
    • Remove the five Phillips # 0 screws from the back panel.

    • Using your finger or a plastic spudger start to carefully pry up the back planel.

  4. Asus A52F XE2 Lower Case Replacement: 手順 4、 2の画像 1 Asus A52F XE2 Lower Case Replacement: 手順 4、 2の画像 2
    • Slide the back panel away and remove the panel.

終わりに

To reassemble your device, follow these instructions in reverse order.

ある他の人がこのガイドを完成しました。

作成者

4人の作成者と共同で作成されました。

Michael Benson

メンバー登録日: 03/08/17

149 ポイント

1ガイドが承認済み

チーム

UMass Dartmouth, Team S5-G1, Botvin Spring 2017 UMass Dartmouth, Team S5-G1, Botvin Spring 2017人のメンバー

UMASSD-BOTVIN-S17S5G1

4 メンバー

7のガイドは作成済み

0 件のコメント

コメントを追加

統計データ:

過去 24時間: 0

過去 7 日: 4

過去 30 日: 11

今までの合計 403