はじめに
Use this guide to replace the flash memory in your Archos 101 G9 tablet.
The Archos 101 G9 tablet flash memory, also known as flash storage, is a storage unit for the tablet. Issues with a full memory can lead to a non-functioning device. Before replacing the flash memory, try to perform a factory reset on your device to see if that can possibly help; follow this guide for instructions. If that does not work and your flash memory is still the main problem, then use this guide to replace your flash memory. Before starting, make sure to completely power off your tablet and disconnect the tablet from any external power source.
必要な工具と部品
-
-
Place an iFixit opening tool in the crease where the display assembly and back of the device meet.
-
Slide the tool firmly through the crease on one side of the device, twisting as you go to create separation.
-
When you reach the corner, carefully pry the two halves of the device apart.
-
Repeat for the remaining three sides and corners.
-
-
-
-
Remove the 2 mm screw that holds the motherboard in place using a Phillips #0 screwdriver.
-
-
-
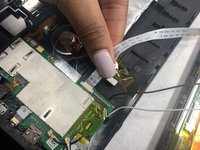
Flip the motherboard around to the backside and pry off the silver covering using a nylon spudger.
-


To reassemble your device, follow these instructions in reverse order.

チーム

UMass Dartmouth, Team 4-1, Gulbrandsen Fall 2021 UMass Dartmouth, Team 4-1, Gulbrandsen Fall 2021人のメンバー
UMASSD-GULBRANDSEN-F21S4G1
3 メンバー
6のガイドは作成済み