この修理ガイドは変更されています。最新の未承認バージョンに切り替えます。
はじめに
The hard drive is critical to the life of the device. The hard drive is a key piece of the time capsule, so awareness and moving slow through the steps is beneficial to ensuring no problems when the repair is made. This guide is do-able by anyone, but will not consume much time. If the user wants to add more storage then a replacement of the hard drive is a popular choice.
必要な工具と部品
-
-
Turn the device upside down to reveal the rubber section of the back plate. Using a metal spudger, carefully wedge the blunt tip into the space between the aluminum back plate and the rubber, separating the two pieces.
-
Depending on air temperature and how set the adhesive is, you may need to spend some time warming the back plate with a hot plate (on low) or hair dryer.
-
-
-
-
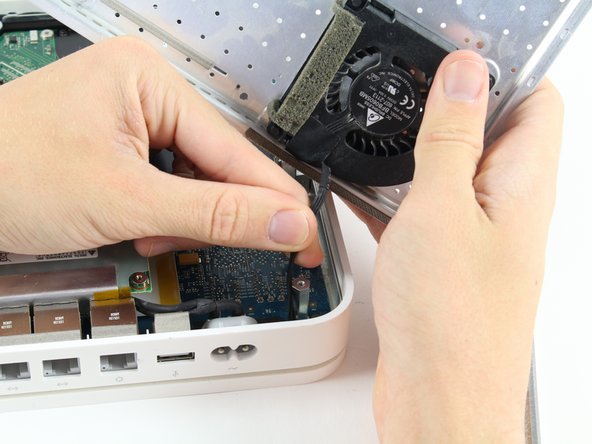
Peel off the adhesive backed foam from the top of the drive.
-
Lift the drive straight up and out of the device.
-


To reassemble your device, follow these instructions in reverse order.
To reassemble your device, follow these instructions in reverse order.
33 の人々がこのガイドを完成させました。
チーム

Cal Poly, Team 4-2, Livingston Fall 2016 Cal Poly, Team 4-2, Livingston Fall 2016人のメンバー
CPSU-LIVINGSTON-F16S4G2
4 メンバー
17のガイドは作成済み
10 件のコメント
This answer: What's the biggest HDD that will fit on my Time Capsule? suggests that you can use pretty much any available drive. If it could take a 4TB in 2014 (one of the answers), I don’t think there would be any limit practically speaking.
Great guide. One note. My unit was quite old and the rubber mat was brittle. Even with a heat gun and spudger I still tore it in several places. This might be avoided by heating up a cloth in a microwave first and applying it to the rubber before beginning to pull it off. Just a thought.
I’m not seeing a guide for the Apple Time Capsule 2TB MC344LLA / A1355 so I’ll have to see which one is closer to my model when it arrives,
But in the meantime has anyone been able to upgrade the hard drive past 2TB without any issues?
Is a Firmware update needed to do so?
David Bell - 返信
I installed a 3 TB about 7 years ago in mine. i’m here now because I can’t get it to power on.
Nubs34 -