メインコンテンツにスキップ

このバージョンは誤った内容を含んでいる可能性があります。最新の承認済みスナップショットに切り替えてください。

必要な工具と部品

  1. この手順は未翻訳です。 翻訳を手伝う。

    : 手順 1、 2の画像 1 : 手順 1、 2の画像 2
    • Turn computer over.

    • Remove battery expansion cover and battery.

  2. この手順は未翻訳です。 翻訳を手伝う。

    : 手順 2、 1の画像 1
    • With monitor hinge at the bottom, remove the two top center screws.

  3. この手順は未翻訳です。 翻訳を手伝う。

    : 手順 3、 1の画像 1
    • Remove top left and top right screws.

  4. この手順は未翻訳です。 翻訳を手伝う。

    : 手順 4、 1の画像 1
    • Remove middle left and middle right screws.

  5. この手順は未翻訳です。 翻訳を手伝う。

    : 手順 5、 1の画像 1
    • Open computer kickstands.

    • Remove screws underneath each kickstand.

  6. この手順は未翻訳です。 翻訳を手伝う。

    : 手順 6、 1の画像 1
    • Lift keyboard from bottom and take out of shell.

  7. この手順は未翻訳です。 翻訳を手伝う。

    : 手順 7、 3の画像 1 : 手順 7、 3の画像 2 : 手順 7、 3の画像 3
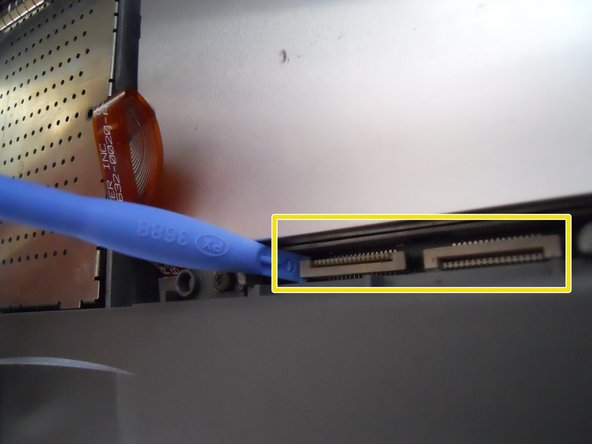
    • Lift the white ribbon clamps securing the keyboard ribbon cables to the motherboard. You can do this using a plastic opening tool.

    • Removing both ribbon cables from the motherboard will leave the clamps like so.

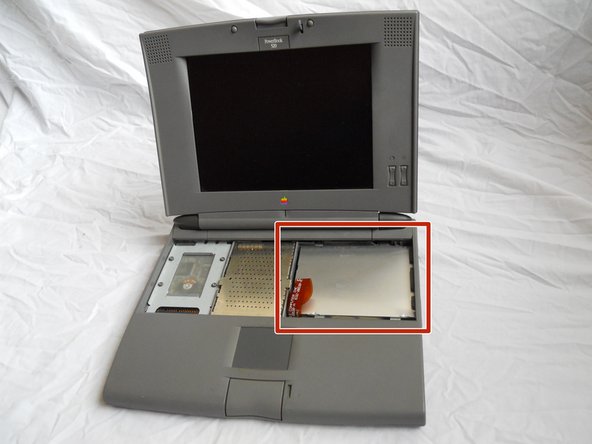
    • From here you can access the logic board, hard drive, and floppy drive.

ゴール

9 の人々がこのガイドを完成させました。

作成者

10人の作成者と共同で作成されました。

Mark McNeff

メンバー登録日: 04/20/11

497 ポイント

2のガイドは作成済み

2 件のコメント

http://tim.id.au/laptops/apple/powerbook... (PDF)

Apple Service Source: PowerBook 500 Series

Guides for everything.

tas - 返信

Thanks been trying to fix this for a long time

Luke - 返信

コメントを追加

統計データ:

過去 24時間: 1

過去 7 日: 19

過去 30 日: 61

今までの合計 6,703