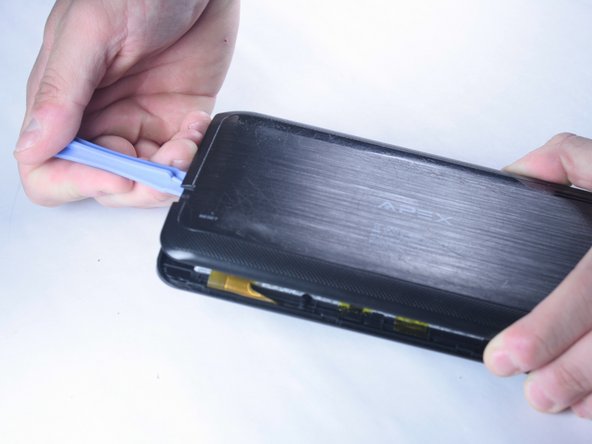
メインコンテンツにスキップ

Apex Tablet 7 Back Panel Replacement

必要な工具と部品

  1. Apex Tablet 7 Back Panel Replacement, Back Panel: 手順 1、 1の画像 1
    • Unscrew the two 2.70 mm Phillips #00 screws on the side of the tablet that has the buttons and the headphone jack (bottom side when holding upright).

  2. Apex Tablet 7 Back Panel Replacement: 手順 2、 2の画像 1 Apex Tablet 7 Back Panel Replacement: 手順 2、 2の画像 2
    • CAUTION: When removing the back panel of the tablet, take caution around the speaker. This is located in the lower right corner when looking at the back of the tablet. There are two wires inside connecting the tablet back panel to the device itself and this connection may be severed if the back is pulled off without care.

    • This connection is shown in red on the pictures.

  3. Apex Tablet 7 Back Panel Replacement: 手順 3、 2の画像 1 Apex Tablet 7 Back Panel Replacement: 手順 3、 2の画像 2
    • Slide a plastic opening tool in between the edge of the back panel and the the top edge of the device.

    • Run the plastic opening tool along the sides of the tablet while keeping it in the crack between the tablet and the back panel to create an opening.

  4. Apex Tablet 7 Back Panel Replacement: 手順 4、 1の画像 1
    • Apply pressure using your hand to pop the back panel off slowly, taking extra care around the speaker connection.

  5. Apex Tablet 7 Back Panel Replacement: 手順 5、 1の画像 1
    • The back panel should now be disconnected from the device. This provides access to the components of the device for repairing and replacing parts of the tablet.

終わりに

To reassemble your device, follow these instructions in reverse order.

2 の人々がこのガイドを完成させました。

作成者

5人の作成者と共同で作成されました。

Steven Gutzwiller

メンバー登録日: 03/20/15

465 ポイント

3のガイドは作成済み

チーム

Baylor, Team 2-2, Grigsby Spring 2015 Baylor, Team 2-2, Grigsby Spring 2015人のメンバー

BU-GRIGSBY-S15S2G2

4 メンバー

10のガイドは作成済み

0 件のコメント

コメントを追加

統計データ:

過去 24時間: 0

過去 7 日: 6

過去 30 日: 7

今までの合計 697