メインコンテンツにスキップ

Aorus x7 v2 Fan Assembly Replacement

必要な工具と部品

  1. Aorus x7 v2 Fan Assembly Replacement, Fan Assembly: 手順 1、 3の画像 1 Aorus x7 v2 Fan Assembly Replacement, Fan Assembly: 手順 1、 3の画像 2 Aorus x7 v2 Fan Assembly Replacement, Fan Assembly: 手順 1、 3の画像 3
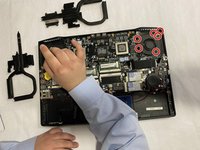
    • Flip the laptop over.

    • Unscrew the 12 screws holding on the bottom cover.

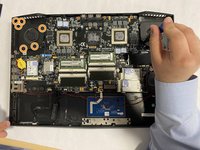
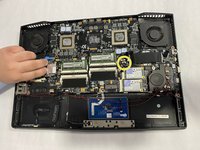
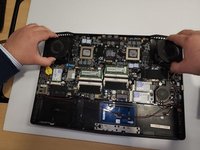
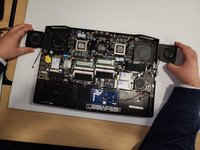
    • Take off the bottom cover.

    • Remove the 12 screws from the heat sink.

  2. Aorus x7 v2 Fan Assembly Replacement: 手順 2、 3の画像 1 Aorus x7 v2 Fan Assembly Replacement: 手順 2、 3の画像 2 Aorus x7 v2 Fan Assembly Replacement: 手順 2、 3の画像 3
    • Remove the heat sinks one by one.

  3. Aorus x7 v2 Fan Assembly Replacement: 手順 3、 3の画像 1 Aorus x7 v2 Fan Assembly Replacement: 手順 3、 3の画像 2 Aorus x7 v2 Fan Assembly Replacement: 手順 3、 3の画像 3
    • Unscrew the six screws from the right fan.

    • Unscrew the six screws from the left fan.

    • Locate the connection plug for the fan to the motherboard and disconnect the left fan connector.

  4. Aorus x7 v2 Fan Assembly Replacement: 手順 4、 3の画像 1 Aorus x7 v2 Fan Assembly Replacement: 手順 4、 3の画像 2 Aorus x7 v2 Fan Assembly Replacement: 手順 4、 3の画像 3
    • Disconnect the right fan connector.

    • Carefully lift up the left and right fans.

    • Set the fans to the side before installing new fans.

終わりに

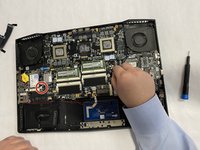
To reassemble your device, follow these instructions in reverse order using new left and right fans.

作成者

7人の作成者と共同で作成されました。

Alexis Hernandez Jimenez

メンバー登録日: 08/25/22

572 ポイント

5のガイドは作成済み

チーム

Gateway, Team 1-4, Pee Fall 2022 Gateway, Team 1-4, Pee Fall 2022人のメンバー

GCC-PEE-F22S1G4

3 メンバー

6のガイドは作成済み

0 件のコメント

コメントを追加

統計データ:

過去 24時間: 0

過去 7 日: 3

過去 30 日: 12

今までの合計 340