メインコンテンツにスキップ

Anker Soundcore Flare Mini Waterproof Outer Shell Replacement

必要な工具と部品

  1. Anker Soundcore Flare Mini Waterproof Outer Shell Replacement, Bottom Cover: 手順 1、 3の画像 1 Anker Soundcore Flare Mini Waterproof Outer Shell Replacement, Bottom Cover: 手順 1、 3の画像 2 Anker Soundcore Flare Mini Waterproof Outer Shell Replacement, Bottom Cover: 手順 1、 3の画像 3
    • The rubber cover of the speaker is glued down.

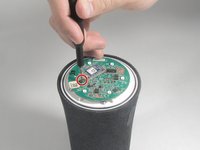
    • Use precision tweezers to peel the rubber cover off of the bottom of the speaker.

  2. Anker Soundcore Flare Mini Waterproof Outer Shell Replacement: 手順 2、 3の画像 1 Anker Soundcore Flare Mini Waterproof Outer Shell Replacement: 手順 2、 3の画像 2 Anker Soundcore Flare Mini Waterproof Outer Shell Replacement: 手順 2、 3の画像 3
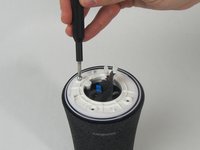
    • Remove six 10 mm screws holding the plastic cover in place using a Phillips #000 screwdriver.

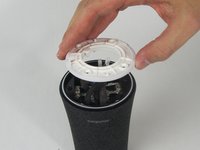
    • Use your hand to pull the plastic cover off the bottom of the speaker.

  3. Anker Soundcore Flare Mini Waterproof Outer Shell Replacement, Motherboard: 手順 3、 3の画像 1 Anker Soundcore Flare Mini Waterproof Outer Shell Replacement, Motherboard: 手順 3、 3の画像 2 Anker Soundcore Flare Mini Waterproof Outer Shell Replacement, Motherboard: 手順 3、 3の画像 3
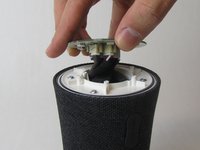
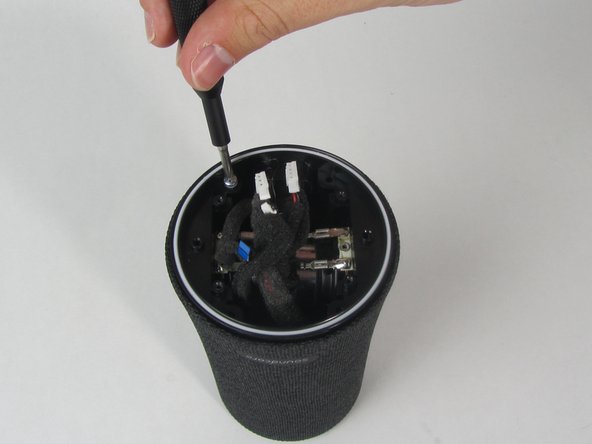
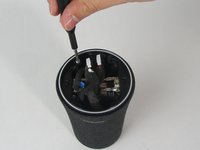
    • Remove the single 10 mm screw holding the motherboard in place using a Phillips #000 screwdriver.

    • Lift the motherboard up.

    • The motherboard is still attached to several wires underneath.

  4. Anker Soundcore Flare Mini Waterproof Outer Shell Replacement: 手順 4、 3の画像 1 Anker Soundcore Flare Mini Waterproof Outer Shell Replacement: 手順 4、 3の画像 2 Anker Soundcore Flare Mini Waterproof Outer Shell Replacement: 手順 4、 3の画像 3
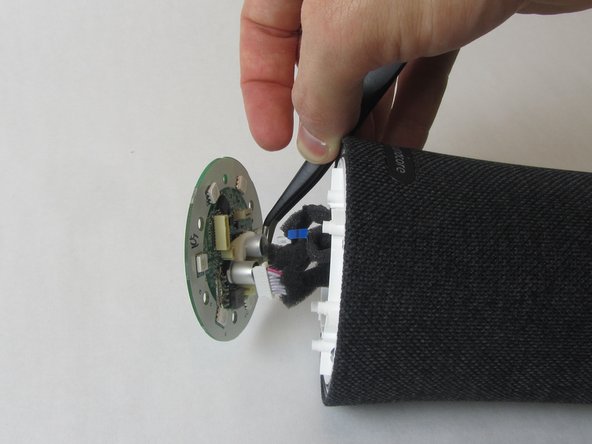
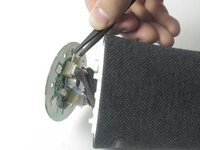
    • Use precision tweezers to firmly grasp the five power connectors and detach them from the back of the motherboard.

    • When removing the power connectors, do not pull the wires themselves.

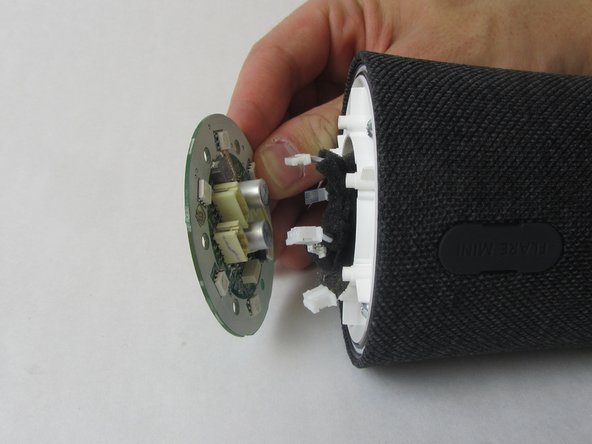
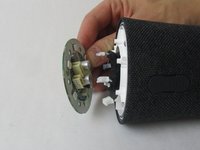
    • Remove the motherboard from the speaker.

  5. Anker Soundcore Flare Mini Waterproof Outer Shell Replacement, Waterproof Outer Shell: 手順 5、 3の画像 1 Anker Soundcore Flare Mini Waterproof Outer Shell Replacement, Waterproof Outer Shell: 手順 5、 3の画像 2 Anker Soundcore Flare Mini Waterproof Outer Shell Replacement, Waterproof Outer Shell: 手順 5、 3の画像 3
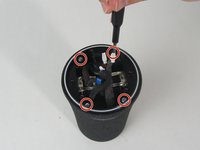
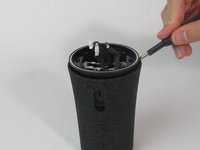
    • Remove the four 11 mm screws from the white plastic cover using a Phillips #1 screwdriver.

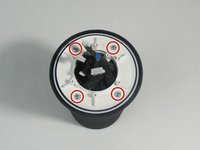
    • Remove the white plastic cover from the speaker.

  6. Anker Soundcore Flare Mini Waterproof Outer Shell Replacement: 手順 6、 2の画像 1 Anker Soundcore Flare Mini Waterproof Outer Shell Replacement: 手順 6、 2の画像 2
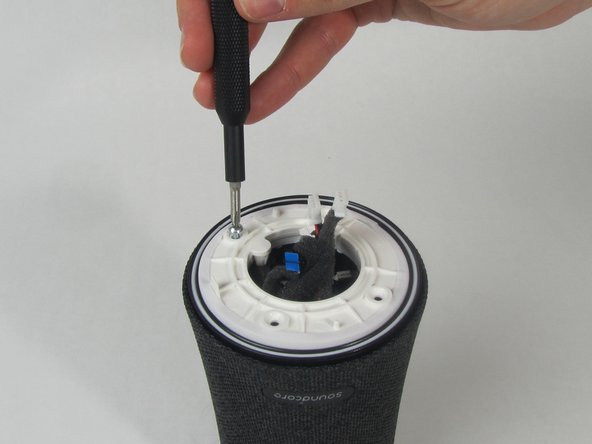
    • Remove the other four 11 mm screws holding the outer shell in place with a Phillips #1 screwdriver.

  7. Anker Soundcore Flare Mini Waterproof Outer Shell Replacement: 手順 7、 1の画像 1
    • Pull the charging port away from the side of the speaker.

  8. Anker Soundcore Flare Mini Waterproof Outer Shell Replacement: 手順 8、 3の画像 1 Anker Soundcore Flare Mini Waterproof Outer Shell Replacement: 手順 8、 3の画像 2 Anker Soundcore Flare Mini Waterproof Outer Shell Replacement: 手順 8、 3の画像 3
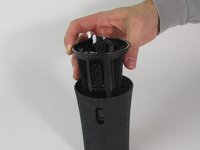
    • Use a spudger to loosen the cover from the inner components of the speaker.

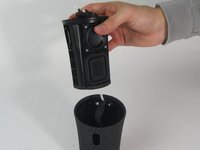
    • Slide the cover completely off.

    • One wire will still be connected to the shell.

終わりに

To reassemble your device, follow these instructions in reverse order.

ある他の人がこのガイドを完成しました。

作成者

2人の作成者と共同で作成されました。

Natalie Herrick

メンバー登録日: 01/09/22

160 ポイント

1ガイドが承認済み

チーム

Illinois Wesleyan University, Team 1-1, Bullock Spring 2022 Illinois Wesleyan University, Team 1-1, Bullock Spring 2022人のメンバー

IWU-BULLOCK-S22S1G1

4 メンバー

5のガイドは作成済み

コメント 1 件

Where can I purchase the outer shell? Share link please

Arsam Sohail - 返信

コメントを追加

統計データ:

過去 24時間: 0

過去 7 日: 4

過去 30 日: 19

今までの合計 424