メインコンテンツにスキップ

AmazonBasics BTV1 Motherboard Replacement

必要な工具と部品

  1. AmazonBasics BTV1 Motherboard Replacement, Motherboard: 手順 1、 2の画像 1 AmazonBasics BTV1 Motherboard Replacement, Motherboard: 手順 1、 2の画像 2
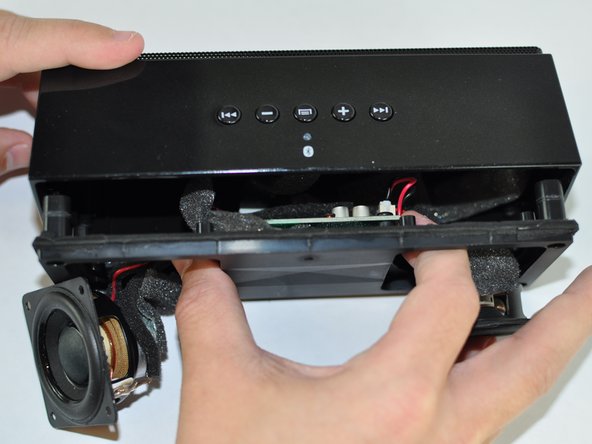
    • Hold the speaker firmly and wedge a plastic opening tool in between the faceplate and the body of the speaker.

    • Move the tool back and forth along the entire perimeter of the face plate until you feel the plate loosen, then pry the plate off.

  2. AmazonBasics BTV1 Motherboard Replacement: 手順 2、 2の画像 1 AmazonBasics BTV1 Motherboard Replacement: 手順 2、 2の画像 2
    • Using a Phillips #1 screwdriver, remove the four black 10mm screws around each of speakers.

    • Using a Phillps #1 screwdriver, remove the four black 10mm screws securing the inside panel to the case.

  3. AmazonBasics BTV1 Motherboard Replacement: 手順 3、 2の画像 1 AmazonBasics BTV1 Motherboard Replacement: 手順 3、 2の画像 2
    • Tilt the case downwards until the speakers fall out of their housings.

    • Reach your thumb and forefinger past the speakers and detach the front speaker panel from the unit.

  4. AmazonBasics BTV1 Motherboard Replacement: 手順 4、 2の画像 1 AmazonBasics BTV1 Motherboard Replacement: 手順 4、 2の画像 2
    • Gently pull each plastic connector from the motherboard.

    • Take a note of which connector goes with each component for easy reassembly.

    • Use a Phillips #1 screwdriver to remove each of the three black 9.6mm screws from the motherboard.

  5. AmazonBasics BTV1 Motherboard Replacement: 手順 5、 1の画像 1
    • Gently pull out the two ribbon connectors to disconnect the motherboard from the case.

終わりに

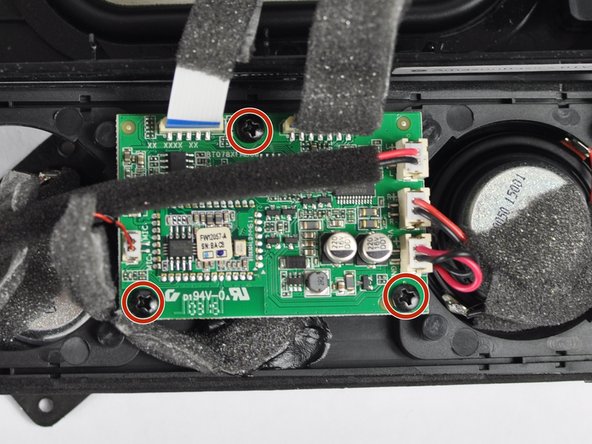
To reassemble your device, follow these instructions in reverse order.

2 の人々がこのガイドを完成させました。

作成者

1人の作成者と共同作成されました。

Chris Shannon

メンバー登録日: 02/01/16

1,039 ポイント

5のガイドは作成済み

チーム

USF Tampa, Team 14-2, Lacy Spring 2016 USF Tampa, Team 14-2, Lacy Spring 2016人のメンバー

USFT-LACY-S16S14G2

3 メンバー

5のガイドは作成済み

0 件のコメント

コメントを追加

統計データ:

過去 24時間: 0

過去 7 日: 0

過去 30 日: 2

今までの合計 471