メインコンテンツにスキップ

AmazonBasics BTV1 AUX Input Jack Replacement

必要な工具と部品

  1. AmazonBasics BTV1 AUX Input Jack Replacement, Battery: 手順 1、 2の画像 1 AmazonBasics BTV1 AUX Input Jack Replacement, Battery: 手順 1、 2の画像 2
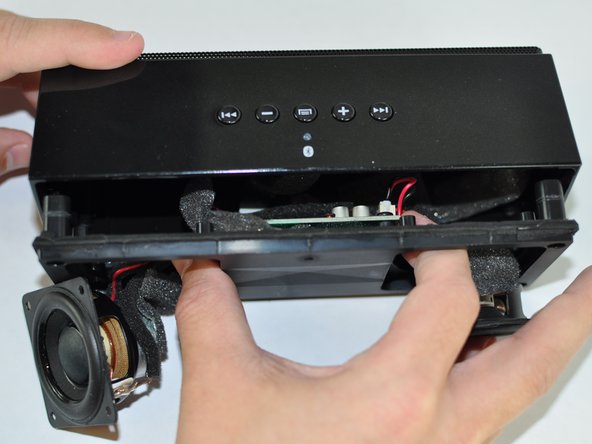
    • Hold the speaker firmly and wedge a plastic opening tool in between the faceplate and the body of the speaker.

    • Move the tool back and forth along the entire perimeter of the face plate until you feel the plate loosen, then pry the plate off.

  2. AmazonBasics BTV1 AUX Input Jack Replacement: 手順 2、 2の画像 1 AmazonBasics BTV1 AUX Input Jack Replacement: 手順 2、 2の画像 2
    • Using a Phillips #1 screwdriver, remove the four black 10mm screws around each of speakers.

    • Using a Phillps #1 screwdriver, remove the four black 10mm screws securing the inside panel to the case.

  3. AmazonBasics BTV1 AUX Input Jack Replacement: 手順 3、 2の画像 1 AmazonBasics BTV1 AUX Input Jack Replacement: 手順 3、 2の画像 2
    • Tilt the case downwards until the speakers fall out of their housings.

    • Reach your thumb and forefinger past the speakers and detach the front speaker panel from the unit.

  4. AmazonBasics BTV1 AUX Input Jack Replacement: 手順 4、 2の画像 1 AmazonBasics BTV1 AUX Input Jack Replacement: 手順 4、 2の画像 2
    • Gently pull each plastic connector from the motherboard.

    • Take a note of which connector goes with each component for easy reassembly.

    • Use a Phillips #1 screwdriver to remove each of the three black 9.6mm screws from the motherboard.

  5. AmazonBasics BTV1 AUX Input Jack Replacement: 手順 5、 2の画像 1 AmazonBasics BTV1 AUX Input Jack Replacement: 手順 5、 2の画像 2
    • Lift the motherboard off the face plate, exposing the battery.

    • Lift the battery out of its housing.

    • Use caution when using tools around the battery; batteries can be dangerous if punctured.

  6. AmazonBasics BTV1 AUX Input Jack Replacement, AUX Input Jack: 手順 6、 3の画像 1 AmazonBasics BTV1 AUX Input Jack Replacement, AUX Input Jack: 手順 6、 3の画像 2 AmazonBasics BTV1 AUX Input Jack Replacement, AUX Input Jack: 手順 6、 3の画像 3
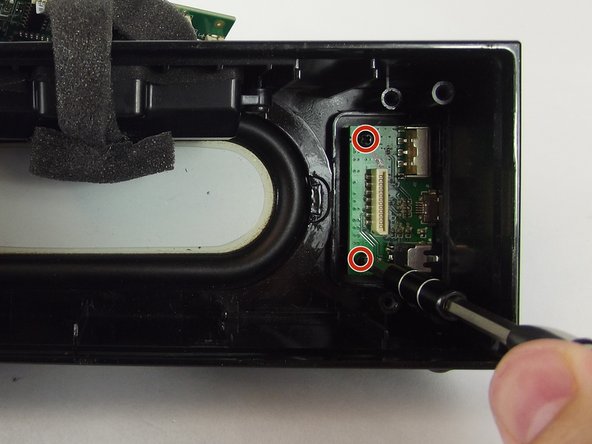
    • Using a Phillips #1 screwdriver, remove the two black 10mm screws on the interior of the case on the side with the USB and AUX inputs.

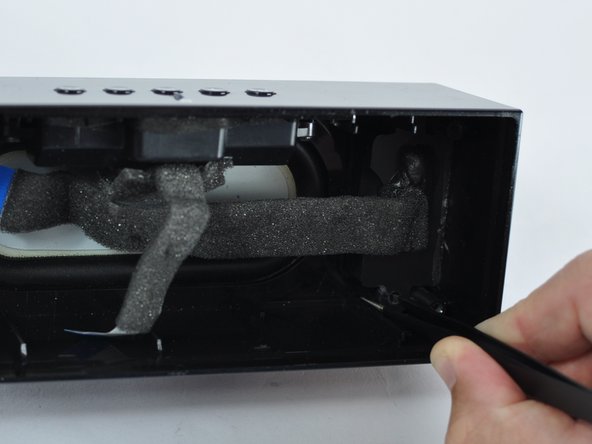
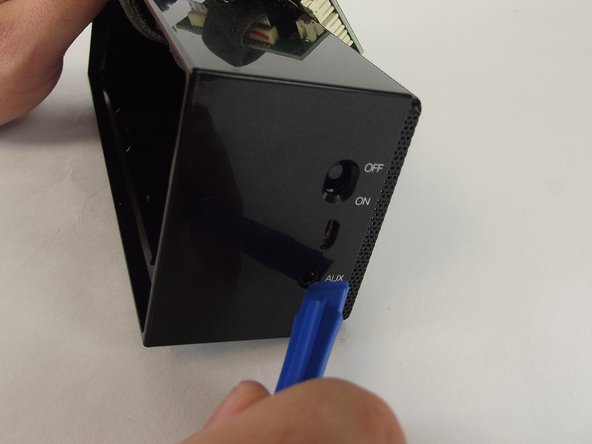
    • Using the prying tool and tweezers at different points to work the audio input casing off.

  7. AmazonBasics BTV1 AUX Input Jack Replacement: 手順 7、 2の画像 1 AmazonBasics BTV1 AUX Input Jack Replacement: 手順 7、 2の画像 2
    • Use your fingers to pull casing off by the ribbon.

    • Use a Phillips #1 screwdriver to remove the two 7.6mm screws that hold the board in place.

  8. AmazonBasics BTV1 AUX Input Jack Replacement: 手順 8、 2の画像 1 AmazonBasics BTV1 AUX Input Jack Replacement: 手順 8、 2の画像 2
    • Use plastic opening tool to lift up the board.

    • Use plastic opening tool to gently push the aux input jack out of its housing.

  9. AmazonBasics BTV1 AUX Input Jack Replacement: 手順 9、 1の画像 1
    • Use the soldering iron to heat up solder joint and desoldering wick to remove the solder on each solder pad.

    • Do not apply heat from soldering iron for lengthy periods of time as this could potentially damage the board.

終わりに

To reassemble your device, follow these instructions in reverse order.

ある他の人がこのガイドを完成しました。

作成者

1人の作成者と共同作成されました。

Chris Shannon

メンバー登録日: 02/01/16

1,039 ポイント

5のガイドは作成済み

チーム

USF Tampa, Team 14-2, Lacy Spring 2016 USF Tampa, Team 14-2, Lacy Spring 2016人のメンバー

USFT-LACY-S16S14G2

3 メンバー

5のガイドは作成済み

0 件のコメント

コメントを追加

統計データ:

過去 24時間: 0

過去 7 日: 0

過去 30 日: 0

今までの合計 631