はじめに
Removing the front plate of your Amazon Luna Controller is a crucial first step if you need to replace a damaged front plate or access internal components for repairs. Before you begin, ensure your controller is powered off to prevent accidental damage.
必要な工具と部品
-
-
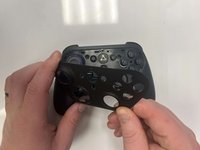
Flip the controller over to its front and locate the seam where the front plate connects to the rest of the body.
-
-


To reassemble your device, follow these instructions in reverse order.
ある他の人がこのガイドを完成しました。

チーム

Western Carolina University, Team 1-4, Virtue Fall 2024 Western Carolina University, Team 1-4, Virtue Fall 2024人のメンバー
WCU-VIRTUE-F24S1G4
3 メンバー
5のガイドは作成済み