メインコンテンツにスキップ

Amazon Fire HD 8 12th Gen Screen Replacement

必要な工具と部品

  1. 注意: 手順 1-2 は、作業進行中としてマークされている ガイド から引用されています。

    Amazon Fire HD 8 12th Gen Screen Replacement, Buttons: 手順 1、 3の画像 1 Amazon Fire HD 8 12th Gen Screen Replacement, Buttons: 手順 1、 3の画像 2 Amazon Fire HD 8 12th Gen Screen Replacement, Buttons: 手順 1、 3の画像 3
    • Remove the device from any electrical source and make sure it is powered off.

    • Put picks around the corner and move them along the edge to pry the case off.

    • Once there is separation between the case and the screen, place a pick in between the screen and on the corner of the back case.

  2. Amazon Fire HD 8 12th Gen Screen Replacement: 手順 2、 2の画像 1 Amazon Fire HD 8 12th Gen Screen Replacement: 手順 2、 2の画像 2
    • With the corners lifted, take the opening tool and pry each corner off.

    • Repeat this for the corner diagonal from the initial corner.

    • Once both corners are pried off, gently take the back case off the device.

  3. Amazon Fire HD 8 12th Gen Screen Replacement, Battery: 手順 3、 2の画像 1 Amazon Fire HD 8 12th Gen Screen Replacement, Battery: 手順 3、 2の画像 2
    • Using the iFixit opening tool, disconnect the battery from the circuit board.

  4. Amazon Fire HD 8 12th Gen Screen Replacement: 手順 4、 3の画像 1 Amazon Fire HD 8 12th Gen Screen Replacement: 手順 4、 3の画像 2 Amazon Fire HD 8 12th Gen Screen Replacement: 手順 4、 3の画像 3
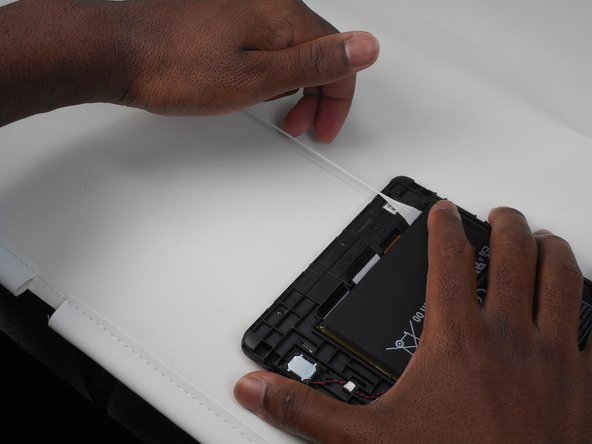
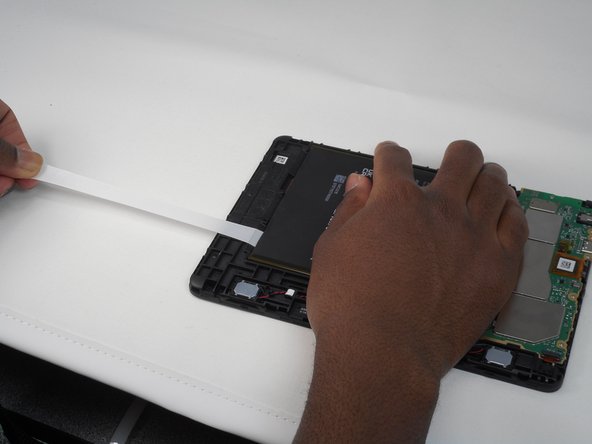
    • Slowly and gently, pull and remove the 3 adhesives under the old battery.

    • Remove all 3 by pulling the adhesive, signified by a black flap with white adhesive. You will know it is removed when the adhesive has come out from under the battery and you are now able to move the battery.

  5. Amazon Fire HD 8 12th Gen Screen Replacement: 手順 5、 3の画像 1 Amazon Fire HD 8 12th Gen Screen Replacement: 手順 5、 3の画像 2 Amazon Fire HD 8 12th Gen Screen Replacement: 手順 5、 3の画像 3
    • Remove the old battery from the device using the opening tool.

    • If necessary, clean under your old battery and then insert the new battery with new adhesive to ensure the battery stays in place.

  6. Amazon Fire HD 8 12th Gen Screen Replacement, Screen: 手順 6、 2の画像 1 Amazon Fire HD 8 12th Gen Screen Replacement, Screen: 手順 6、 2の画像 2
    • Start off by heating the edges of the screen to melt the adhesive.

    • Insert the opening picks between the screen and device.

  7. Amazon Fire HD 8 12th Gen Screen Replacement: 手順 7、 3の画像 1 Amazon Fire HD 8 12th Gen Screen Replacement: 手順 7、 3の画像 2 Amazon Fire HD 8 12th Gen Screen Replacement: 手順 7、 3の画像 3
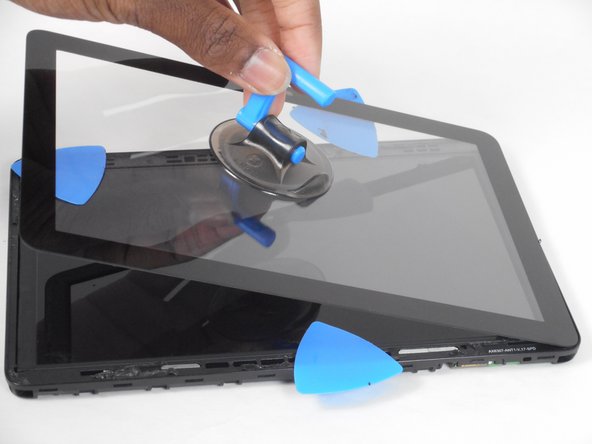
    • Slide the opening pick in between the screen and device, prying it just above the device.

    • Place the suction on the screen

  8. Amazon Fire HD 8 12th Gen Screen Replacement: 手順 8、 3の画像 1 Amazon Fire HD 8 12th Gen Screen Replacement: 手順 8、 3の画像 2 Amazon Fire HD 8 12th Gen Screen Replacement: 手順 8、 3の画像 3
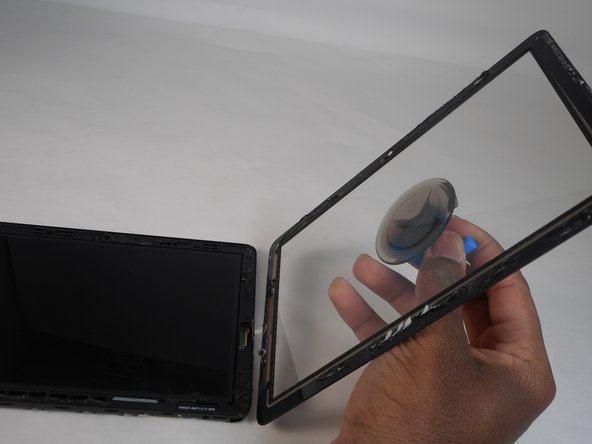
    • Gently pull the screen off using the suction and opening tool.

  9. Amazon Fire HD 8 12th Gen Screen Replacement: 手順 9、 3の画像 1 Amazon Fire HD 8 12th Gen Screen Replacement: 手順 9、 3の画像 2 Amazon Fire HD 8 12th Gen Screen Replacement: 手順 9、 3の画像 3
    この手順で使用する道具:
    Tweezers
    $4.99
    購入する
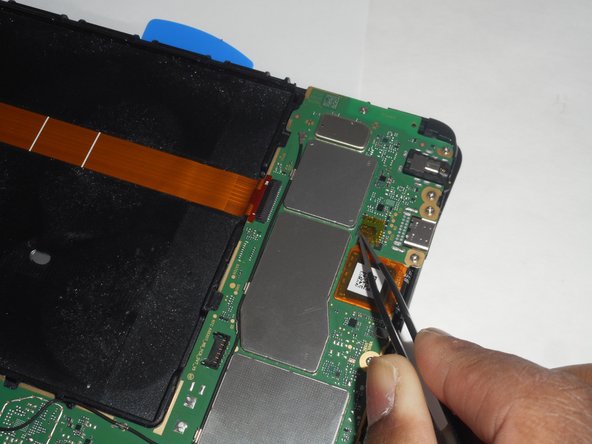
    • Heat up the little black square with yellow orange tape around it on the back of the device, atop the motherboard.

    • Once heated, remove the little black square using tweezers. Unhooking the screen from the screen.

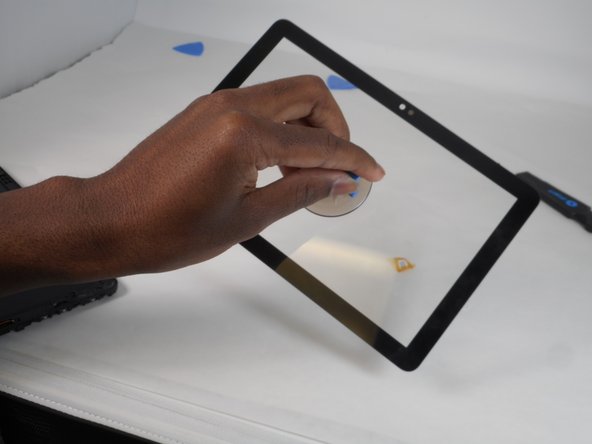
    • Pulling the suction cup, fully remove the screen from the device.

終わりに

To reassemble your device, follow these instructions in reverse order.

作成者

3人の作成者と共同で作成されました。

Rama Sura

メンバー登録日: 02/13/23

412 ポイント

3のガイドは作成済み

チーム

University of Memphis, Team 1-1, Sneed Fall 2023 University of Memphis, Team 1-1, Sneed Fall 2023人のメンバー

UM-SNEED-F23S1G1

4 メンバー

7のガイドは作成済み

0 件のコメント

コメントを追加

統計データ:

過去 24時間: 6

過去 7 日: 27

過去 30 日: 113

今までの合計 558