メインコンテンツにスキップ

Amazon Fire HD 7 (4th Generation) Display Replacement

必要な工具と部品

  1. Amazon Fire HD 7 (4th Generation) Display Replacement, Motherboard: 手順 1、 3の画像 1 Amazon Fire HD 7 (4th Generation) Display Replacement, Motherboard: 手順 1、 3の画像 2 Amazon Fire HD 7 (4th Generation) Display Replacement, Motherboard: 手順 1、 3の画像 3
    • Insert the plastic opening tool behind the rear case to free the clips holding the case together.

    • Work your way around the device to free all the clips.

  2. Amazon Fire HD 7 (4th Generation) Display Replacement: 手順 2、 1の画像 1
    • Once all clips have been released, remove the back case to reveal the inside of the device.

  3. Amazon Fire HD 7 (4th Generation) Display Replacement: 手順 3、 3の画像 1 Amazon Fire HD 7 (4th Generation) Display Replacement: 手順 3、 3の画像 2 Amazon Fire HD 7 (4th Generation) Display Replacement: 手順 3、 3の画像 3
    • Remove the nine silver screws located around the motherboard with the T5 Torx screwdriver.

  4. Amazon Fire HD 7 (4th Generation) Display Replacement: 手順 4、 3の画像 1 Amazon Fire HD 7 (4th Generation) Display Replacement: 手順 4、 3の画像 2 Amazon Fire HD 7 (4th Generation) Display Replacement: 手順 4、 3の画像 3
    • Remove the six black screws located around the battery and the speaker with the T5 Torx screwdriver.

    • Make your way around the battery and speaker to remove all of them.

  5. Amazon Fire HD 7 (4th Generation) Display Replacement: 手順 5、 3の画像 1 Amazon Fire HD 7 (4th Generation) Display Replacement: 手順 5、 3の画像 2 Amazon Fire HD 7 (4th Generation) Display Replacement: 手順 5、 3の画像 3
    この手順で使用する道具:
    Tweezers
    $4.99
    購入する
    • Carefully unplug the three wire connections by placing a plastic spudger under the connections and lifting up.

    • Disconnect the battery and speaker connections by placing the round handle spudger under the wires and lifting up and out.

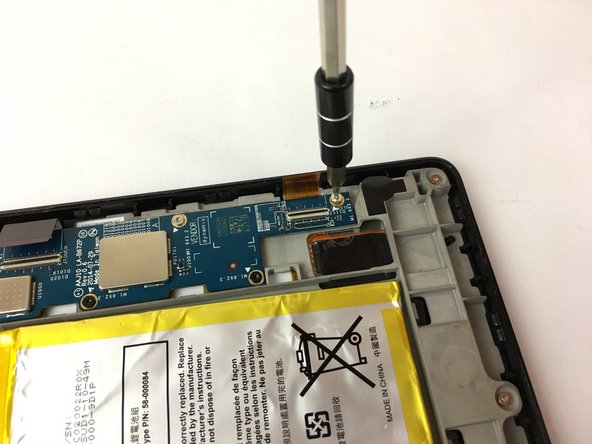
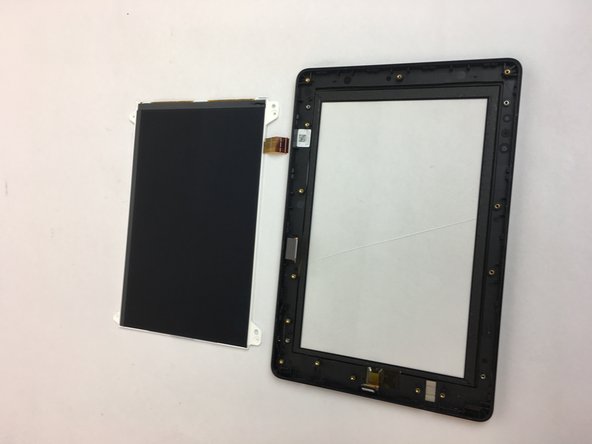
    • Disconnect the display connections from the motherboard by using the plastic spudger to lift the clamp holding the ribbon cable. Then, using the tweezers, grab the ribbon wire and pull away from the motherboard.

  6. Amazon Fire HD 7 (4th Generation) Display Replacement: 手順 6、 2の画像 1 Amazon Fire HD 7 (4th Generation) Display Replacement: 手順 6、 2の画像 2
    • Remove the two screws holding the rear camera in place using the T5 Torx screwdriver.

    • Once freed from the screws, gently lift and remove the rear camera.

    • The camera lens is sensitive. Be careful when removing and handling the rear camera.

  7. Amazon Fire HD 7 (4th Generation) Display Replacement: 手順 7、 2の画像 1 Amazon Fire HD 7 (4th Generation) Display Replacement: 手順 7、 2の画像 2
    • Now the motherboard is free to be removed.

    • Lift the motherboard up to remove it as shown in the picture.

  8. Amazon Fire HD 7 (4th Generation) Display Replacement, Display: 手順 8、 3の画像 1 Amazon Fire HD 7 (4th Generation) Display Replacement, Display: 手順 8、 3の画像 2 Amazon Fire HD 7 (4th Generation) Display Replacement, Display: 手順 8、 3の画像 3
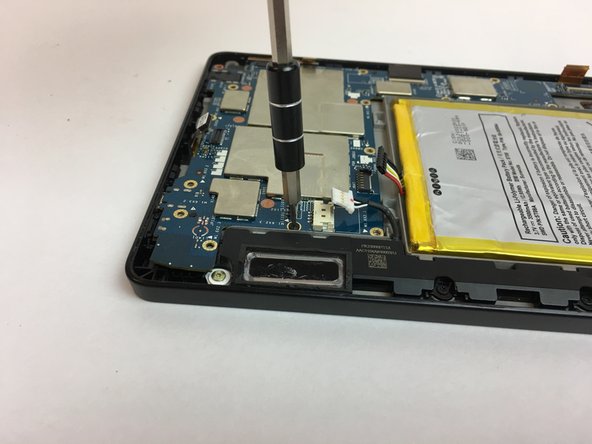
    • Following the bottom edge of the device, remove the (3) T5 hex silver screws with the T5 torx screwdriver.

  9. Amazon Fire HD 7 (4th Generation) Display Replacement: 手順 9、 2の画像 1 Amazon Fire HD 7 (4th Generation) Display Replacement: 手順 9、 2の画像 2
    • The motherboard chassis can now be removed to reveal the display screen.

    • Remove the volume button components.

  10. Amazon Fire HD 7 (4th Generation) Display Replacement: 手順 10、 3の画像 1 Amazon Fire HD 7 (4th Generation) Display Replacement: 手順 10、 3の画像 2 Amazon Fire HD 7 (4th Generation) Display Replacement: 手順 10、 3の画像 3
    • Remove the (4) T5 hex silver screws in the corners of the display screen using the T5 torx screwdriver.

  11. Amazon Fire HD 7 (4th Generation) Display Replacement: 手順 11、 3の画像 1 Amazon Fire HD 7 (4th Generation) Display Replacement: 手順 11、 3の画像 2 Amazon Fire HD 7 (4th Generation) Display Replacement: 手順 11、 3の画像 3
    • The LCD display screen may now be removed and replaced.

ゴール

7 の人々がこのガイドを完成させました。

作成者

4人の作成者と共同で作成されました。

Omir Rosado

メンバー登録日: 09/30/16

725 ポイント

5のガイドは作成済み

チーム

USF Tampa, Team 4-4, Passmore Fall 2016 USF Tampa, Team 4-4, Passmore Fall 2016人のメンバー

USFT-PASSMORE-F16S4G4

4 メンバー

10のガイドは作成済み

コメント 1 件

finding it very difficult to source a new touch screen for this model.

colin - 返信

コメントを追加

統計データ:

過去 24時間: 0

過去 7 日: 17

過去 30 日: 60

今までの合計 6,764