メインコンテンツにスキップ

Amazon Echo 2nd Generation MIC Board Replacement

必要な工具と部品

  1. Amazon Echo 2nd Generation MIC Board Replacement, AMP Board: 手順 1、 3の画像 1 Amazon Echo 2nd Generation MIC Board Replacement, AMP Board: 手順 1、 3の画像 2 Amazon Echo 2nd Generation MIC Board Replacement, AMP Board: 手順 1、 3の画像 3
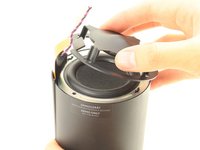
    • Remove the rubber layer beneath the device.

    • Look for the crater beneath the rubber layer and place your thumb on it. Hold down and lift off the cover with your other hand.

    • Remove the four 8.0 mm T8 Torx screws on the lid.

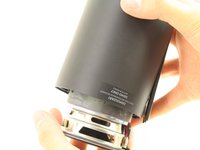
    • Remove the lid from the device.

  2. Amazon Echo 2nd Generation MIC Board Replacement: 手順 2、 3の画像 1 Amazon Echo 2nd Generation MIC Board Replacement: 手順 2、 3の画像 2 Amazon Echo 2nd Generation MIC Board Replacement: 手順 2、 3の画像 3
    • Use a spudger to flip up the small flap on the ZIF connector.

    • Gently pull the ribbon cable out of the ZIF connector.

    • Lift the AMP Board gently while sliding the ribbon cable out through the center hole to reveal another set of wires underneath the board.

  3. Amazon Echo 2nd Generation MIC Board Replacement: 手順 3、 2の画像 1 Amazon Echo 2nd Generation MIC Board Replacement: 手順 3、 2の画像 2
    • Use a spudger to lift up one of the small flaps on only one side of the female connector.

    • Pull on the wire toward the lifted side until the male connector is disconnected.

    • Remove the AMP Board.

  4. Amazon Echo 2nd Generation MIC Board Replacement, Subwoofer (speaker): 手順 4、 2の画像 1 Amazon Echo 2nd Generation MIC Board Replacement, Subwoofer (speaker): 手順 4、 2の画像 2
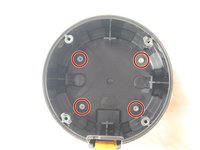
    • Remove the four 30.0 mm T8 Torx screws in the corners.

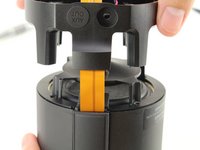
    • Remove the large plastic piece on top of the subwoofer while threading the ribbon cable and male connector through the hole.

  5. Amazon Echo 2nd Generation MIC Board Replacement: 手順 5、 2の画像 1 Amazon Echo 2nd Generation MIC Board Replacement: 手順 5、 2の画像 2
    • Remove the lid on top of the subwoofer.

    • Flip the device over and let the subwoofer fall into your hand.

    • The subwoofer is a strong magnet. Keep it away from any other electronics and unshielded wires.

  6. Amazon Echo 2nd Generation MIC Board Replacement, Front Cover Panel: 手順 6、 2の画像 1 Amazon Echo 2nd Generation MIC Board Replacement, Front Cover Panel: 手順 6、 2の画像 2
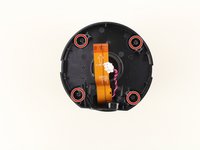
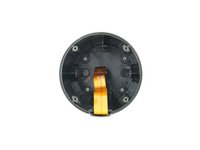
    • Remove the four 16.0 mm T8 Torx screws underneath the speaker.

    • Once you unscrew the four 16.0 mm T8 Torx screws, the remaining components of the device have no support. Take caution when flipping the device over to avoid damage to the remaining components.

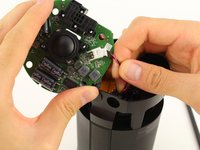
    • Flip the device over while supporting the front panel side.

    • Remove the front panel cover by lifting it.

  7. Amazon Echo 2nd Generation MIC Board Replacement, MIC Board: 手順 7、 3の画像 1 Amazon Echo 2nd Generation MIC Board Replacement, MIC Board: 手順 7、 3の画像 2 Amazon Echo 2nd Generation MIC Board Replacement, MIC Board: 手順 7、 3の画像 3
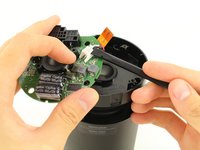
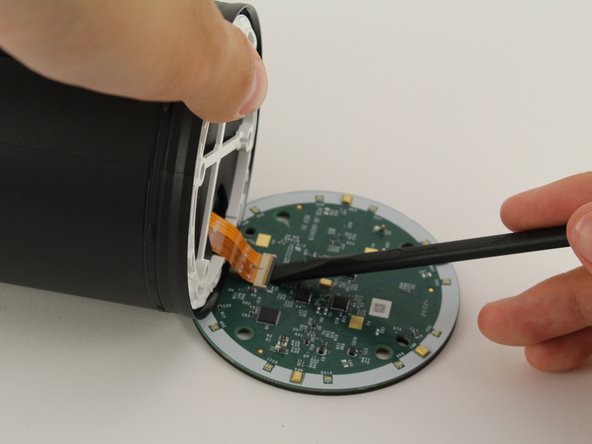
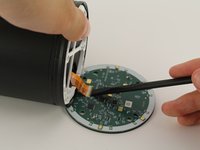
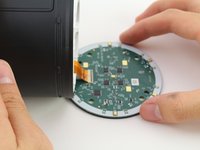
    • Lift the MIC board over and lay it down against a surface.

    • Use a spudger to flip up the small flap on the ZIF connector.

    • Disconnect the ribbon cable from the MIC board and pull the board away.

終わりに

To reassemble your device, follow these instructions in reverse order.

ある他の人がこのガイドを完成しました。

作成者

2人の作成者と共同で作成されました。

Billy Pho

メンバー登録日: 10/08/18

437 ポイント

2のガイドは作成済み

チーム

Cal Poly, Team S4-G4, White Fall 2018 Cal Poly, Team S4-G4, White Fall 2018人のメンバー

CPSU-WHITE-F18S4G4

3 メンバー

5のガイドは作成済み

コメント 1 件

Is there a place to buy a replacement MIC Board?

Michael Petrucci - 返信

コメントを追加

統計データ:

過去 24時間: 0

過去 7 日: 3

過去 30 日: 15

今までの合計 2,698