この修理ガイドは変更されています。最新の未承認バージョンに切り替えます。
はじめに
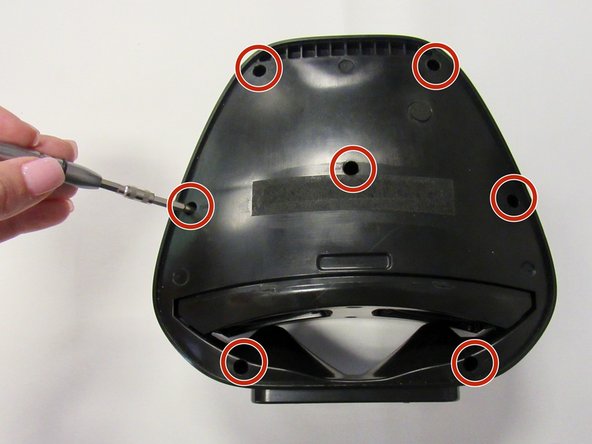
If you need access to any of the internal components of your Altec Lansing VersA Smart speaker to replace components, start with this basic removal guide. This guide is a prerequisite to all other repair guides. In this guide, you will remove all external panels and coverings to expose the components within.
必要な工具と部品


もう少しです!
ゴール

チーム

University of Alabama, Team S1-G3, Bedsole Fall 2018 University of Alabama, Team S1-G3, Bedsole Fall 2018人のメンバー
UA-BEDSOLE-F18S1G3
3 メンバー
6のガイドは作成済み