はじめに
The front panel may need to be replaced if it is cracked or damaged.
必要な工具と部品
-
-
Remove all eight 1 cm Phillips head screws from the back panel of the AlphaSmart Pro with the Phillips #00 Screwdriver.
-
Carefully separate the front panel from the back panel.
 FixBotに聞いてみる
-
-
-
-
To remove the ribbon cable, use the spudger to lift each side of the connector from the socket.
-
Gently pull up on the connector to completely remove the connector from the socket.
-
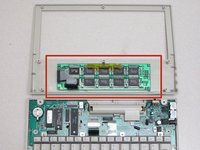
You are now able to separate the front panel from the back panel.
-
-
-
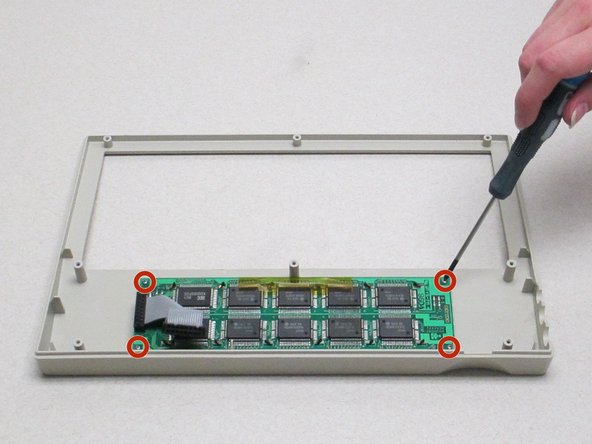
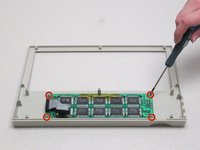
Looking at the front panel, use the Phillips #00 screwdriver to remove the four Phillips head 0.8 cm screws from each corner of the display motherboard.
-
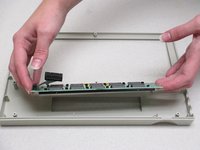
Lift the display screen and motherboard from the plastic front panel to separate the two pieces.
-


To reassemble your device, follow these instructions in reverse order.
チーム

Clemson, Team 1-1, Benson Fall 2014 Clemson, Team 1-1, Benson Fall 2014人のメンバー
CLEM-BENSON-F14S1G1
4 メンバー
16のガイドは作成済み