メインコンテンツにスキップ
リペアコミュニティに参加 - アカウントの作成

Alldaymall A88X Battery Replacement

必要な工具と部品

    1. Alldaymall A88X Battery Replacement, Alldaymall A88X Back Cover: 手順 1、 3の画像 1 Alldaymall A88X Battery Replacement, Alldaymall A88X Back Cover: 手順 1、 3の画像 2 Alldaymall A88X Battery Replacement, Alldaymall A88X Back Cover: 手順 1、 3の画像 3
      • Using a plastic opening tool, carefully pry the device apart. Make your way around the entire perimeter of the device and carefully place the two panels next to each other.

      • After the panels are separated, watch out for the speaker on the rear panel as it's wire is rather short.

      • When separating the panels keep an eye out for the power button and volume rocker as they can be dislodged.

      FixBotに聞いてみる

      コメントを追加

    2. Alldaymall A88X Battery Replacement: 手順 2、 1の画像 1
      この手順で使用する道具:
      Tweezers
      $4.99
      • Grip the speaker from the sides with your fingers or a pair of tweezers and slowly begin to remove it from the rear panel.

      • When removing the speaker, make sure not to disconnect the wires in any way.

      • After the speaker has been removed, place the rear panel aside.

      FixBotに聞いてみる

      コメントを追加

    1. Alldaymall A88X Battery Replacement, Battery: 手順 3、 3の画像 1 Alldaymall A88X Battery Replacement, Battery: 手順 3、 3の画像 2 Alldaymall A88X Battery Replacement, Battery: 手順 3、 3の画像 3
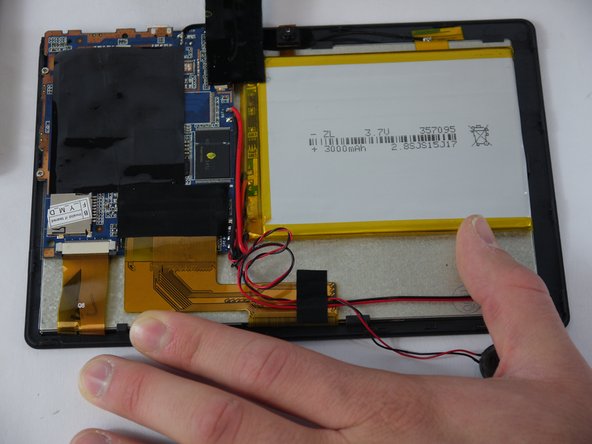
      • Carefully separate the speaker wire from the tape and proceed to peel the tape off in an upwards direction.

      • The tape we are removing covers a number of connections on the motherboard. Be extra careful not to server any of these.

      FixBotに聞いてみる

      コメントを追加

    2. Alldaymall A88X Battery Replacement: 手順 4、 3の画像 1 Alldaymall A88X Battery Replacement: 手順 4、 3の画像 2 Alldaymall A88X Battery Replacement: 手順 4、 3の画像 3
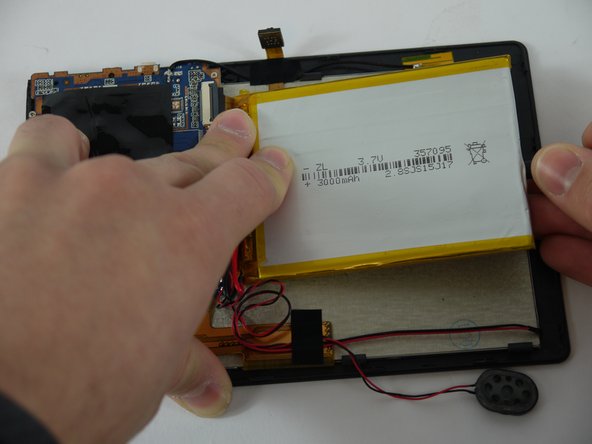
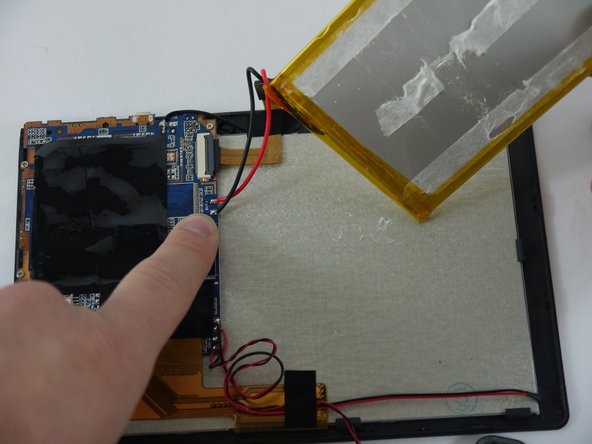
      • Using a nylon spudger, slowly work your way underneath the battery separating it from the panel beneath.

      • After the battery is separated from the panel make sure to place it face down above the tablet itself.

      • Throughout the removal process keep an eye on the battery's wires and make sure they do not break.

      FixBotに聞いてみる

      コメントを追加

    3. Alldaymall A88X Battery Replacement: 手順 5、 2の画像 1 Alldaymall A88X Battery Replacement: 手順 5、 2の画像 2
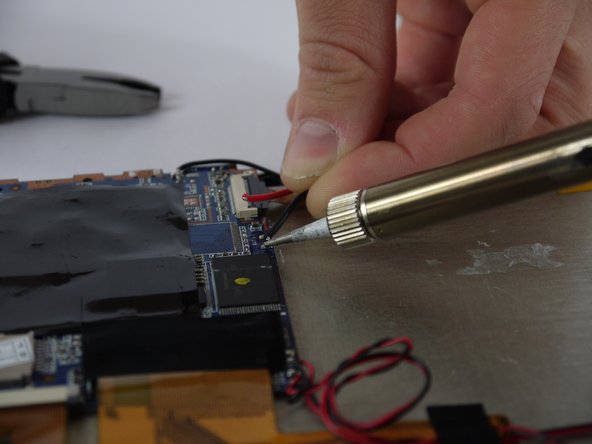
      • Desolder the wires that connect the battery to the motherboard.

      FixBotに聞いてみる

      コメントを追加

終わりに

To reassemble your device, follow these instructions in reverse order.

キャンセル: このガイドを終了できませんでした。

4 の人々がこのガイドを完成させました。

作成者

2人の作成者と共同で作成されました。

Alex

メンバー登録日: 02/10/16

101 ポイント

1ガイドが承認済み

チーム

USF Tampa, Team 4-1, Lacy Spring 2016 USF Tampa, Team 4-1, Lacy Spring 2016人のメンバー

USFT-LACY-S16S4G1

4 メンバー

96のガイドは作成済み

0件のガイドコメント

コメントを追加

統計データ:

過去 24時間: 4

過去 7 日: 9

過去 30 日: 36

今までの合計 1,653