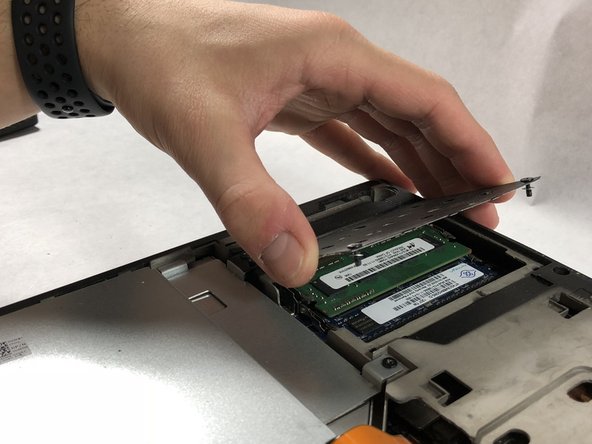
メインコンテンツにスキップ

Alienware P18G M14X R1 RAM Replacement

必要な工具と部品

  1. Alienware P18G M14X R1 RAM Replacement, Back Cover: 手順 1、 1の画像 1
    • Loosen the top left and top right 6.5mm PH1 screws that hold down the back cover.

    • The screws will not be able to be removed from the back cover. They can only be loosened or tightened.

  2. Alienware P18G M14X R1 RAM Replacement: 手順 2、 1の画像 1
    • Slide back cover forward using your thumbs.

  3. Alienware P18G M14X R1 RAM Replacement: 手順 3、 1の画像 1
    • Lift up the cover and set aside exposing the internals of the computer.

  4. Alienware P18G M14X R1 RAM Replacement, RAM: 手順 4、 1の画像 1
    • Unscrew the two 6.35 mm using the PH1 screw driver.

  5. Alienware P18G M14X R1 RAM Replacement: 手順 5、 2の画像 1 Alienware P18G M14X R1 RAM Replacement: 手順 5、 2の画像 2
    • Lift the plate and remove it to uncover the RAM sticks.

  6. Alienware P18G M14X R1 RAM Replacement: 手順 6、 1の画像 1
    • Push outward on the prongs that secure the RAM stick in the slots.

    • After releasing the prongs the rams stick will rise up.

  7. Alienware P18G M14X R1 RAM Replacement: 手順 7、 1の画像 1
    • Be very gentle in this step, making sure to not damage anything.

    • Pull the RAM stick out of its housing.

  8. Alienware P18G M14X R1 RAM Replacement: 手順 8、 1の画像 1
    • Push outward on the prongs that secure the RAM stick in the slots.

    • After releasing the prongs the rams stick will rise up.

  9. Alienware P18G M14X R1 RAM Replacement: 手順 9、 1の画像 1
    • Be very gentle in this step, making sure to not damage anything.

    • Pull the second ram stick out of its housing.

終わりに

To reassemble your device, follow these instructions in reverse order.

作成者

1人の作成者と共同作成されました。

Andonaq Grozdani

メンバー登録日: 03/01/18

892 ポイント

5のガイドは作成済み

チーム

UMass Dartmouth, Team S2-G2, Simcock Spring 2018 UMass Dartmouth, Team S2-G2, Simcock Spring 2018人のメンバー

UMASSD-SIMCOCK-S18S2G2

3 メンバー

5のガイドは作成済み

0 件のコメント

コメントを追加

統計データ:

過去 24時間: 0

過去 7 日: 0

過去 30 日: 7

今までの合計 987