メインコンテンツにスキップ

Alienware M15x Hard Drive Replacement

必要な工具と部品

  1. Alienware M15x Hard Drive Replacement, Battery: 手順 1、 3の画像 1 Alienware M15x Hard Drive Replacement, Battery: 手順 1、 3の画像 2 Alienware M15x Hard Drive Replacement, Battery: 手順 1、 3の画像 3
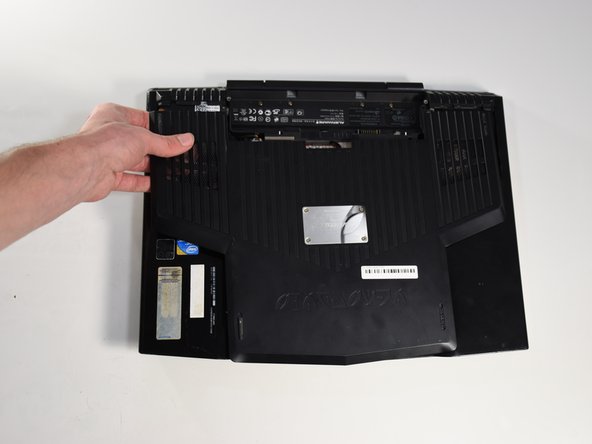
    • Remove the battery by sliding the latch to the left and pulling the battery up.

  2. Alienware M15x Hard Drive Replacement, Compartment Door: 手順 2、 2の画像 1 Alienware M15x Hard Drive Replacement, Compartment Door: 手順 2、 2の画像 2
    • Remove the two 4-mm screws that hold the compartment door to the rest of the computer using a PH#0 screwdriver tip.

  3. Alienware M15x Hard Drive Replacement: 手順 3、 3の画像 1 Alienware M15x Hard Drive Replacement: 手順 3、 3の画像 2 Alienware M15x Hard Drive Replacement: 手順 3、 3の画像 3
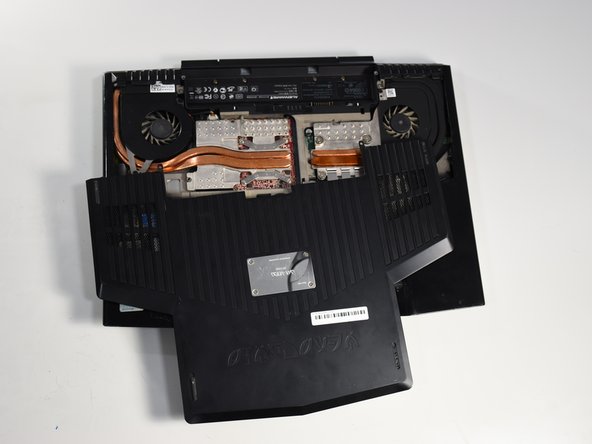
    • Slide the compartment door towards the front of the computer and lift.

  4. Alienware M15x Hard Drive Replacement, Hard Drive: 手順 4、 1の画像 1
    • Use Phillips #1 screwdriver to loosen the four screws on the hard drive enclosure.

  5. Alienware M15x Hard Drive Replacement: 手順 5、 2の画像 1 Alienware M15x Hard Drive Replacement: 手順 5、 2の画像 2
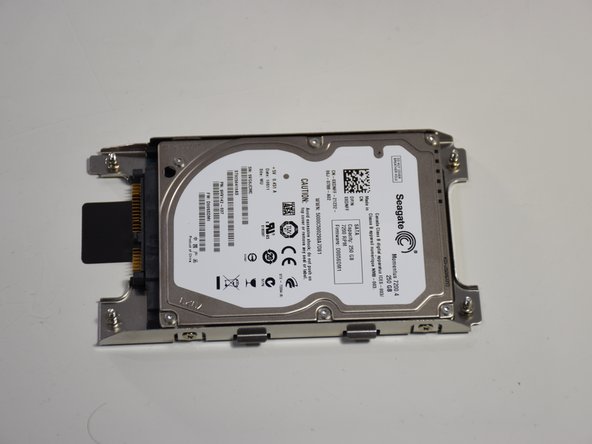
    • Once the screws are loosened use the "PULL" tab to remove the current hard drive from the computer.

  6. Alienware M15x Hard Drive Replacement: 手順 6、 2の画像 1 Alienware M15x Hard Drive Replacement: 手順 6、 2の画像 2
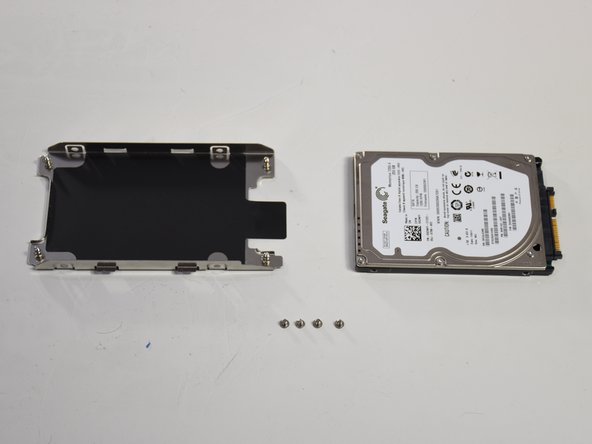
    • Remove the four small screws indicated to remove the casing to the hard drive.

  7. Alienware M15x Hard Drive Replacement: 手順 7、 1の画像 1
    • Now take off the SATA converter and then connect it to the drive you would like to replace it with.

終わりに

To reassemble your device, follow these instructions in reverse order.

作成者

1人の作成者と共同作成されました。

David Sann

メンバー登録日: 01/22/18

111 ポイント

1ガイドが承認済み

チーム

Cal Poly, Team S11-G3, Banghart Winter 2018 Cal Poly, Team S11-G3, Banghart Winter 2018人のメンバー

CPSU-BANGHART-W18S11G3

5 メンバー

6のガイドは作成済み

0 件のコメント

コメントを追加

統計データ:

過去 24時間: 3

過去 7 日: 3

過去 30 日: 10

今までの合計 835