メインコンテンツにスキップ

Alienware Aurora A5 SSD Replacement

必要な工具と部品

  1. Alienware Aurora A5 SSD Replacement, SSD: 手順 1、 2の画像 1 Alienware Aurora A5 SSD Replacement, SSD: 手順 1、 2の画像 2
    • Power off the computer.

    • To ensure the PC is completely off, remove the cables at the back of the PC.

  2. Alienware Aurora A5 SSD Replacement: 手順 2、 3の画像 1 Alienware Aurora A5 SSD Replacement: 手順 2、 3の画像 2 Alienware Aurora A5 SSD Replacement: 手順 2、 3の画像 3
    • Lift the black latch at the back of the PC to pop open the side cover.

    • Carefully remove the side cover by lifting it up.

  3. Alienware Aurora A5 SSD Replacement: 手順 3、 2の画像 1 Alienware Aurora A5 SSD Replacement: 手順 3、 2の画像 2
    • Unlock both tabs on the back of the PC by pushing them up.

    • Remove the power supply latch to get access to the inside.

  4. Alienware Aurora A5 SSD Replacement: 手順 4、 3の画像 1 Alienware Aurora A5 SSD Replacement: 手順 4、 3の画像 2 Alienware Aurora A5 SSD Replacement: 手順 4、 3の画像 3
    • Remove the black plastic part by pushing it down and then pulling it towards you.

    • Unlock the blue latch and pull to remove the graphics card.

  5. Alienware Aurora A5 SSD Replacement: 手順 5、 3の画像 1 Alienware Aurora A5 SSD Replacement: 手順 5、 3の画像 2 Alienware Aurora A5 SSD Replacement: 手順 5、 3の画像 3
    • Use the Phillips #1 screwdriver to remove the 3.7 mm screw and remove the old M2 SSD.

終わりに

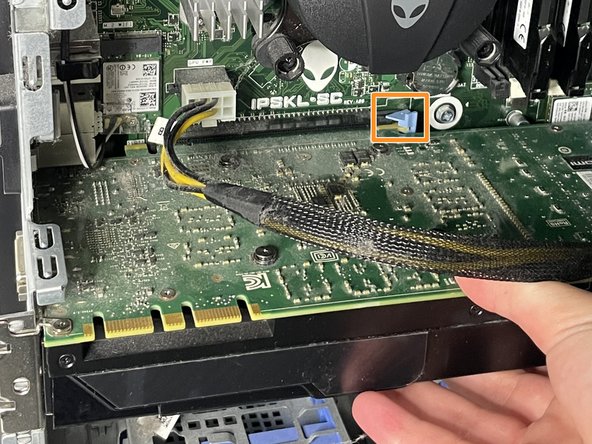
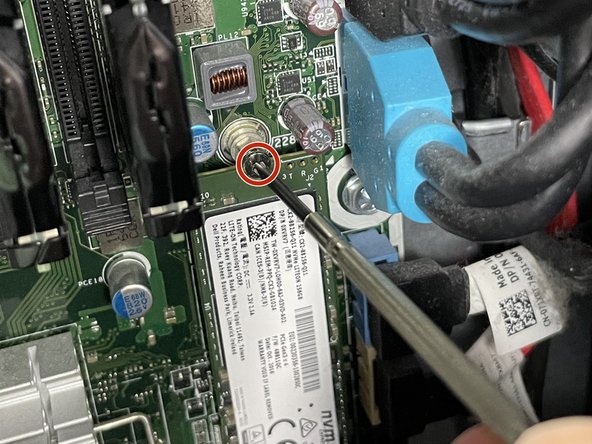
Ensure that you tightly screwed on the M2 SSD and that you inserted the graphics card back to its position so that the PC runs smoothly with no problems. Once you have completed all the steps and reconnected the cables you have successfully replaced the NVMe M2 SSD and your PC is ready to be turned on!

4 の人々がこのガイドを完成させました。

作成者

2人の作成者と共同で作成されました。

Sarah Mohammed

メンバー登録日: 05/10/21

205 ポイント

1ガイドが承認済み

チーム

York University, Team S1-G17, O'Regan Summer 2021 York University, Team S1-G17, O'Regan Summer 2021人のメンバー

YORK-O'REGAN-SU21S1G17

1 メンバー

2のガイドは作成済み

0 件のコメント

コメントを追加

統計データ:

過去 24時間: 2

過去 7 日: 32

過去 30 日: 143

今までの合計 1,301