メインコンテンツにスキップ

Alcatel Pop 4 Plus Front Camera Replacement

必要な工具と部品

  1. Alcatel Pop 4 Plus Front Camera Replacement, Battery: 手順 1、 2の画像 1 Alcatel Pop 4 Plus Front Camera Replacement, Battery: 手順 1、 2の画像 2
    • Remove the back cover by sliding your fingernail in the grove around the edge of the phone and prying it off.

  2. Alcatel Pop 4 Plus Front Camera Replacement: 手順 2、 2の画像 1 Alcatel Pop 4 Plus Front Camera Replacement: 手順 2、 2の画像 2
    • Remove seventeen 3mm Phillips #000 screws from the mid-frame.

  3. Alcatel Pop 4 Plus Front Camera Replacement: 手順 3、 1の画像 1
    • Use the flat end of the spudger, or your fingernail, to pry off the mid-frame.

  4. Alcatel Pop 4 Plus Front Camera Replacement: 手順 4、 2の画像 1 Alcatel Pop 4 Plus Front Camera Replacement: 手順 4、 2の画像 2
    • Use the flat end of the spudger disconnect the battery from the motherboard.

    • Use the flat end of the spudger tool to pry out the battery.

  5. Alcatel Pop 4 Plus Front Camera Replacement, Motherboard: 手順 5、 2の画像 1 Alcatel Pop 4 Plus Front Camera Replacement, Motherboard: 手順 5、 2の画像 2
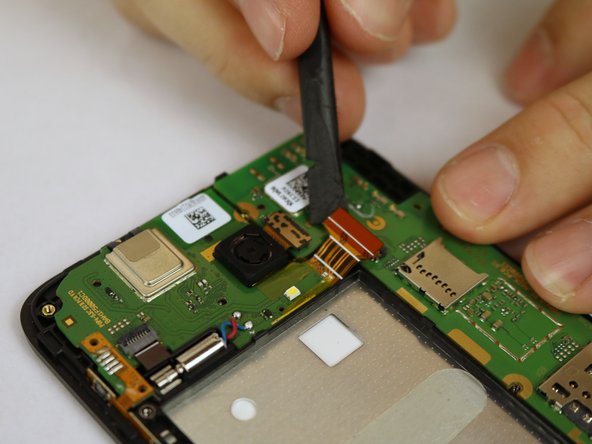
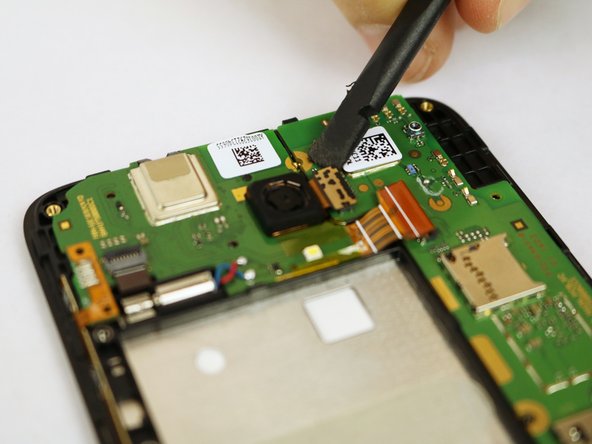
    • Use a spudger to flip up the retaining flap on the USB ribbon cable ZIF socket.

    • Slide the ribbon cable out of the socket.

  6. Alcatel Pop 4 Plus Front Camera Replacement: 手順 6、 2の画像 1 Alcatel Pop 4 Plus Front Camera Replacement: 手順 6、 2の画像 2
    • Use the flat end of a spudger to disconnect the ribbon cable.

  7. Alcatel Pop 4 Plus Front Camera Replacement: 手順 7、 2の画像 1 Alcatel Pop 4 Plus Front Camera Replacement: 手順 7、 2の画像 2
    • Using the flat end of the spudger to disconnect the ribbon cable.

  8. Alcatel Pop 4 Plus Front Camera Replacement: 手順 8、 2の画像 1 Alcatel Pop 4 Plus Front Camera Replacement: 手順 8、 2の画像 2
    • Using the flat end of the spudger, disconnect the camera from the motherboard.

  9. Alcatel Pop 4 Plus Front Camera Replacement: 手順 9、 1の画像 1
    • Use the flat end of the spudger to pry off the motherboard.

  10. Alcatel Pop 4 Plus Front Camera Replacement, Front Camera: 手順 10、 1の画像 1
    • Disconnect the camera from the motherboard using the flattened of a spudger.

終わりに

To reassemble your device, follow these instructions in reverse order.

作成者

3人の作成者と共同で作成されました。

peter achanccaray

メンバー登録日: 01/25/18

123 ポイント

1ガイドが承認済み

チーム

USF Tampa, Team S20-G6, Passmore Spring 2018 USF Tampa, Team S20-G6, Passmore Spring 2018人のメンバー

USFT-PASSMORE-S18S20G6

4 メンバー

12のガイドは作成済み

0 件のコメント

コメントを追加

統計データ:

過去 24時間: 0

過去 7 日: 0

過去 30 日: 0

今までの合計 280