はじめに
初代AirPodsの分解をしてから2年が経過しました。この間、AirPodsは驚くほど人気のイヤフォンとなる一方で、短いライフスパンという悪いイメージも付随しました。この新モデルの外見は初代モデルと同じに見えますが、実際は注目すべき内部のアップグレードが幾つかあるようです。でも、私たちが望んでいる本当のアップグレードは修理難易度の改善です。数年間使用した後、埋め立て地に運ばれる運命だけは避けてほしいものです。
このアップグレードと小売価格が釣り上げられたことは相関するのでしょうか?'H1のH''とはどういう意味でしょうか?このAirPodsは、私たちが待ち望んでいるRepairPods(修理できるAirPods)革命となるのでしょうか?その答えを見つけるには、たった一つの方法しかありませんー分解を始めましょう!
分解ビデオを日本語字幕付きでご覧いただけます。画面右下の設定から字幕をクリックして、”日本語”を選択してください。
最新のテックニュースや分解情報は、 Twitter、Twitter日本語版、InstagramやFacebookをフォローしてください。iFixitから直接、ニュースレターを受信ボックスに投函して欲しい方は こちらから購読ください。(英語配信)
必要な工具と部品
ビデオの概要
-
-
この素敵なデンタルフロスは前に何度も見たことがあります。Appleによると、前モデルから6000円も値上がりした価値があるようです。さて、仕様書に記載されている内容です。
-
AirPodsの各イヤフォンの重量は4g(0.14 oz)で、Charging Caseは40g(1.41 oz)です。
-
AirPodのイヤホンのサイズは16.5 mm × 18.0 mm × 40.5 mm (0.65インチ× 0.71インチ × 1.59インチ)です。Charging caseのサイズは44.3 mm × 21.3 mm × 53.5 mm (1.74インチ× 0.84インチ× 2.11インチ)です。
-
Bluetooth 5に対応した新H1チップ
-
Wireless charging case
-
"Hey Siri"に対応
-
-
-
まずボックスに付いている不思議なマークを点検していきましょう。"AirPower"と呼ばれるものについて、複数の箇所で記載されているのを確認できますが…?
-
次に外箱にX線を当てて、開封して安全かどうか点検します。ーたとえ安全でなくても開けますが。私たちのモットーは安全は第3です。
-
たった2年前に発売された製品を古いとは考えないでしょうが、レポートによると初代AirPods (画像左側)は老朽化が早く進んでいると言われています。
-
新しいケース (画像右側)はキラキラ輝いて見えますが、その理由は初代モデルが消耗しているからでしょう。
-
比較で気づくことは、新しく登場した外付けLED充電インディケーターとペアリングボタンの位置が変更しました。
AirPower as many of your readers know is the wireless charging mat that Apple was supposed to have released by now.
What nobody talks about and what I noticed immediately is this: Why does Apple have this on the outside of the AirPods 2 box as a sticker??!! What’s underneath the sticker?
We start our examination with these curious markings on the boxes. We're seeing multiple references to something called "AirPower" ... ?
firefish45 - 返信
-
-
-
次は、他社製品のワイヤレス式イヤフォンの登場です。ここに新モデルのSamsung Galaxy Budsを用意しました。このイヤフォンの分解はつい最近公開しましたが、驚くことに修理が可能です!AirPods、次はあなたたちの番ですよ。
-
私たちはAirPodsのデザインの優先順位について、言いたい事は沢山あります。しかし、Appleのエンジニア能力には脱帽しています。このX線画像で確認できるバッテリー、マイク、アンテナ、スピーカードライバー、回路基板、これらを耳の中に詰め込めるのです。
-
-
-
おしゃべりはここまで!この新モデルの分解に取りかかりましょう。初代モデルでも同じ方法を試みたように、熱を当てて接着剤を柔らかくすることから始めます。上手くいくのでしょうか?うーん…多分。
-
次に、慎重さが求められるブレード作業です。
-
イヤフォン外側をスライスしたら、次はリラックスしてもらうためにイソプロピルアルコールのお風呂に浸かってもらいましょう。内側に付けられた(接着剤)ガードを少しでも柔らかくするためです。
-
-
-
-
アルコール風呂は、内部に侵入するための足掛かりとなりました。生じた隙間にピンセットを差し込むことができました。力を込めてこじ開けると、スピーカードライバーを取り出せます。
-
超音波ナイフのメスを使って、このAirPodのお腹を切開していくと、額から汗が流れ落ちます。下に搭載されたバッテリーを傷つけないように外ケースをスライスしました…が、わずかにダメージが入りました。
-
フレックスケーブル、アンテナ、マイクはまとめて一緒に折り紙のようにきちんと折り畳まれて、接着剤で固定されています。これから外ケースの大部分を削ぎ落とします。最後に先端が鋭利なツールを使って、残りを掻き出します。
-
私たちは分解エンジニアというバッジを付けていますが、今日私たちは外科医、もしくは化石発掘調査員のような気分です。
-
-
-
このデリケートな化石を取り出せたので、ブレイン部分を点検してみましょう。
-
Apple 343S00289 (Appleの新H1チップのよう)
-
Dialog セミコンダクタ (旧Adesto) AT25SL128 128 Mb シリアルフラッシュメモリ
-
Apple 338S00420 (低電力ステレオオーディオコーデックのよう)
-
T 8 36 (おそらくSTMicroelectronics 慣性センサー)
-
Bosch Sensortec BMA280 3軸加速度センサー (おそらく)
-
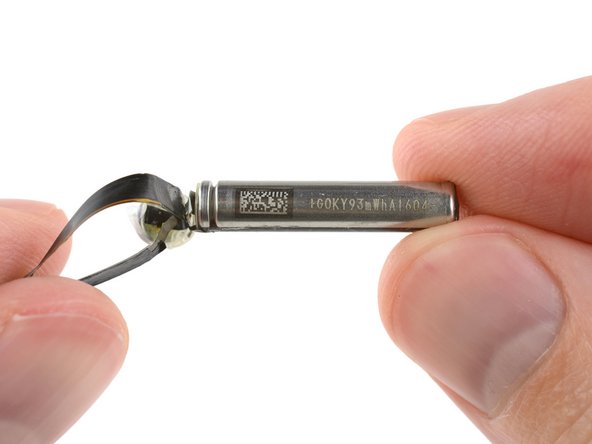
次はパワー部分に注目しましょう。各イヤフォンに搭載されているバッテリーの容量は初代モデルと同じ93mAhです。
-
-
-
初代モデルの分解で判明した事は、AirPodsケースは頑丈で割れにくいということです。そこで今回は、両側から締め付けるバイスを使って点検しました。(iFixitコミュニティメンバーが作成してくれたガイドを基に行いました)
-
バイスから加えられる力によってケースの変形が生じ、合わせ目部分にできた隙間にブレードを差し込みます。そこから接着剤をスライスしてAirPodを本体につなぎ合わせているドッキングチューブを取り出します。
-
次にスパッジャーを使って、ケース前面にあるAirPodチューブ間に付けられたステータスLEDを取り出します。
-
-
-
このメタル製ヒンジは前モデルと比べるとより頑丈に見えます。その上、このヒンジに付けられた接着剤も同様に強力です。
-
次はバッテリーです。バッテリーを接着剤から剥がすのは容易くいきません。本来は適切な手段ではないのですが、ヒートガンのレベルを11まで上げました。バッテリーが膨らんでくるのを眺めていると、このバッテリーがGalaxy Note 7のように爆発しないことを願うばかりでした。
-
努力の甲斐もなく、1本のスパッジャーではこのバッテリーを取り出すことができません。ラッキーなことに、スパッジャーが数本ありました。
-
-
-
ここでも同じ流れ作業が続きます。ケースから次のレイヤーを取り出すにはーもうお判りですよねーさらに熱を当て、プライヤーでこじ開けます。
-
初代AirPodの破壊的分解から取り出したボードと比べると、このロジックボードには、レイヤーのようなものが表面に付けられています。おそらく防水機能の役割のためにあるのでしょう。
-
最後に、暗闇を照らす希望の光ですーモジュール式の充電ポートがまだ残っています!
-
…しかしながら、充電ポートにたどり着くまでの道のりを考えると、充電ポート以外に壊れてしまったパーツの方が多いはずです。
-
キラキラ輝く防水性コートが付いたボードの下に、幾つかチップを確認できました。
-
Broadcom BCM59356A2KUBGワイヤレス充電モジュール
-
1 Mbフラッシュ搭載 STMicroelectronics STM32L476MG 32ビット ARM Cortex-M4 マイクロコントローラー
-
TI 87A6FP
-
-
-
分解はこれで終了です!さあ、このパーツを組み立てて、音楽を聴きましょう。
-
というのは冗談です!もう壊れています。
-
しかしながら、デザインの改良はされていないわけではありません。このAirPodsは洗濯機で洗ったとしても生き残る可能性があります。でも、これ以上のことをAppleもできるはずです。
-
ウォールペーパーが欲しい方は、こちらから、AirPodsのX線画像を入手していただくことができます。画像を印刷して、AirPodsのケースに貼りましょう!
-


以下の翻訳者の皆さんにお礼を申し上げます:
100%

Midori Doiさんは世界中で修理する私たちを助けてくれています! あなたも貢献してみませんか?
翻訳を始める ›

21 件のコメント
That shiny water repellent coating looks like conformal coating. Does helps but only to a certain degree.
Love the tear-down but could you also delve into the top magnets that pull/hold the airpods in their charging tube and also how they are magnetically aligned in the lid? My thoughts are that the rear lid magnets oppose each other so has to help hold the lid open but their opposing force is overcome when the front magnets are attracted and obviously have more leverage being further from the hinge to snap shut and hold the lid closed. To me, this is an ingeniously overlooked design aspect of the case using magnets rather than springs to create a spring-like effect.
You guessed correctly :) That’s exactly what’s happening.
Yeah, this is important. You can sort of see it here, but it’s covered up by some type of grill.
If you check the dates on the serial numbers of the “New AirPods” you will find that they were going to be released with the iPhone Xs. Really Apple?
Ryan Scott - 返信
The hinge is on the same side as the charging coil… Anyone with a wireless charger should know metallic objects in proximity of the coil is a big no no… Change in hinge material/size mamy be also to prevent the hinge from heating while the case is charging
Vielen Dank an Annika und Sandra für ihre Übersetzung
Danke dir! Haben wir gern gemacht!
If one is trying to replace the battery rather than do a full dissection, might that be possible by making two cuts all the way through the tubes— one just above the battery and one just below, severing only the connections to the battery, antennas, and whatever is below it (a mic?).
The x-ray, were it less oblique, might show how many conductors are involved, but maybe it’d be possible to cleanly chop those tubes such that the battery is removed, then replace it with a new battery, reconnect the antennas and mic, and continue to use the AirPods for a couple more years with a new battery?
Or maybe there’s a bigger bundle of wires running through there or there’s too much glop and I’m just dreaming.
The Black Tape like thing, connecting the Speaker side to the main, what are they called. I tried to open mine, and have detached it from the middle. Can i like solder it or something ?
That is a flex cable. It’s a flexible plastic film carrying very thin wires within. Unfortunately, you can’t fix it by soldering.
has anyone checked if there are the same parts in both airpods?
My right airpod stopped playing sound a few months ago. I decided finally to say “whats it gonna hurt at this point?” and pried open the buds top with a FINGERNAIL, got my finger between the crack and slid across, broke up the glue a bit and was able to open it like a clamshell. I then proceeded to gently slip a tweezer tip between the driver and the top part of the bud, successfully revealing the driver and the underside of the mesh. I was playing music at the time so I covered the sensors and had a listen and it was playing loud and clear. I then pushed the driver back into place (removing a bit of glue that was in the way) and snapped the top back on to the stem. They come apart just like the earbuds. While I dont have the glue to keep it together permanently, I believe the friction will just be enough. It doesnt move around at all and ive already dropped it a couple times without issue. They continue to sound great now that ive done this. Nothing was damaged in the process aside from said glue.
Really enjoy the teardowns! would be great to know what drivers/coils they are using!
What the brand of the battery?
Die dauernde Werbung für Galaxy Buds im Text nervt.