メインコンテンツにスキップ

Air Hog Smash Bots Controller Motherboard Replacement

必要な工具と部品

  1. Air Hog Smash Bots Controller Motherboard Replacement, Front Panel: 手順 1、 2の画像 1 Air Hog Smash Bots Controller Motherboard Replacement, Front Panel: 手順 1、 2の画像 2
    • Take out your controller and access to the back of the controller.

  2. Air Hog Smash Bots Controller Motherboard Replacement: 手順 2、 1の画像 1
    • Remove the screw on the battery lid. Using the Hex 4 socket and PH #0 bit, remove the 8 mm screw.

  3. Air Hog Smash Bots Controller Motherboard Replacement: 手順 3、 1の画像 1
    • Remove the 2 AAA batteries.

  4. Air Hog Smash Bots Controller Motherboard Replacement: 手順 4、 2の画像 1 Air Hog Smash Bots Controller Motherboard Replacement: 手順 4、 2の画像 2
    • Using the Hex 4 socket and PH #0 bit, remove the four 8 mm screws on the panel.

  5. Air Hog Smash Bots Controller Motherboard Replacement: 手順 5、 2の画像 1 Air Hog Smash Bots Controller Motherboard Replacement: 手順 5、 2の画像 2
    • Use the plastic opening tool to disconnect the front and back parts of the panel.

    • Some of the internal components may be displaced when opening the controller.

  6. Air Hog Smash Bots Controller Motherboard Replacement, Controller Motherboard: 手順 6、 2の画像 1 Air Hog Smash Bots Controller Motherboard Replacement, Controller Motherboard: 手順 6、 2の画像 2
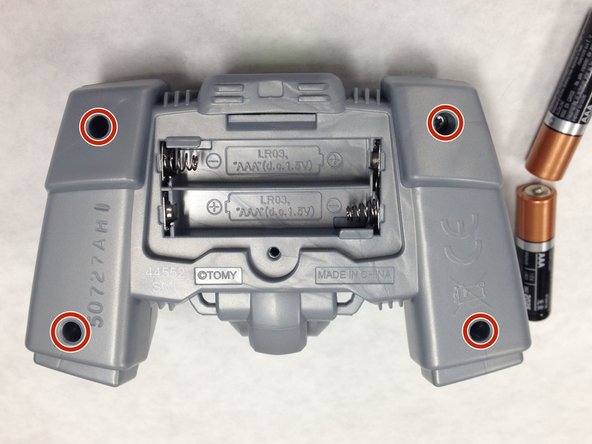
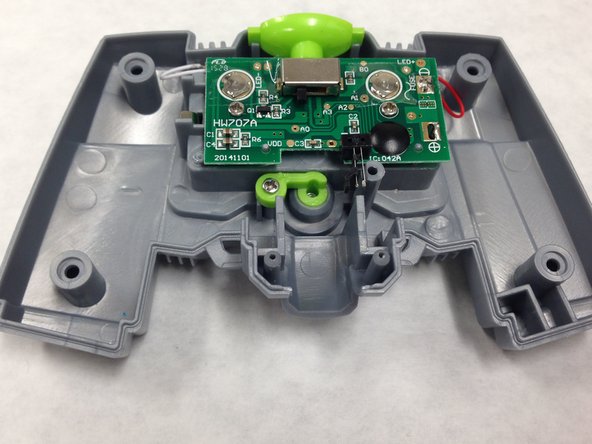
    • Using the PH #0 bit, remove two 8 mm screws on the main board.

    • De-solder the LED wires from the motherboard.

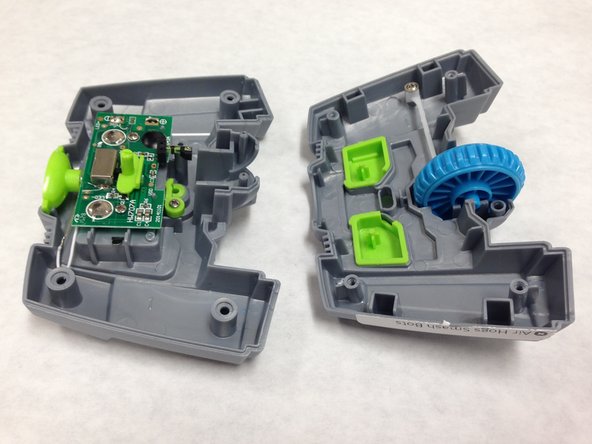
    • Lift the motherboard with a spudger to remove it from the case.

終わりに

To reassemble your device, follow these instructions in reverse order.

ある他の人がこのガイドを完成しました。

作成者

3人の作成者と共同で作成されました。

Brittany Frecker

メンバー登録日: 02/08/16

542 ポイント

4のガイドは作成済み

チーム

IUPUI, Team 1-1, Baechle Spring 2016 IUPUI, Team 1-1, Baechle Spring 2016人のメンバー

IUPUI-BAECHLE-S16S1G1

4 メンバー

14のガイドは作成済み

コメント 1 件

Hi,

Remot controller doesn't work.

Because my son used it into water.

So what should I do for fix it?

Thanks.

Ali Hori - 返信

コメントを追加

統計データ:

過去 24時間: 0

過去 7 日: 0

過去 30 日: 0

今までの合計 153